TABLE OF CONTENTS
Introduction
‘Analysis Codes’ are simply categories for sales reports, in which each of the items that you sell are allocated. This enables you to get sales reports by the ‘Analysis Codes’ you set up. Please note that ‘Analysis Codes’ are not set up for each item you sell, this is known as a PLU (Price Look Up). The process of setting up a PLU is outside the scope of this manual, as these are set up elsewhere in the Merac software. Please note that when you set up a PLU, it is assigned to a specific ‘Analysis Code’. This determines which ‘Analysis Code’ this PLU will report to in the relevant sales reports in the Merac software.
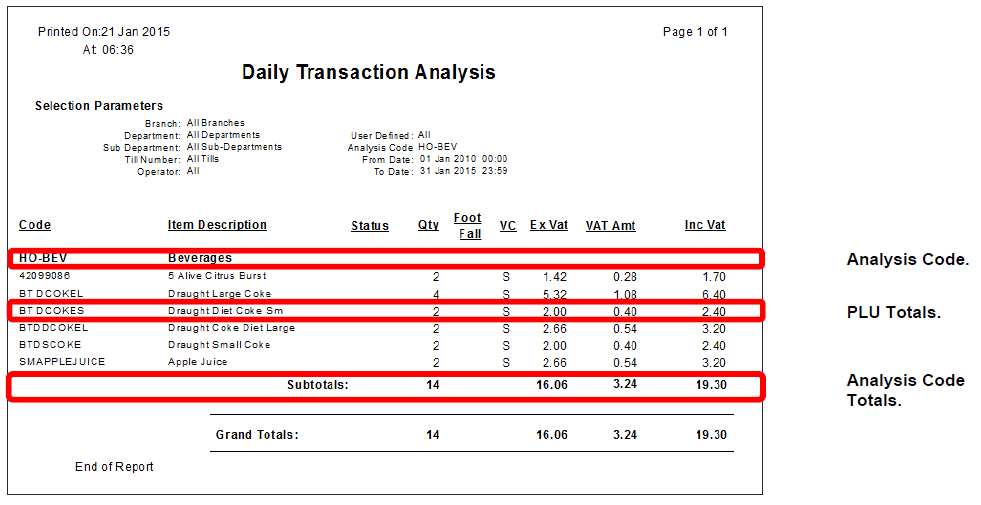
An example of a key report which uses the analysis code structure is the ‘Daily Transaction Analysis’ report. An extract of this report is shown below so you can see how the analysis code set up affects your reports. The below data for simplicity shows data for a single 'Analysis Code' and the breakdown of item (PLU) sales within that. However when you run a report it will typically be showing data for all the 'Analysis Codes' selected by using the report filters.
How to set up the ‘Analysis Codes’ that are used in specific sales (transaction based) reports is detailed in this guide.
Analysis Code – Structure Example
The ‘Analysis Codes’ structure can be set up as a one, two, or three tier (maximum) hierarchy.
The number of tiers simply depends on your reporting requirements.
An example of a simple one tier analysis code structure would be when you only want a split between ‘Hospitality’, ‘Admissions’ and ‘Retail’ sales.
If you then need a more detailed break-down for your sales reports than just the first-tier analysis code, you can add a second tier to give the level of detail required. For example, if you wanted to get a report for ‘Admissions’ total sales but also want a breakdown from this into further categories (‘Analysis Codes’) for ‘Adults’, ‘Children’ and ‘Senior Citizens’, then these would be added as second-tier ‘Analysis Codes’ under ‘Admissions’.
Likewise, if you need a further split of any second-tier analysis code you can add a third tier
as required. Taking the above example, you may need to split the ‘Adults’ second-tier analysis code into categories for ‘Adult Single Tickets’ and ‘Adult Group Tickets’. In which case these would each be set up as a third tier under the ‘Adults’ analysis code.
How to set up this tiered ‘Analysis Codes’ structure is detailed below.
Analysis Code – Set Up
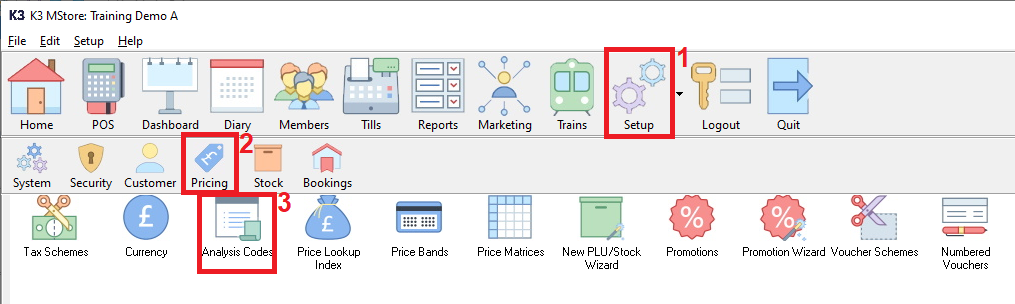
To set up ‘Analysis Codes’ please 1. click on Setup then 2. click Pricing then 3. double click Analysis Codes.
Please note that each analysis code must have a ‘code’ and a ‘description’.
You can use any ‘Description’ you like (maximum 50 characters) but the ‘Code’ for each tier
has a specific structure. An example of the three-tier hierarchy are shown below:
1st tier code structure: ##
2nd tier code structure ##-###
3rd tier code structure: ##-###-####
N.B. you must include the hyphen(s) ‘-‘ in a 2nd or 3rd tier code as shown above.
Setting Up a 1st Tier Analysis Code
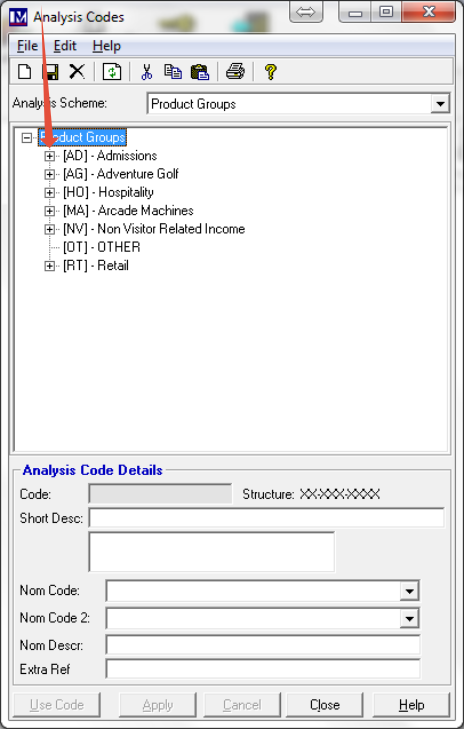
Click on the text ‘Product Groups’ (at the top of the screen), so it becomes highlighted.
Next click on the button here to add a new 1st tier analysis code.
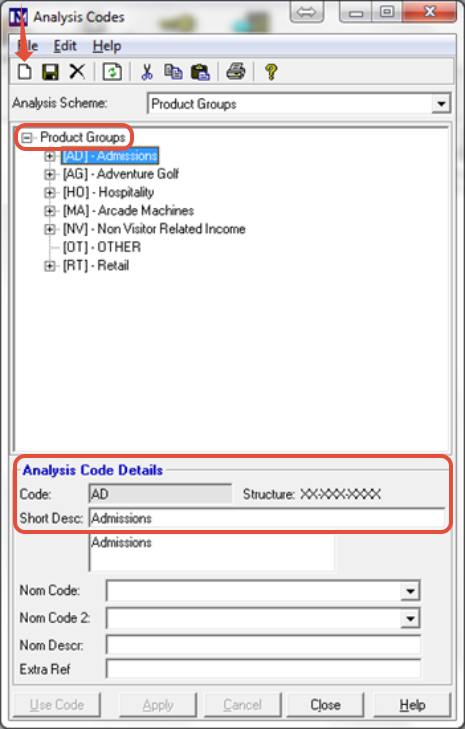
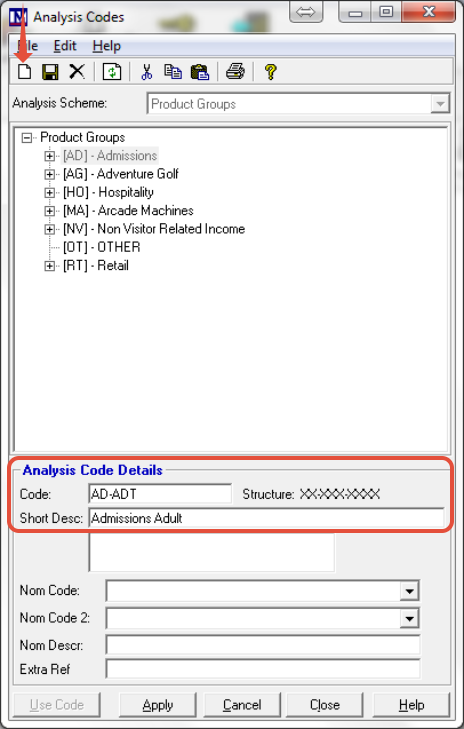
Now type in the required 2-digit code in the ‘Code:’ box.
Next type in the required description for this analysis code in the ‘Short Desc:’ box.
Click on the ‘Apply’ button to create the 1st tier analysis code.
Repeat as required until all 1st tier ‘Analysis Codes’ have been set up.
Setting Up a 2nd Tier Analysis Code
To add a 2nd tier analysis code, click on the 1st tier analysis code you will add this new code under.
(so that the required 1st tier analysis code is highlighted blue, e.g. ‘Admissions’).
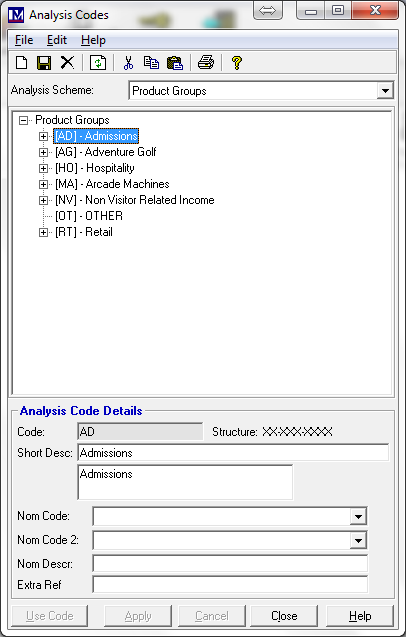
Next click on the button here to add a new 2nd tier analysis code.
Now type in the required code in the ‘Code:’ box, which must be in the format ##-###.
Next type in the required description for this analysis code in the ‘Short Desc:’ box.
Click on the ‘Apply’ button to create the analysis code.
Repeat as required until all 2nd tier ‘Analysis Codes’ have been set up.
Setting Up a 3rd Tier Analysis Code
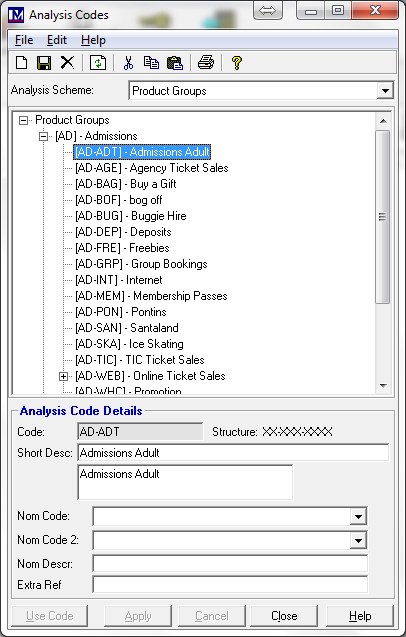
You must first navigate to the required 2nd tier analysis code.
To do this click on the ‘+’ symbol here so you can see the relevant 2nd tier analysis codes.
To add a 3rd tier analysis code, click on the 2nd tier analysis code you will add this code under.
N.B. the 'Analysis Code' that you clicked on should now become highlighted blue, e.g. ‘Admissions Adult’).
Next click on the button here to add a new 3rd tier analysis code.
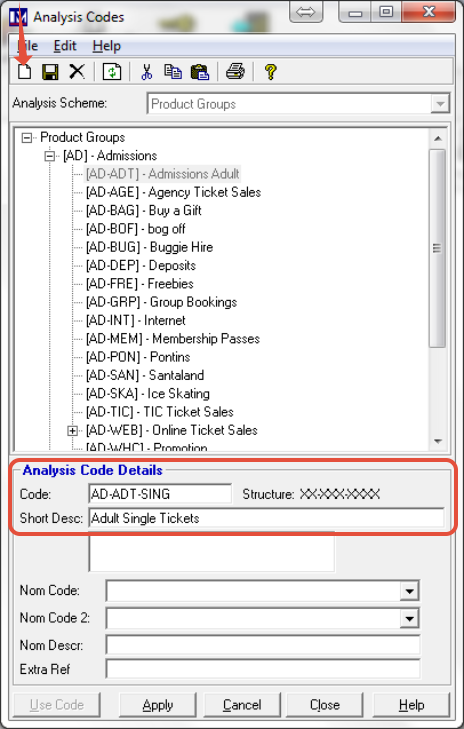
Now type in the required code in the ‘Code:’ box, which must be in the format ##-###-####.
Next type in the required description for this analysis code in the ‘Short Desc:’ box.
Click on the ‘Apply’ button to create the analysis code.
Repeat as required until all 3rd tier ‘Analysis Codes’ have been set up.
Once all ‘Analysis Codes’ have been added, click on the ‘Close’ button.
You would now repeat the processes to create all the 1st, 2nd and 3rd tier ' Analysis Codes' for the entire business.
Please Note:
The 'Analysis Codes' structure required for your business will not necessarily follow any of the sample structures detailed in the above screenshots. You will need to have internal discussions about proposed 'Analysis Codes' structure that is best for your business before implementing this, as this structure affects all future reporting. To re-structure this after you have gone live potentially requires a lot of work both in restructuring the 'Analysis Codes' but also you are likely to need to re-map all PLUs to the new ‘Analysis Codes’ structure. This can be done by using Setup > Pricing > Price Lookup Index to amend PLU records in the usual way. Send any changes to ‘Analysis Codes’ and PLUs to the tills using Edit > Recreate Till Data.