TABLE OF CONTENTS
- Introduction
- 'Customer' Mail Merge Template Creation
- Now scroll down to the Section 4 titled 'Adding Merge Fields to a Template'.
- 'Member' Mail Merge Template Creation
- 'Booking' Mail Merge Template Creation
- Now follow the instructions in Section 4 below.
- Adding Merge Fields To a Template
- Previewing Your Mail Merge Template
Introduction
This guide explains how to input merge fields onto a pre-existing Microsoft Word (MS) documents, in order to create Customer, Member or Booking “mail merge template” that are as required for mail merges which can be started from within Merac. Please note Merac not install or supply the MS Word software this needs to have already been installed on your computer. In addition Merac do not support or provide training on using MS Word itself, including using MS Word to carry out mail merges. There are specific ways to create a mail merge template for main the 3 different mail merge purposes, namely a "Customer", "Member" or "Booking" mail merge. The process to create each mail merge template type is similar but differs slightly and are explained below.
'Customer' Mail Merge Template Creation
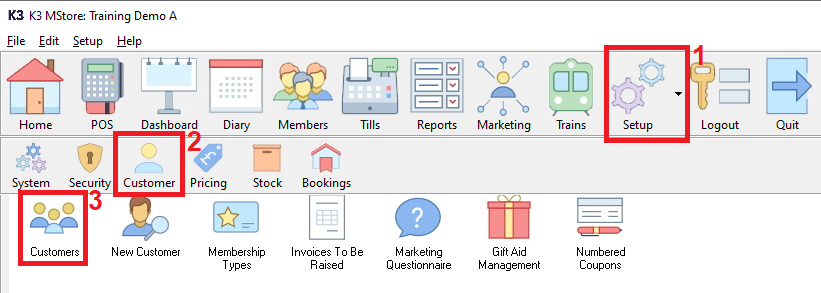
First, navigate to the Customers screen as follows:
1. Click the ‘Setup’ icon.
2. Click the ‘Customer’ icon.
3. Double click the ‘Customers’ icon.
Once in the Customers screen you simply need to search for any customer record and click the ‘Search’ button.
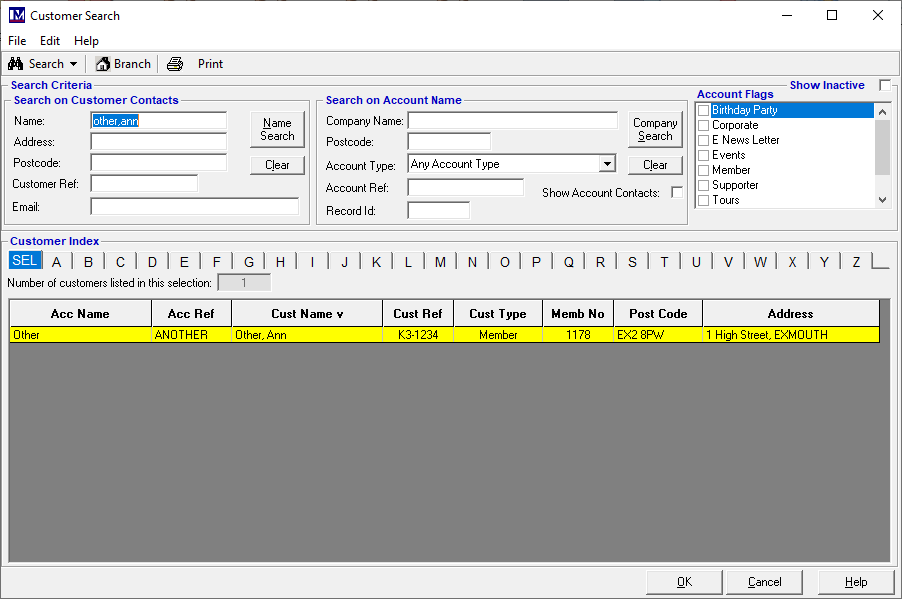
Double click or highlight the record you wish to use and click the ‘OK’ button.
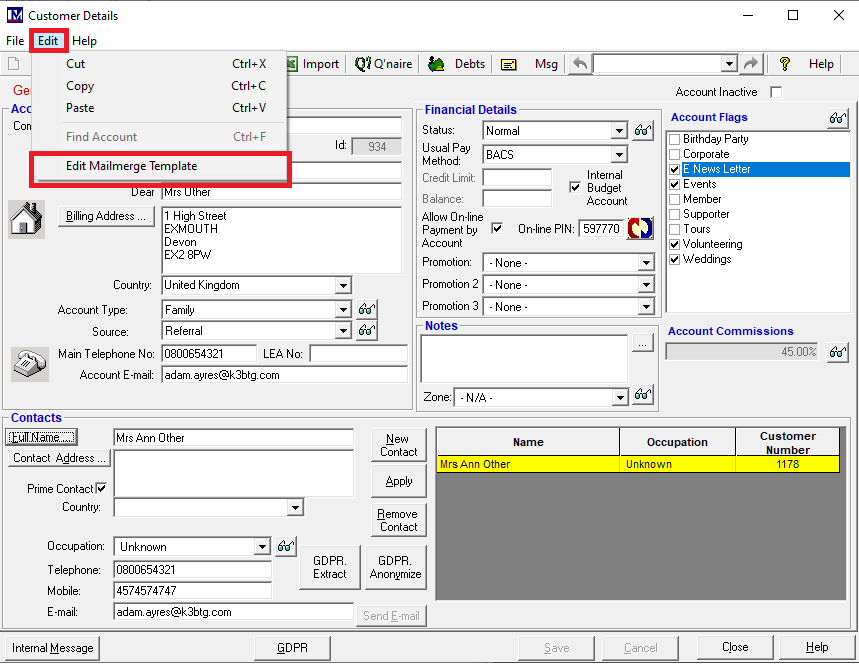
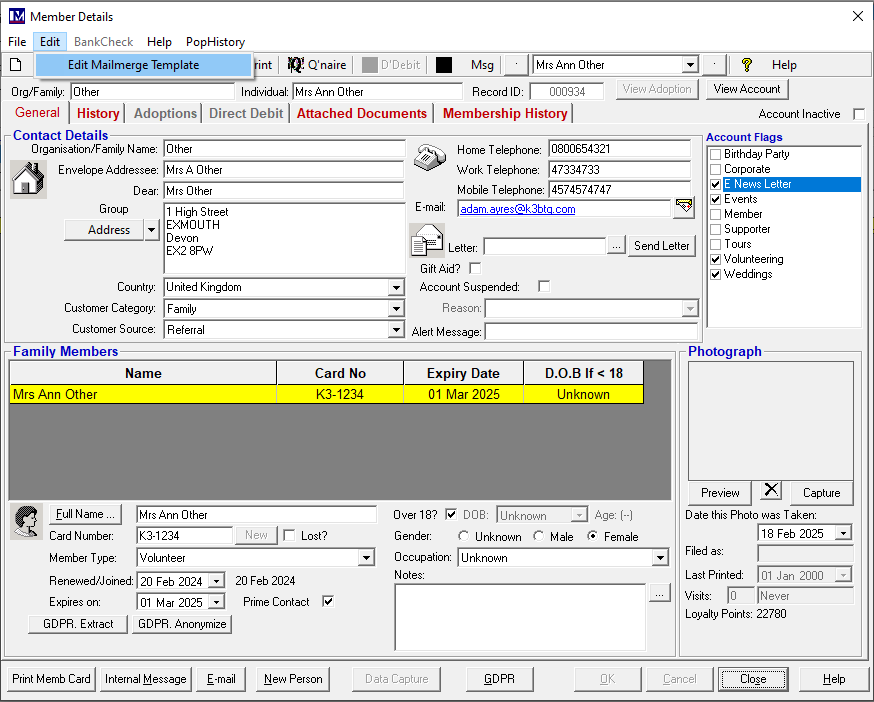
Once the customer record opens, click ‘Edit’, which opens a dropdown menu.
Click the ‘Edit Mailmerge Template’ option from the dropdown menu.
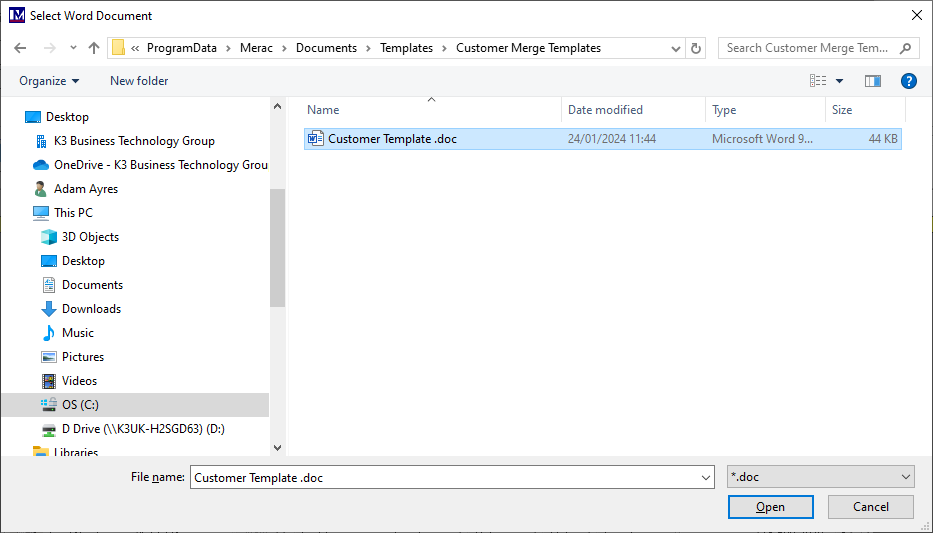
This will open up MS Windows 'File Explorer', simply find and select the require MS Word document and click ‘Open’.

Now scroll down to the Section 4 titled 'Adding Merge Fields to a Template'.
'Member' Mail Merge Template Creation
Click the ‘Members’ icon.

Find any member using member search screen.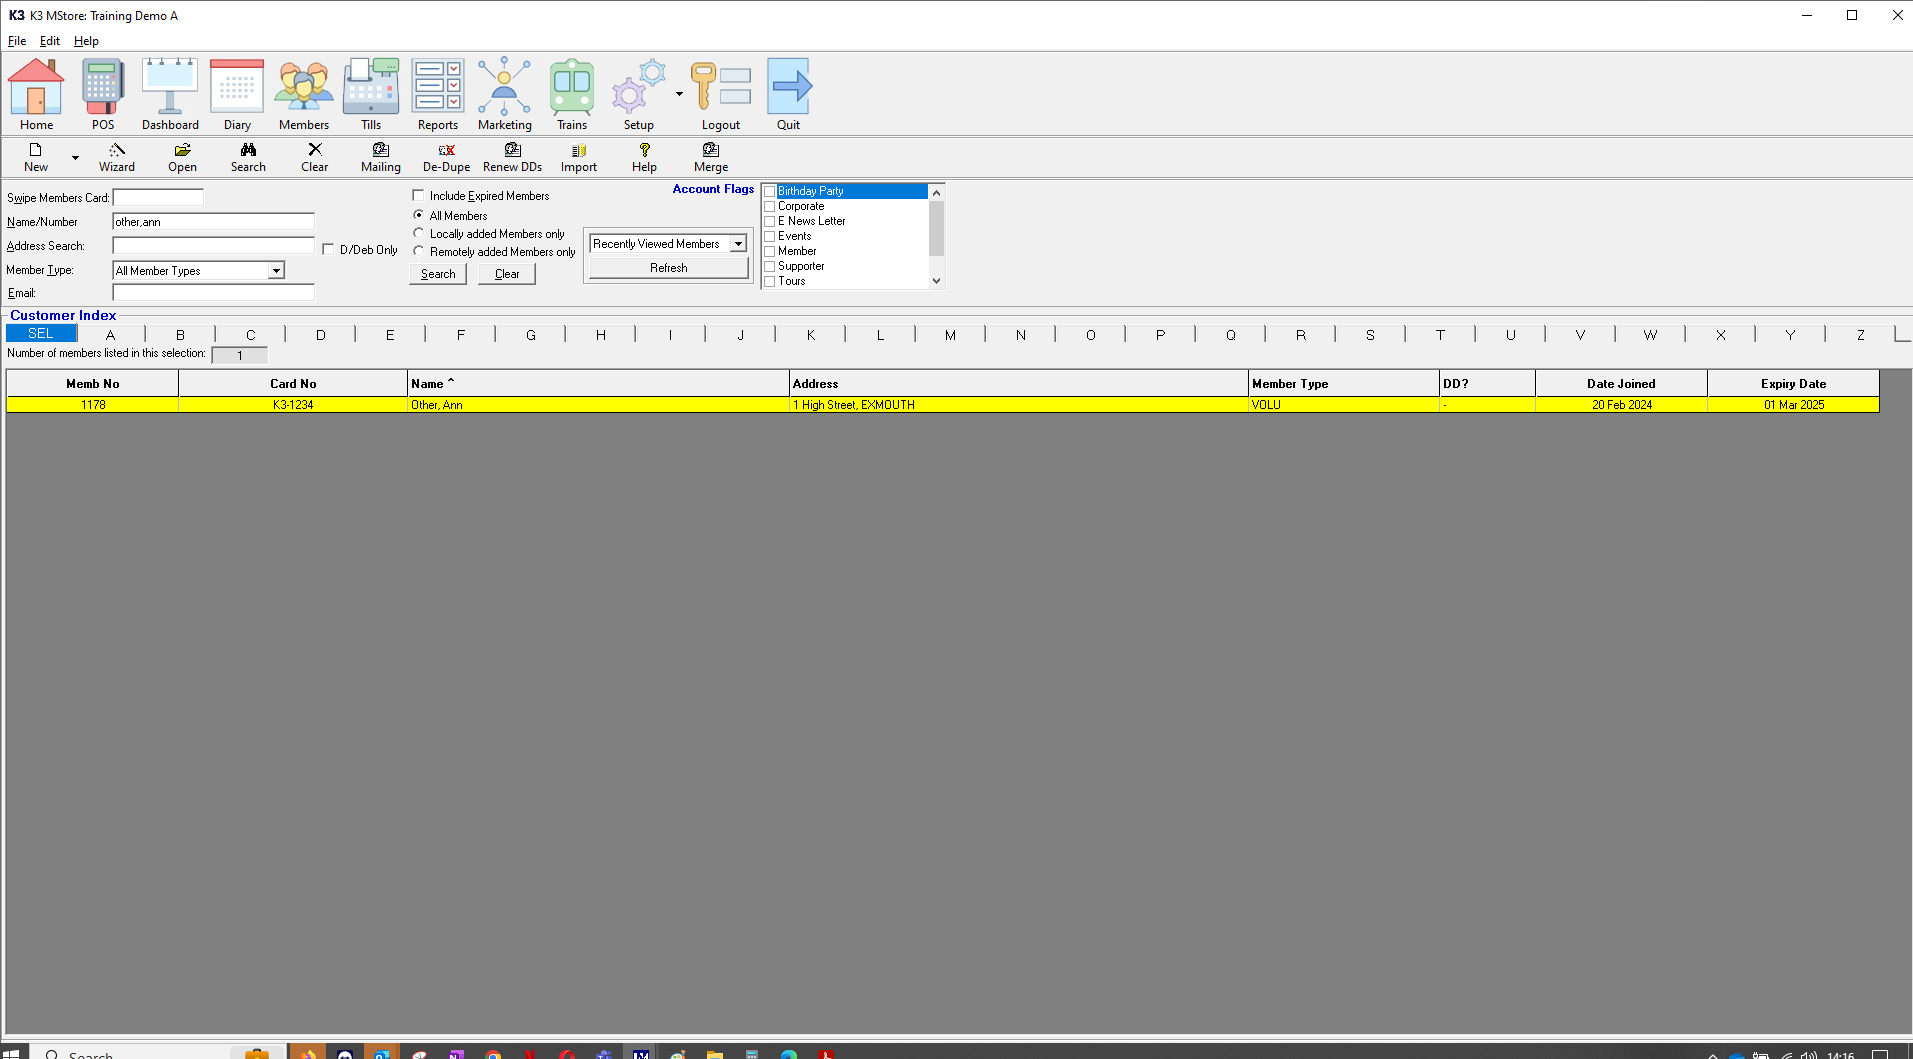
Double-click on the member record to open it.
On the member record click ‘Edit’, which opens a dropdown menu.
Click the ‘Edit Mailmerge Template’ option from the dropdown menu.
This will open up MS Windows 'File Explorer', simply find and select the require MS Word document and click ‘Open’.
Now scroll down to the Section 4 titled 'Adding Merge Fields to a Template'.
'Booking' Mail Merge Template Creation
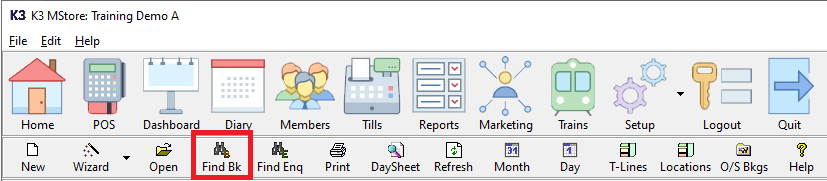
Click the ‘Diary’ icon.
Now click the ‘Find BK’ (find booking) icon.
Use the ‘Booking Search’ screen to find any booking.
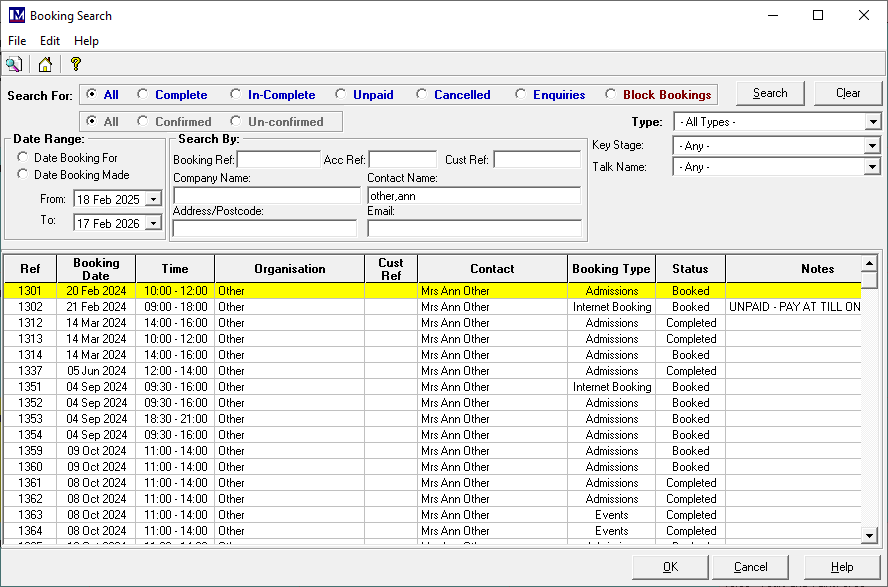
Double click any booking, this will open the selected Booking record.
At the top of the booking record screen, click ‘Edit’, which opens a dropdown menu.
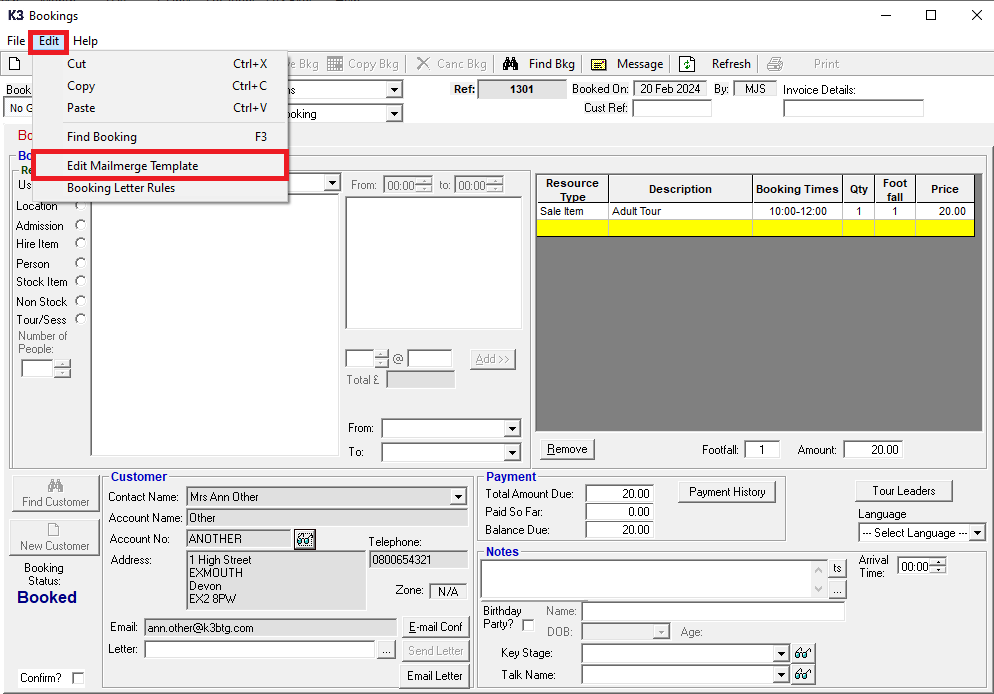
Click the ‘Edit Mailmerge Template’ option from the dropdown menu.
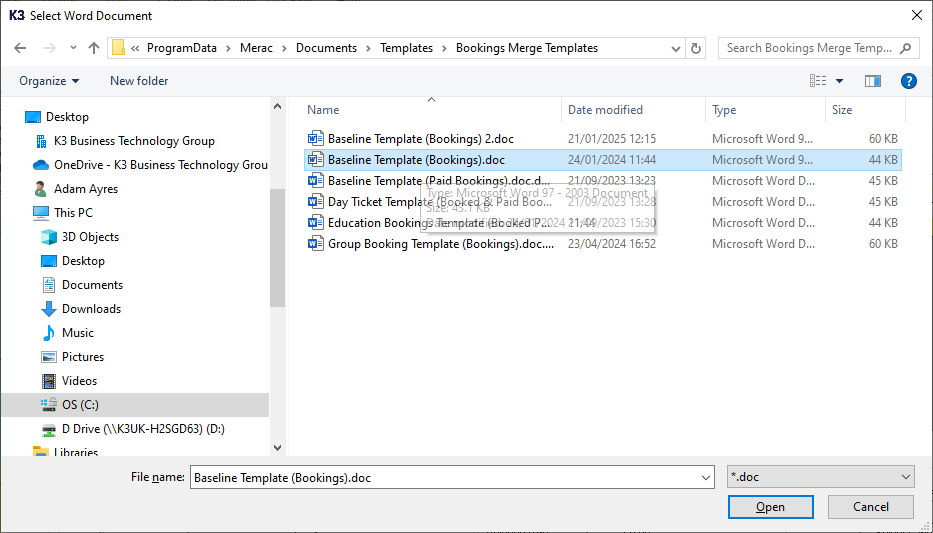
This will open up MS Windows 'File Explorer', simply find and select the require MS Word document and click ‘Open’.
Now follow the instructions in Section 4 below.
Adding Merge Fields To a Template
Once the MS Word document has been opened, the process for adding merge fields is the same across the 3 different categories of mail merge types as detailed in the previous sections (namely Member, Customer and Booking mail merges). The only variations are the merge fields available differ for each different type of mail merge category mentioned above.
Please Note: for some versions of Microsoft Word, you may have to minimise, then maximise the MS Word document first again in order to be able to insert a merge field into it.
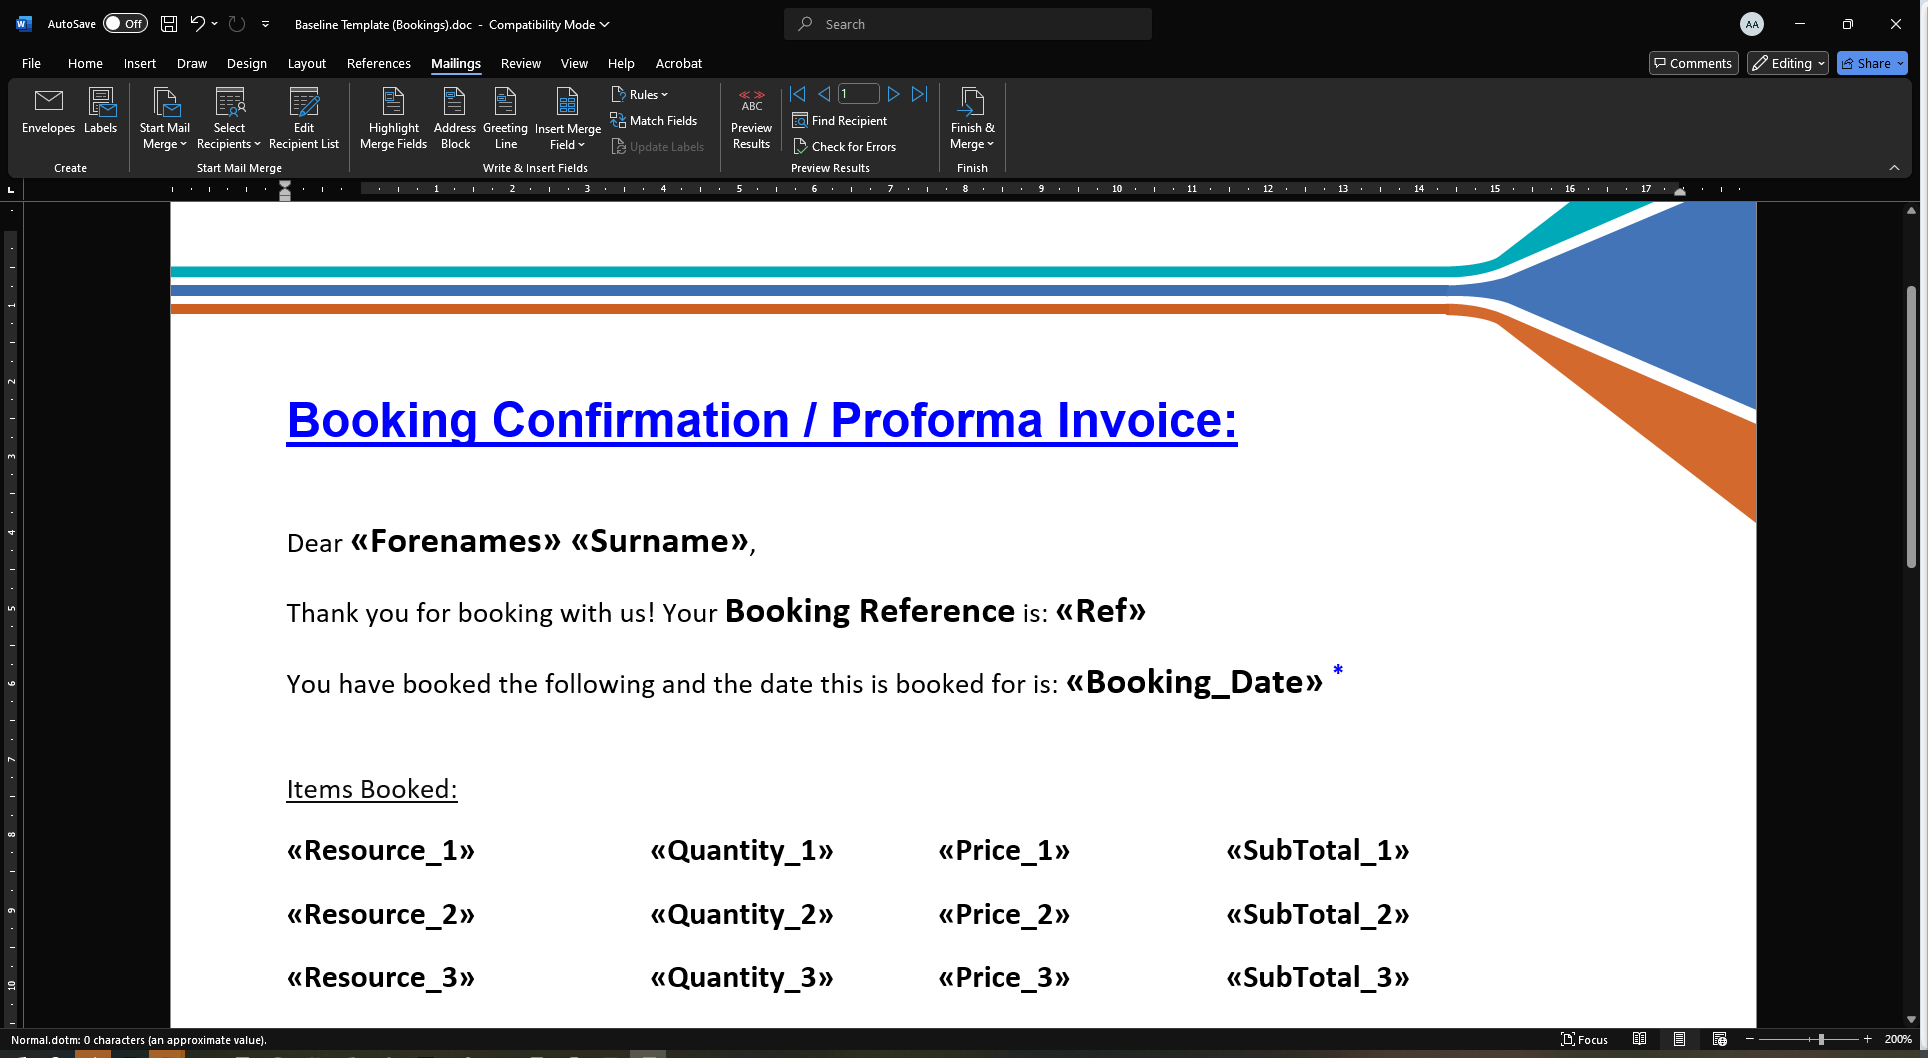
It is possible to insert merge fields anywhere on the document, or even into a blank document. The method shown is using a Word document in which the fixed-text content has already been created. This is recommended, as having the fixed-text content of the letter in place where the merge fields need to be added makes is simpler to add the required merge fields names in the correct positions. In this example, all the information we want to be replaced by merge fields are highlighted in yellow, the highlighting would simply be removed once all the required merge fields have been added.
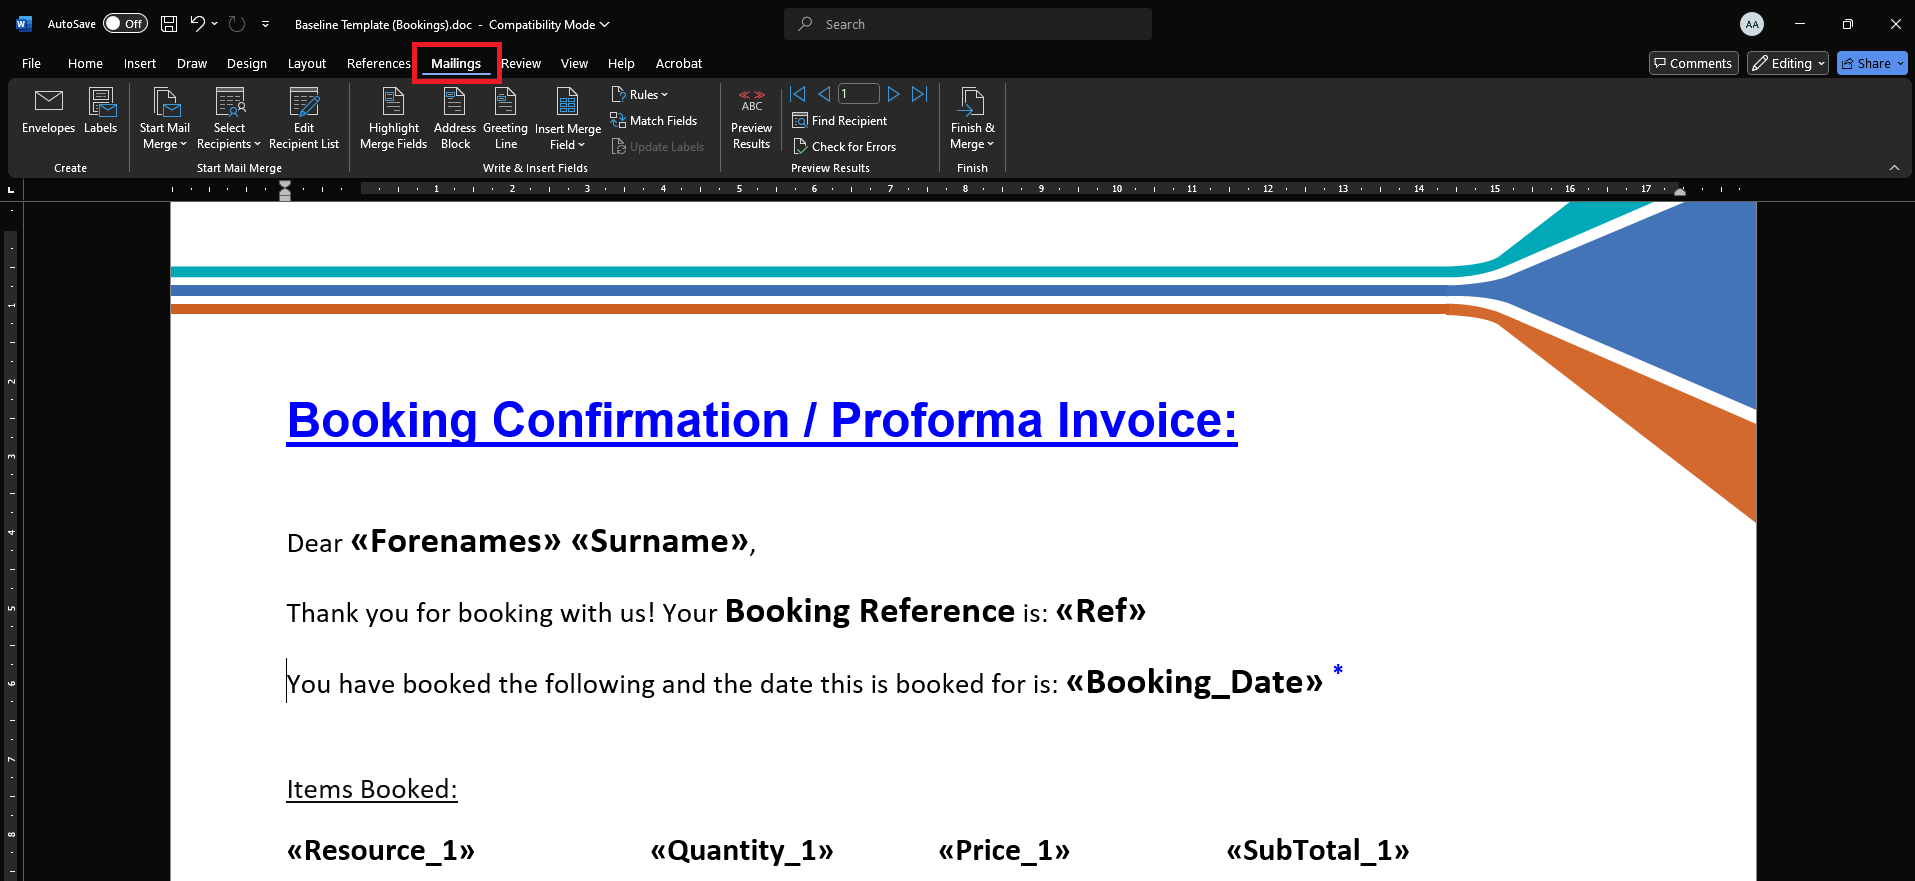
First, ensure you have the ‘Mailings’ tab selected.
Select where you want to insert the merge field using your mouse in the usual way.
In the above example the word Title (using click and drag), which will be replaced by the relevant merge filed.
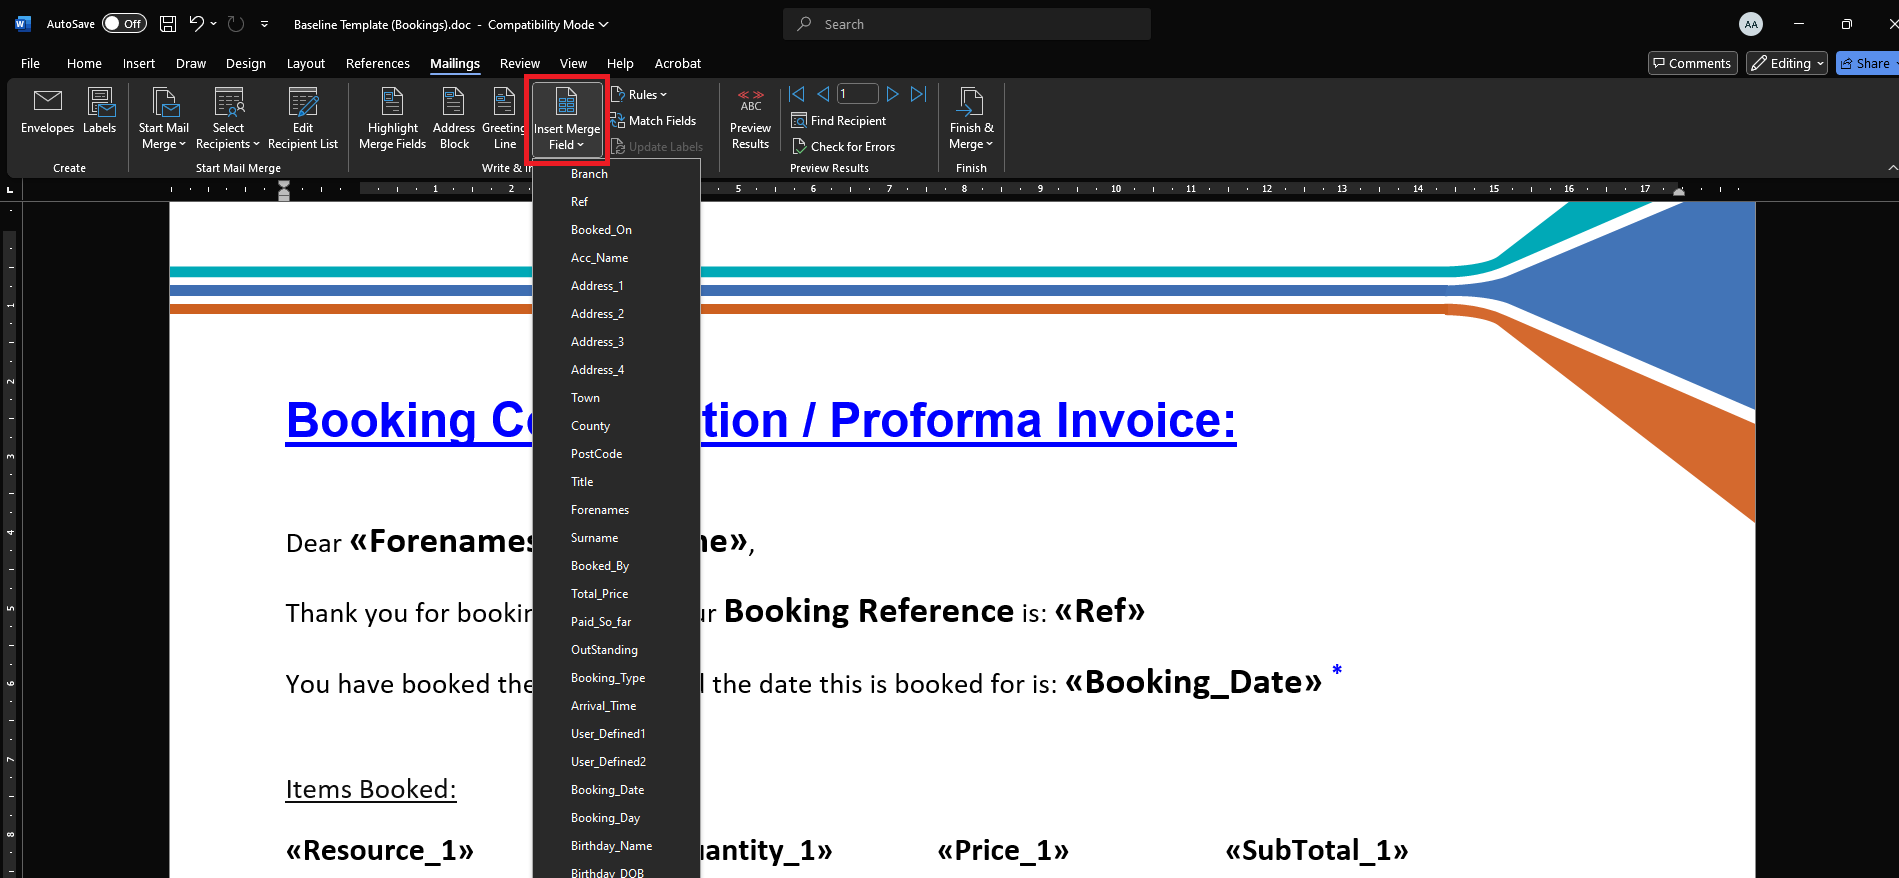
Click on the ‘Insert Merge Field’ icon.
This will then produce a dropdown menu of the merge fields available for your chosen template category.
Click on the name of the merge field that is required, in this example the 'Title' merge field is selected.
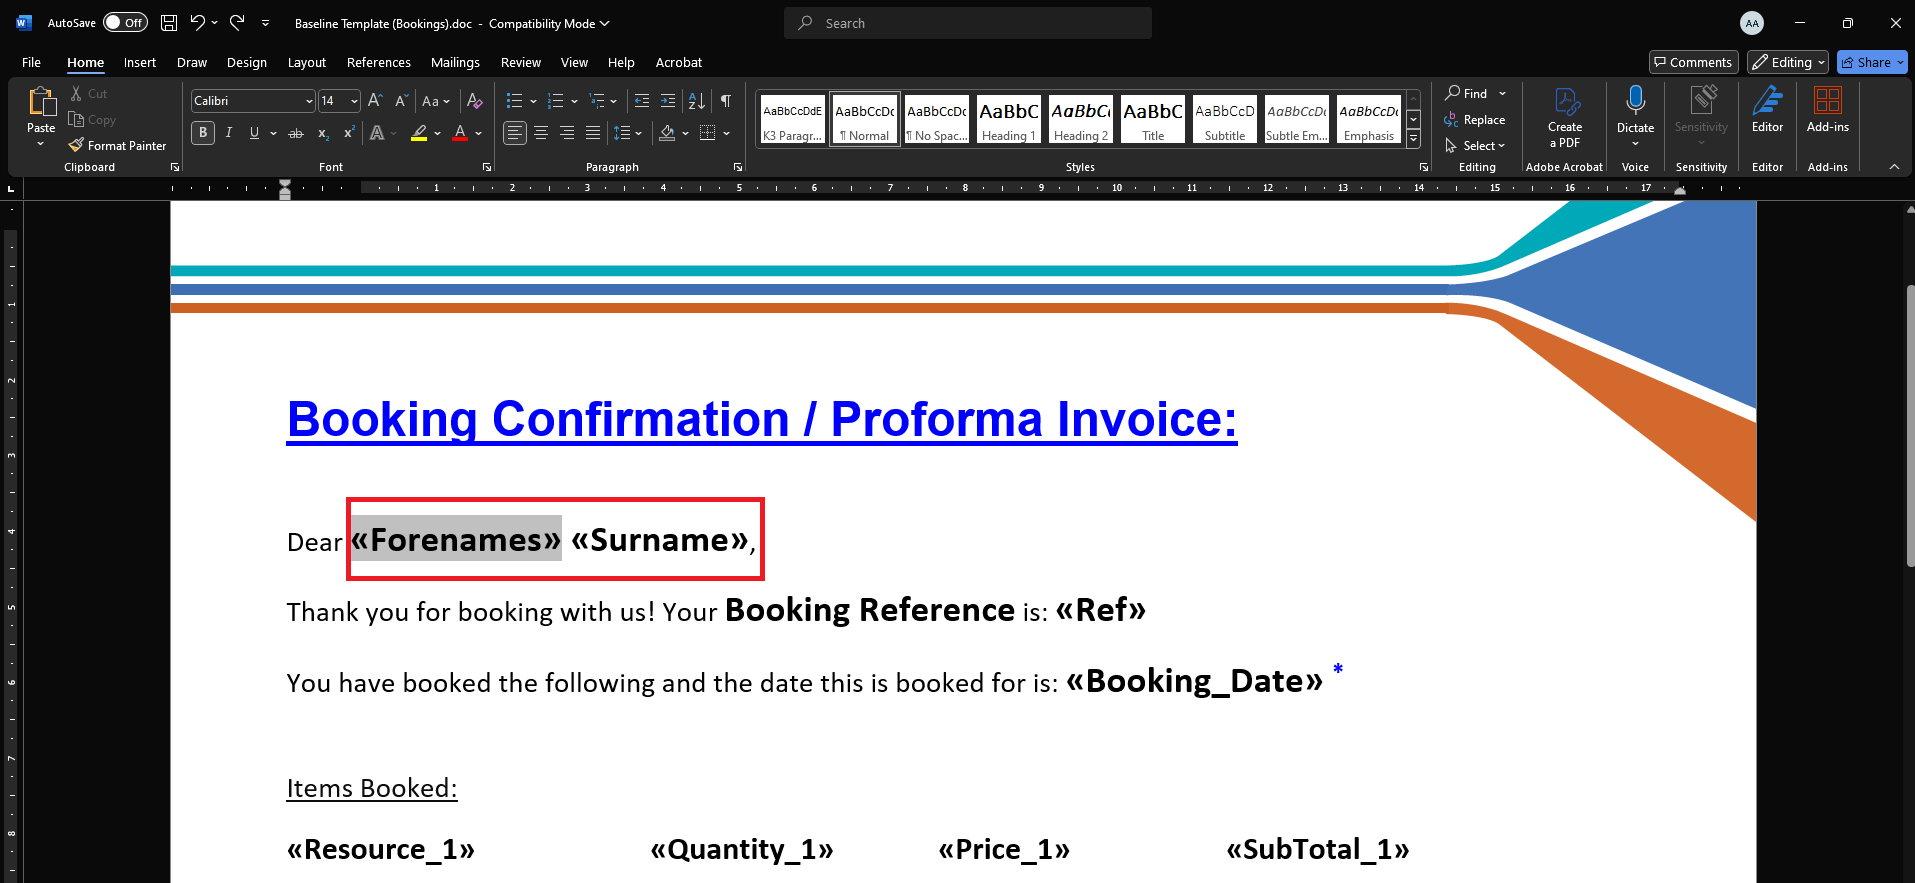
When you have successfully added a merge field, it will appear inside << >> these brackets
For example in the below you will see the <<Forenames>> and <<Surname>> merge fields were added
Repeat the previous steps until all the required merge fields have been added into the MS Word document.
Previewing Your Mail Merge Template
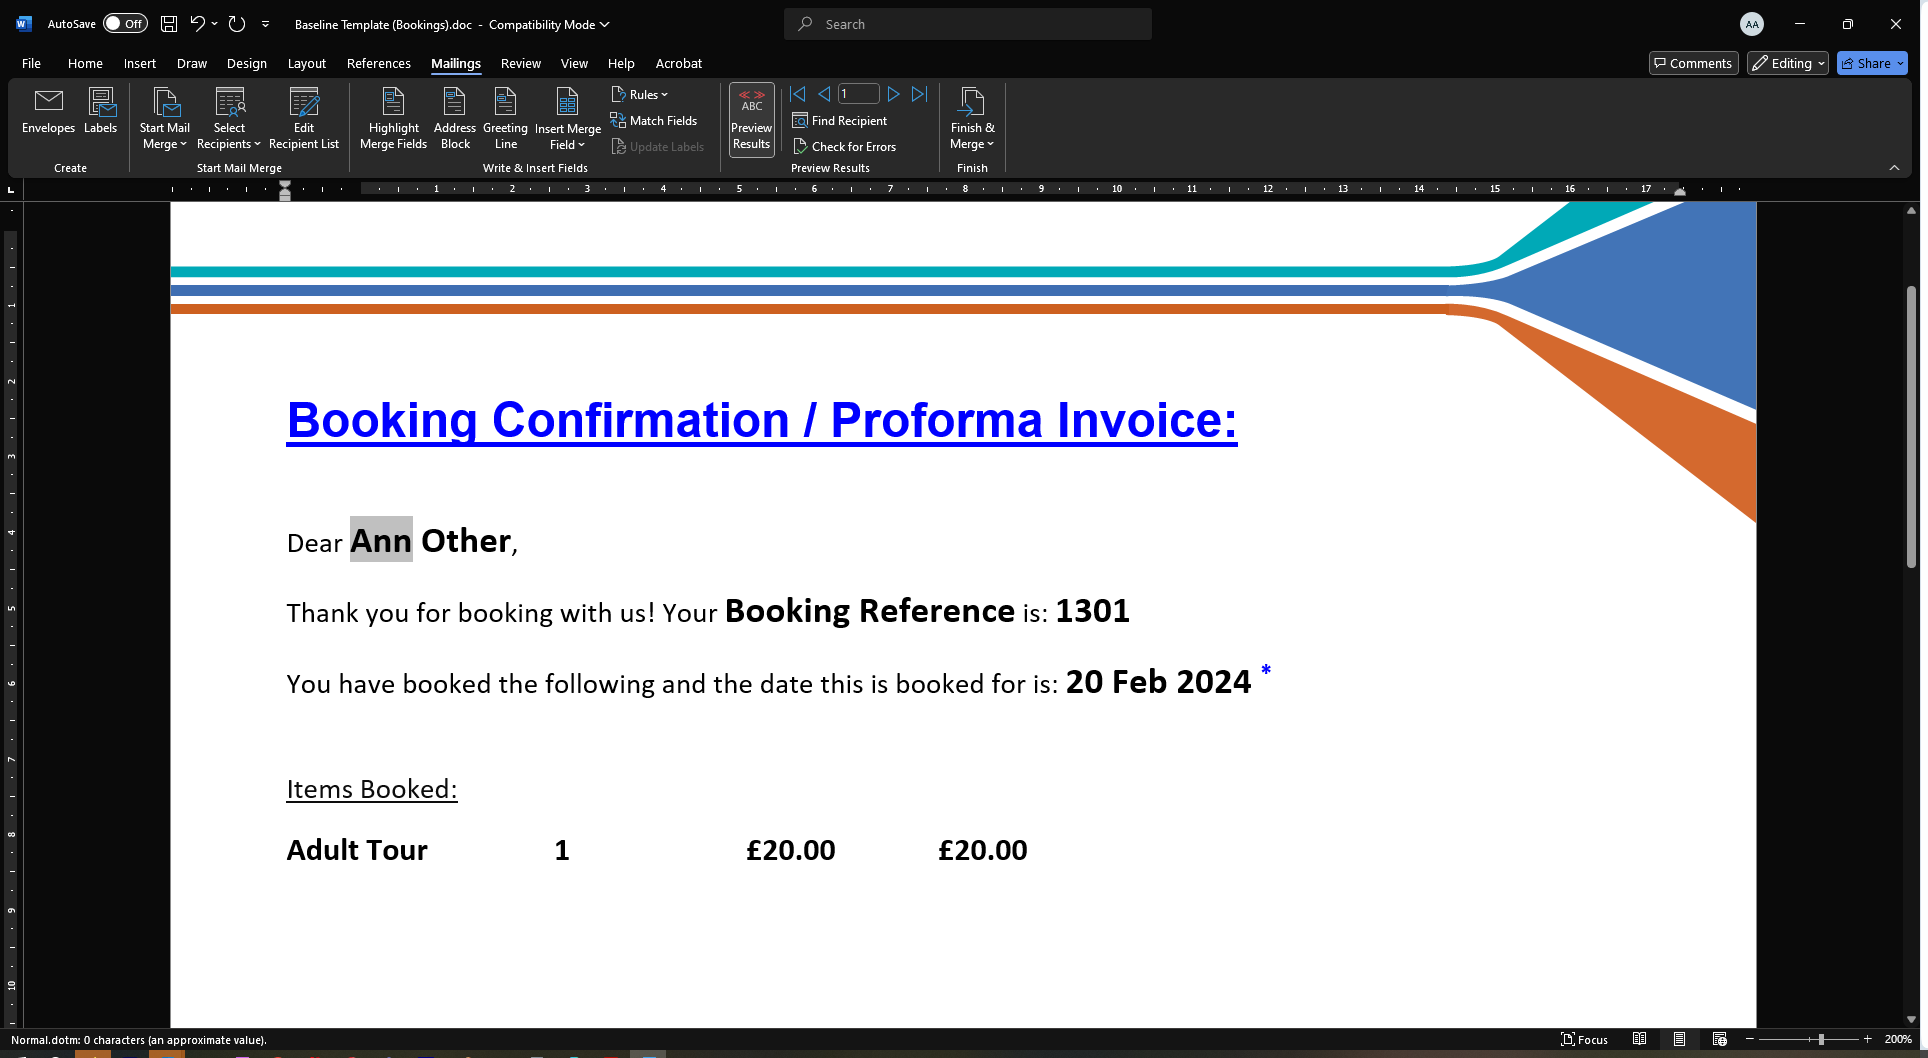
When you have added all the necessary merge fields, the document will look like the one below.
Now it is advised you check all the merge fields you have inputted display the required information.

To do this, click on ‘Preview Results’ (on the ‘Mailings’ tab). This will then show the information merged from the the previously selected Booking / Customer / Member record (depending on the record that you opened)
You can use the mail merge functionality within MS Word to complete the mail merge as required and save the results.
Please note any support with or training on MSWord for document creation or for carrying out mail merges is not covered by Merac, as we do not provide training or support on Microsoft Word itself. Merac only provide training on how find /add the Merac specific merge fields into an MS Word document (as detailed above). Any support / training on using MS Word and it's mail merge functionality would need to be provided by your preferred training / support provider.