
TABLE OF CONTENTS
Introduction
The following is a step by step example on how to use the ‘Member Mailing’ option within the ‘Merac’ back office software. This option enables you to create your own data extracts from your member’s database which you can either (i) extract as a Microsoft Excel spread sheet, or (ii) mail merge to Microsoft Word.
Using both functions requires you to have Microsoft Word and Excel already installed on your computer by your IT department. Please note Merac do not supply technical support or training for these applications.
Using Member Mailing
The following instructions detail how to use member mailing to extract data.
First, click on the ‘Members’ button. 
Next, select the ‘Mailing’ option.

Select ‘Mail_Membership’ from the dropdown list.
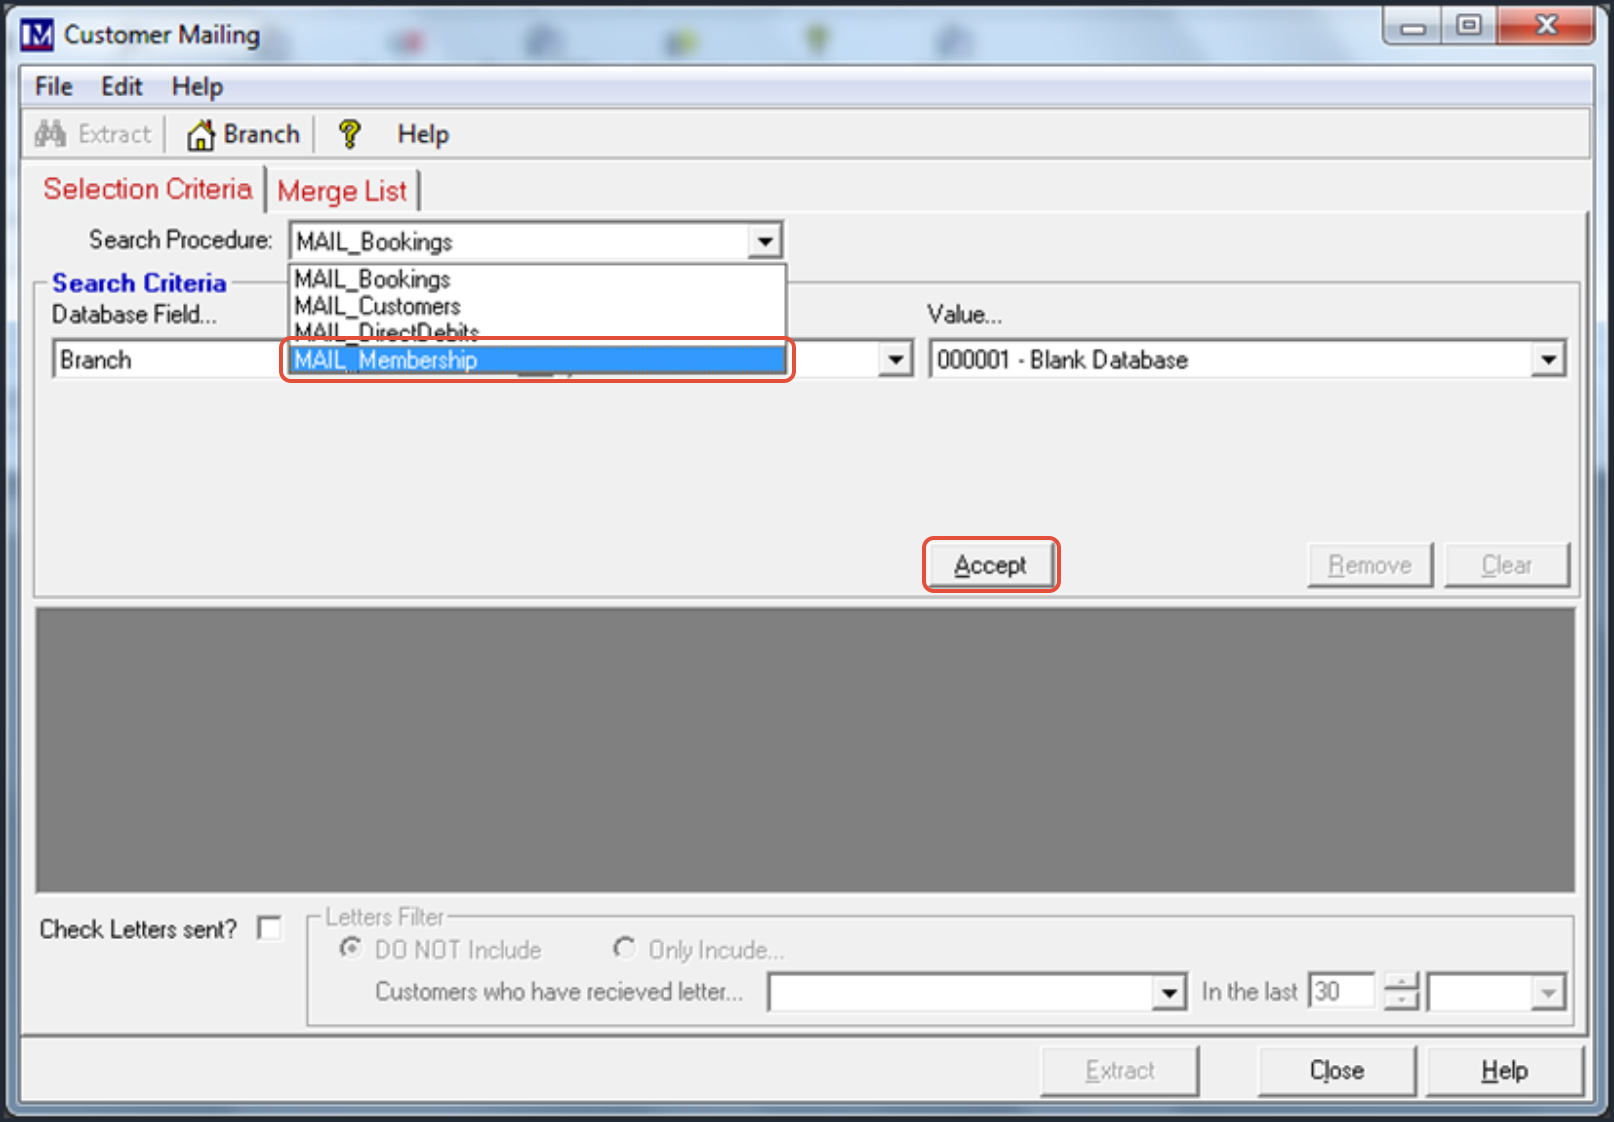
Now click on ‘Accept’.
Please note there are also options on the 'Search Procedure' dropdown to find:
(i) only customers that are members (by selecting Mail_Membership)
(ii) only customers that made bookings (by selecting Mail_Bookings)
(iii) only customers that are Direct Debit Members (by selecting Mail_DirectDebits)
(iv) all customer data by selecting (Mail_Customers).
Please note this manual only covers option (i) above that shows you how to find data for customers that are members in the Merac back office software by selecting Mail_Membership in the above screen. Using any of the the other 'Search Procedure' options in the dropdown above follows the same process steps as detailed in this manual. However, the options that are available to select in the 'Search Criteria' options will differ depending on the 'Search Procedure' selected.
You will see the screen as shown below.
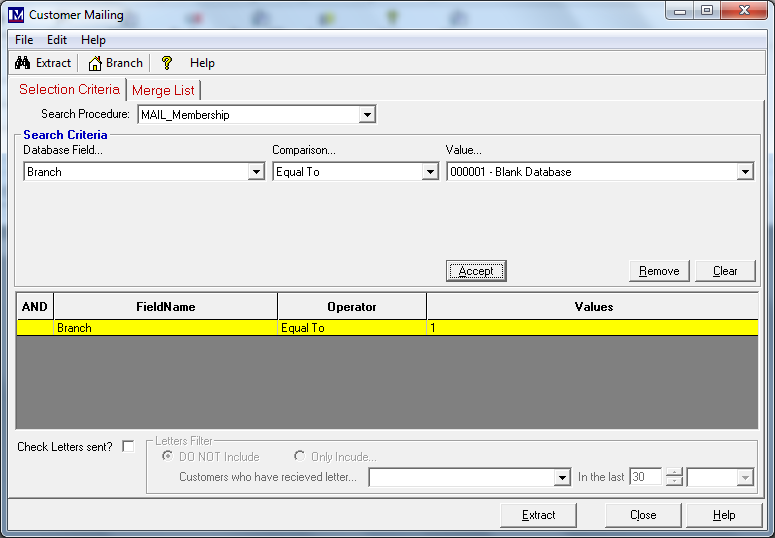
We will now show you one specific example of how to extract member data, for memberships will expire between a selected date range.
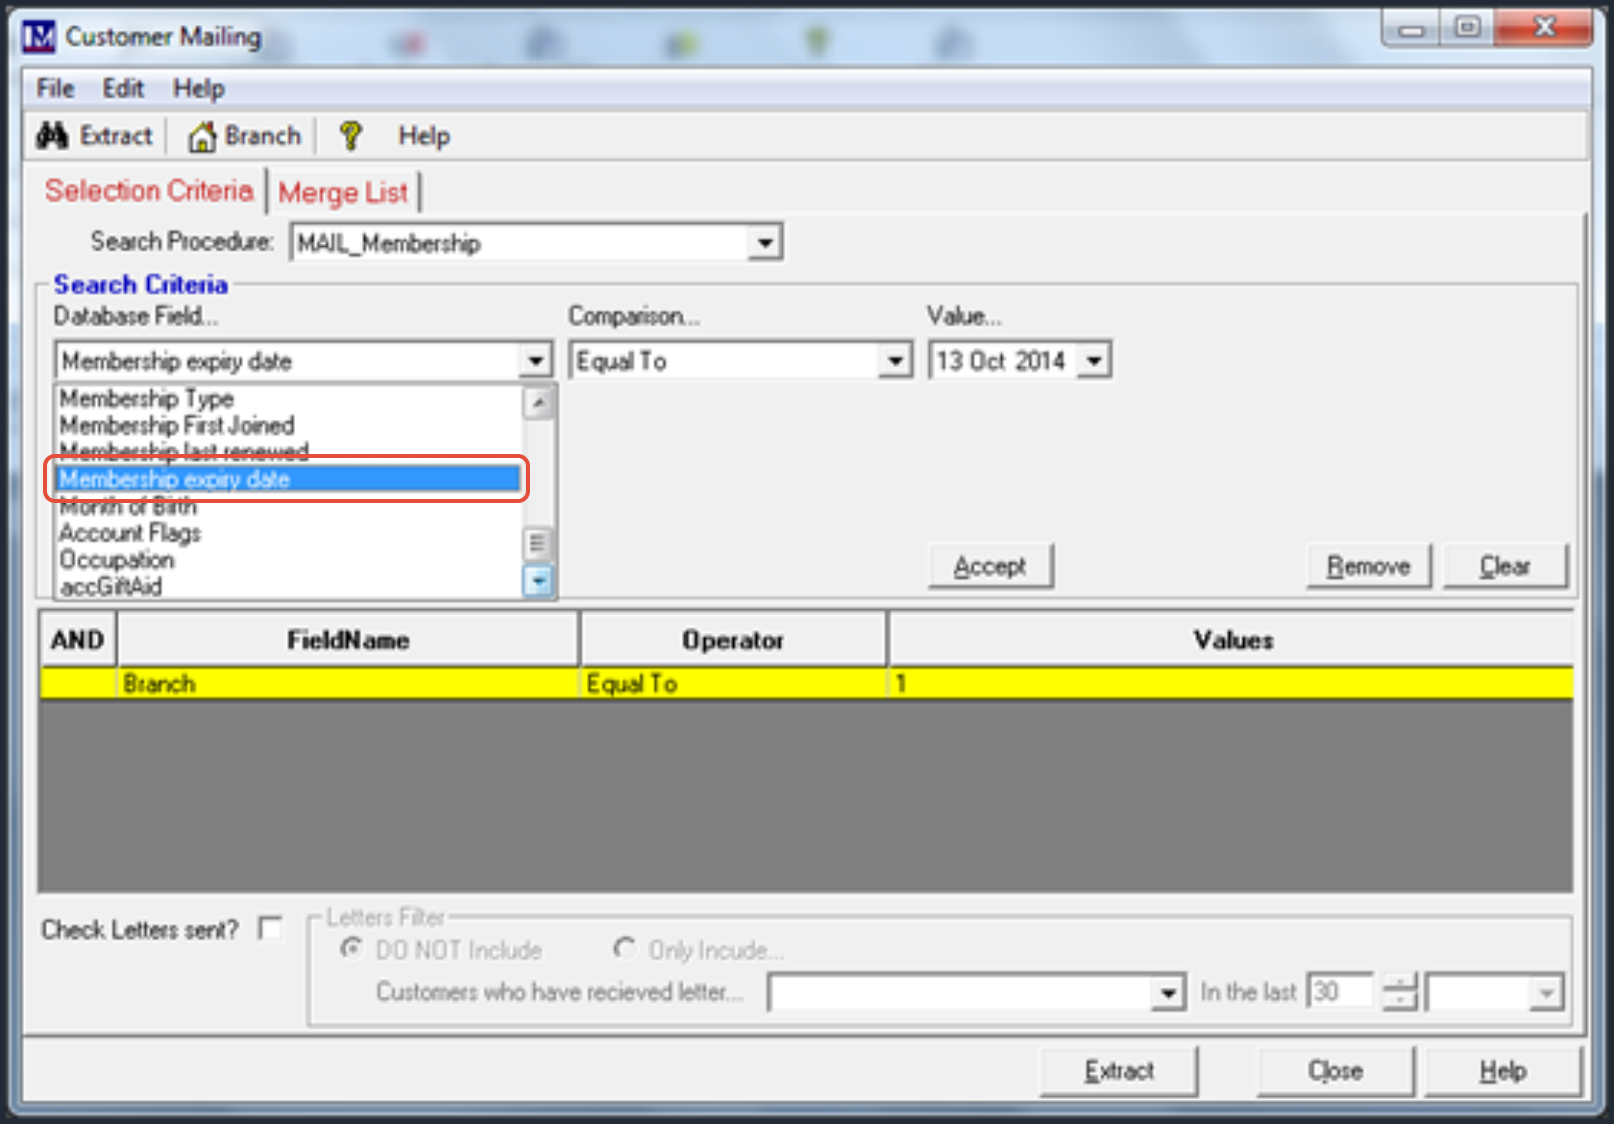
Select ‘Membership expiry date’ from the ‘Database Field’ dropdown as shown below.
Now select 'Is between the values' from the ‘Comparison’ dropdown as shown below.
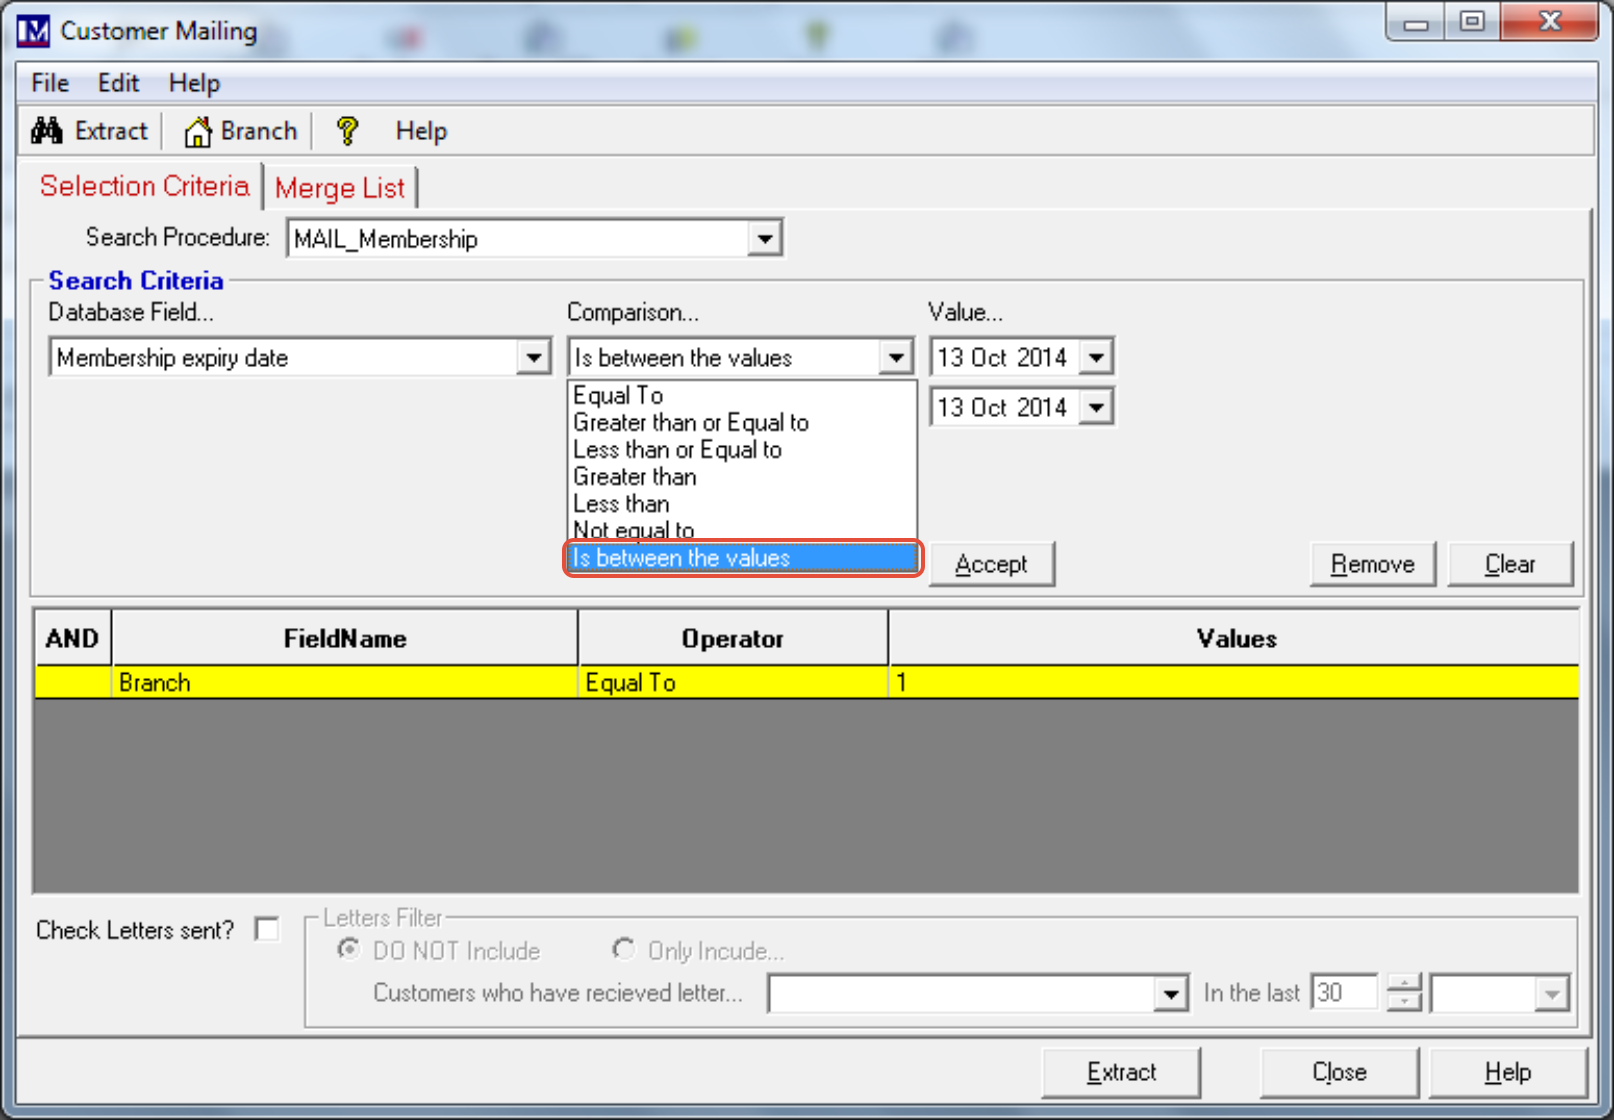
Now select the required “from” date from the top ‘Value’ dropdown as shown below.
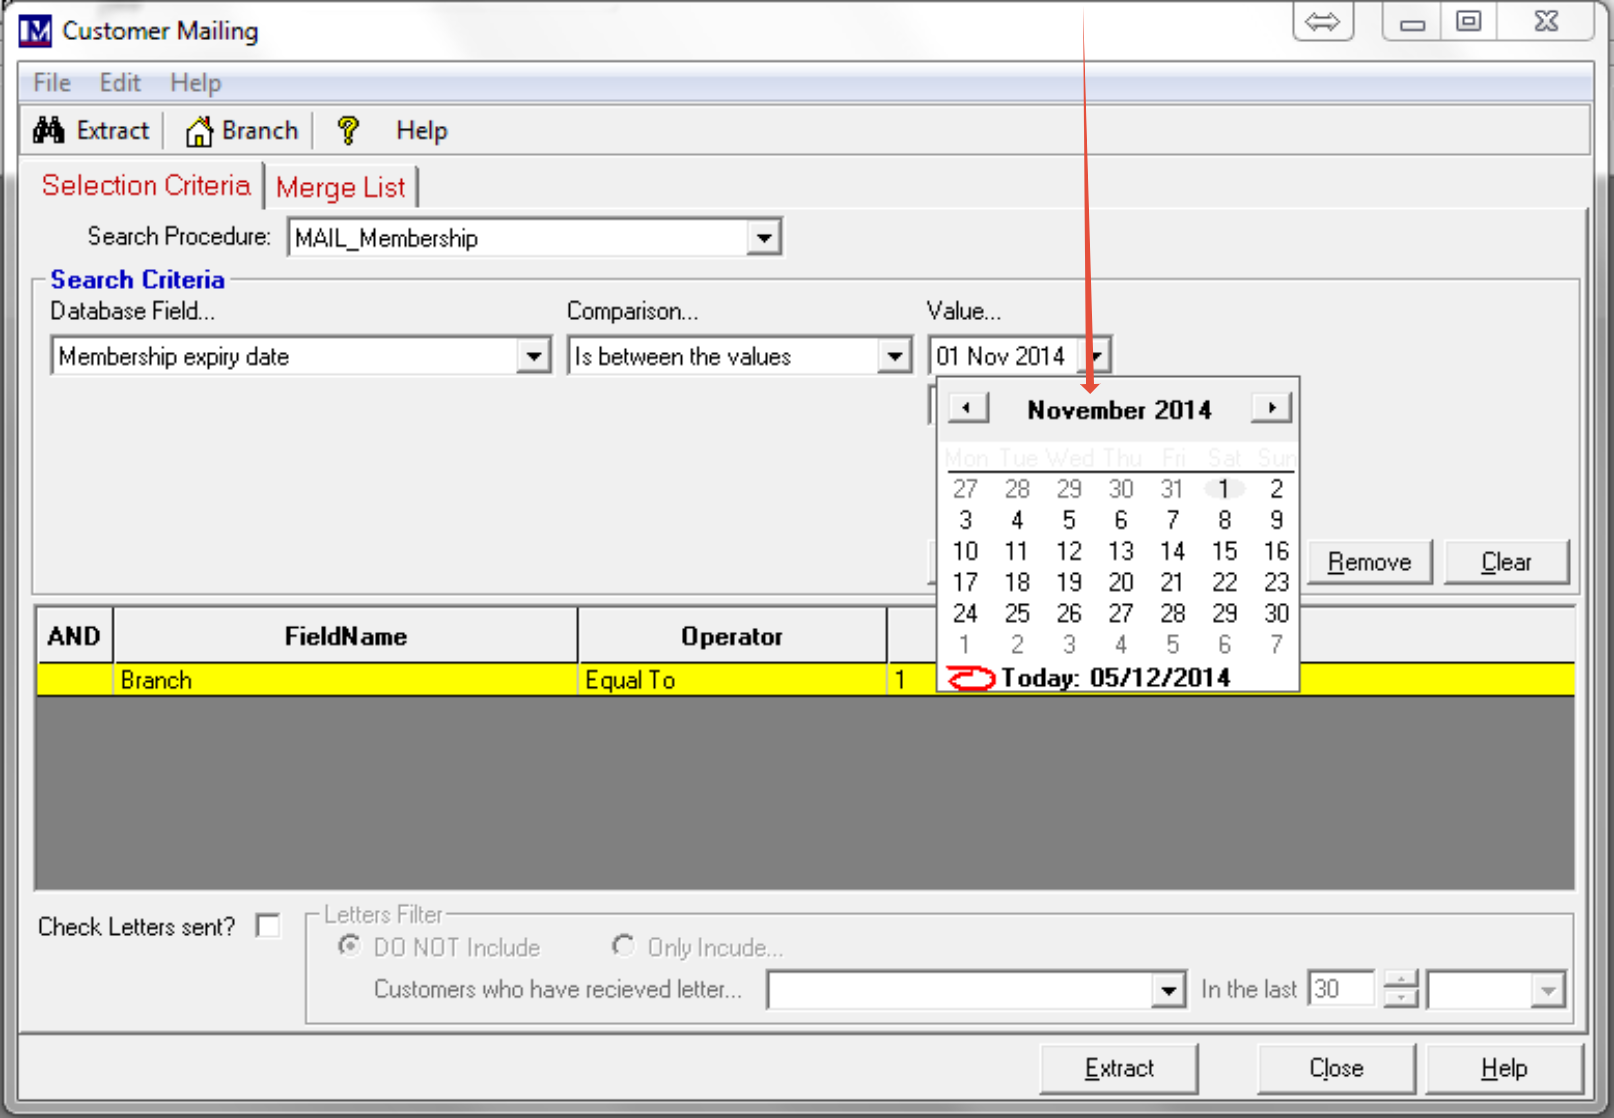
Now select the required “to” date from the bottom ‘Value’ dropdown as shown below.

Next click on the 'Accept' button.
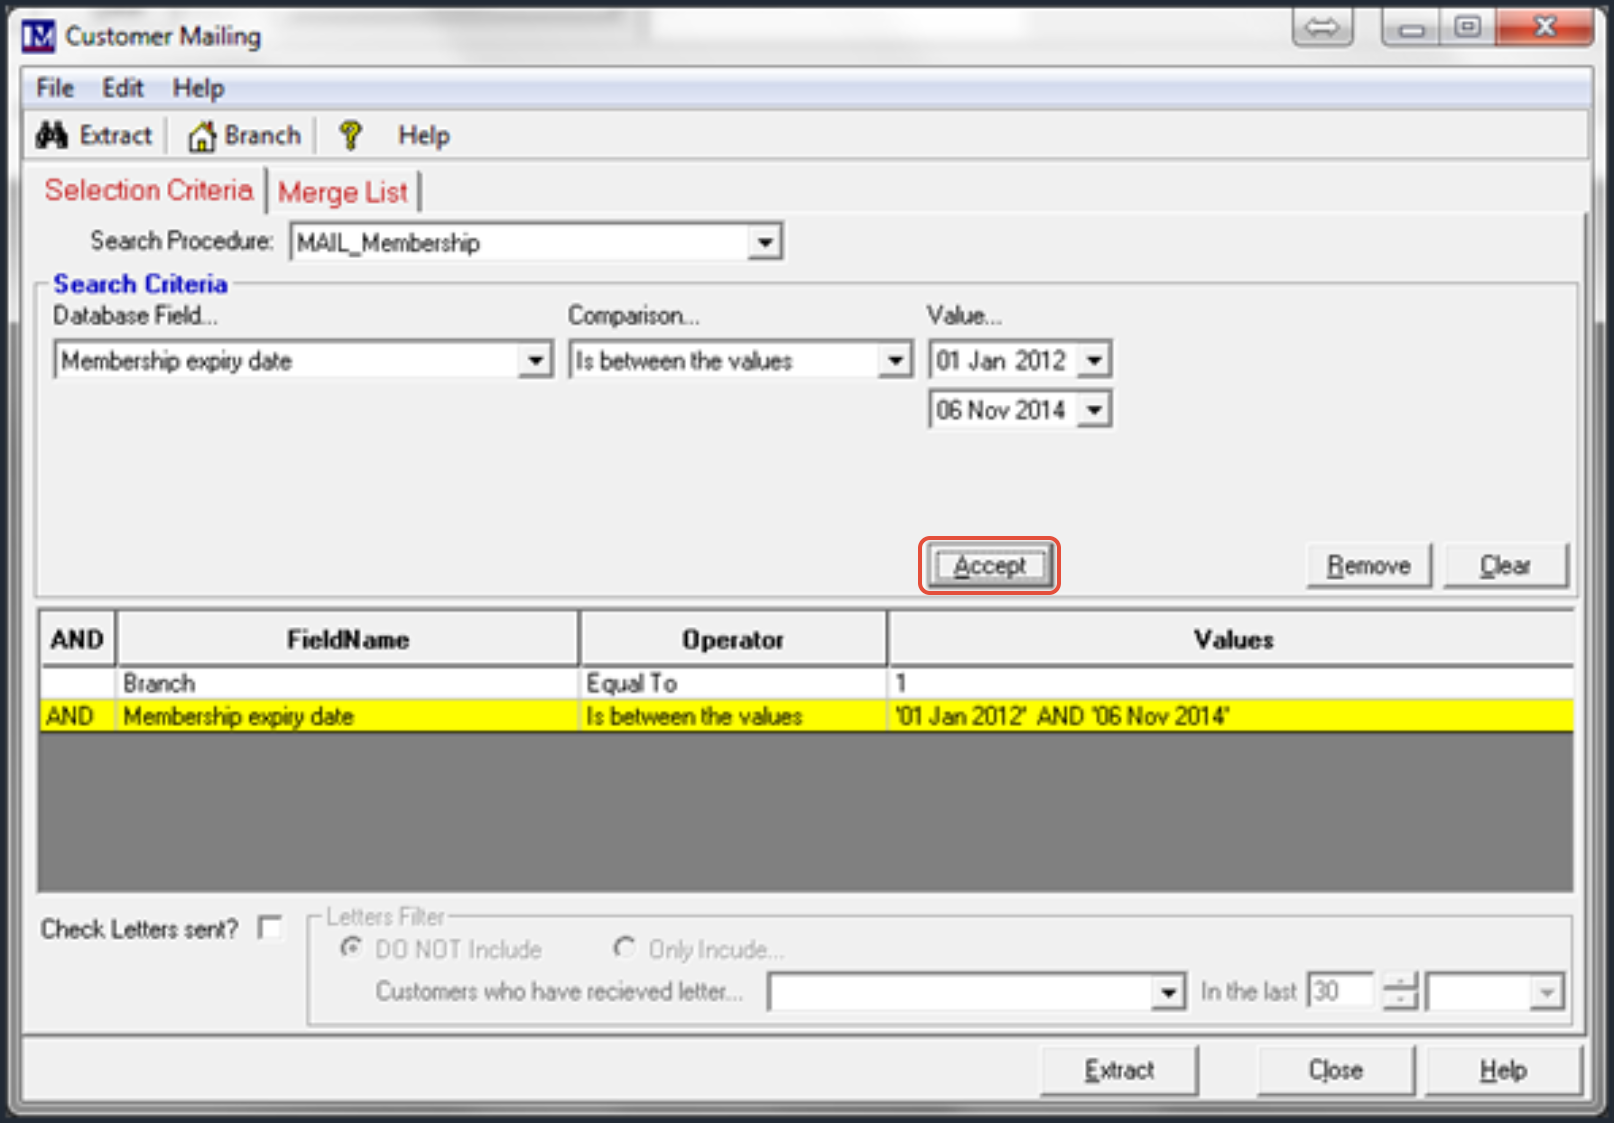
N.B. in this example we are only carrying out a simple search. If you wanted to add multiple ‘Search Criteria’ you could select other criteria from the ‘Database Field’ dropdown list here and add these additional criteria as required (using a similar procedure as detailed above).
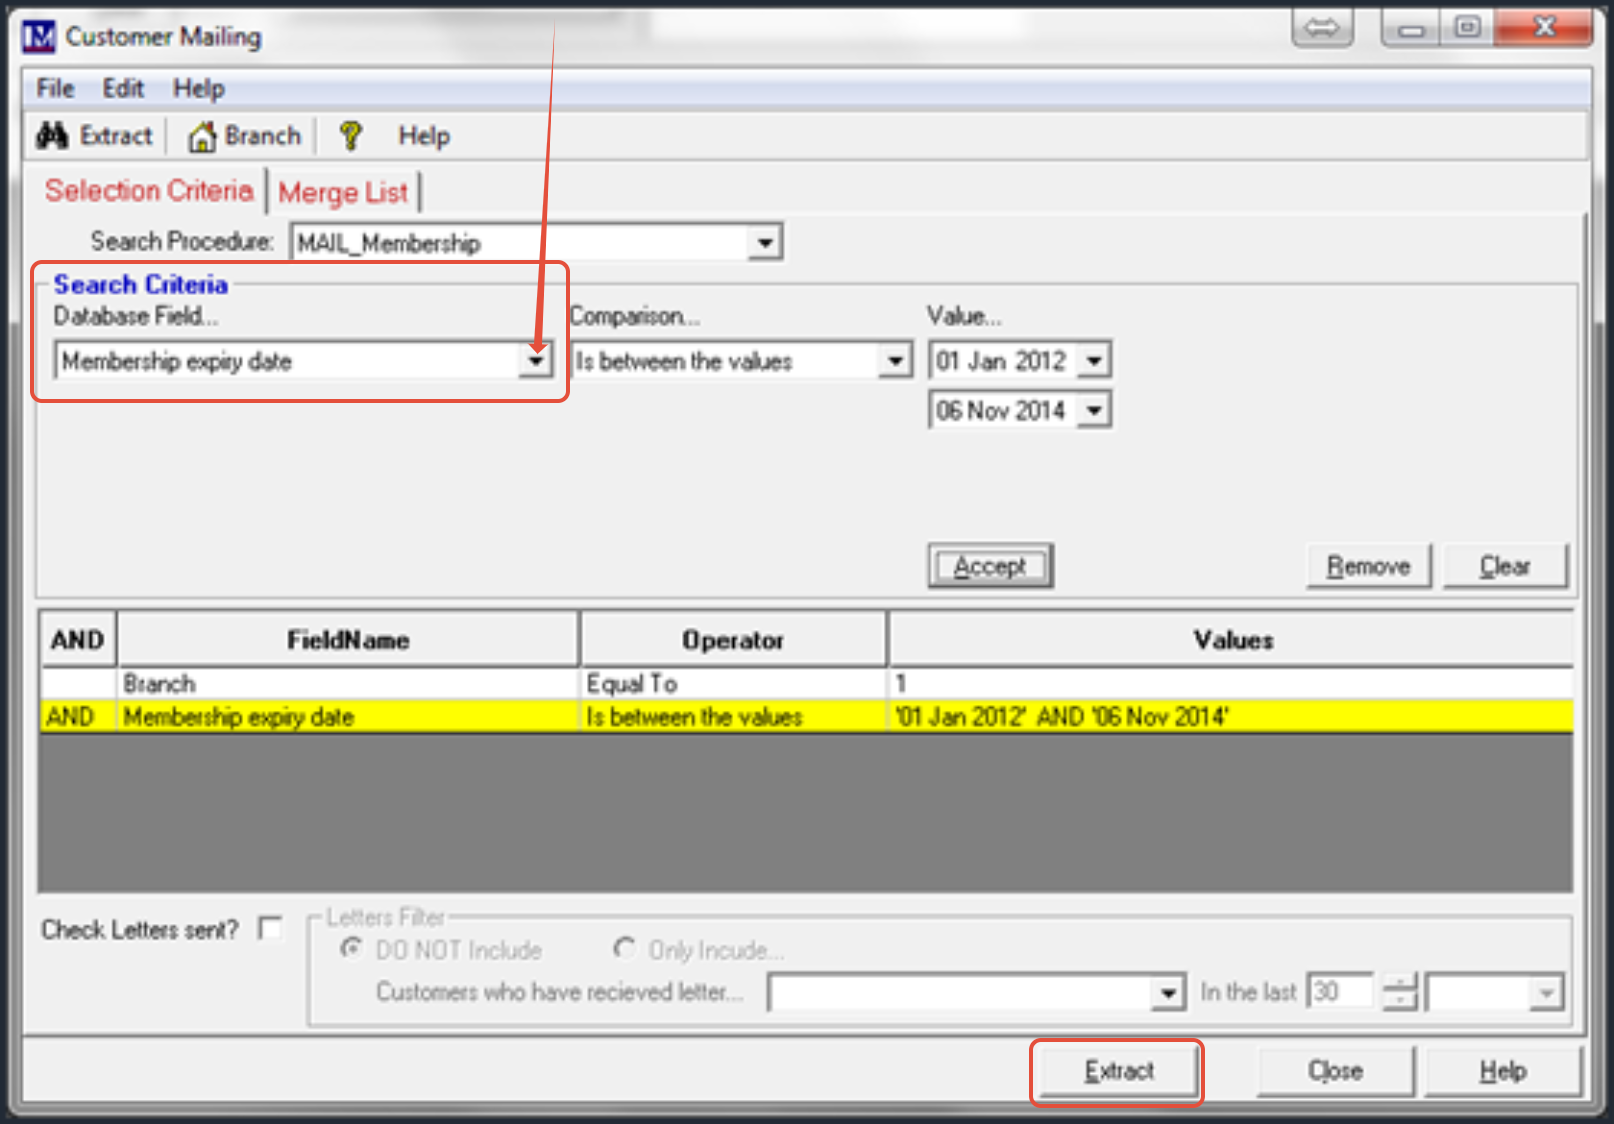
Once all the search criteria have been defined as required, click on ‘Extract’.
If you want the results as a Microsoft Excel spreadsheet, click on 'Export Data To List'.
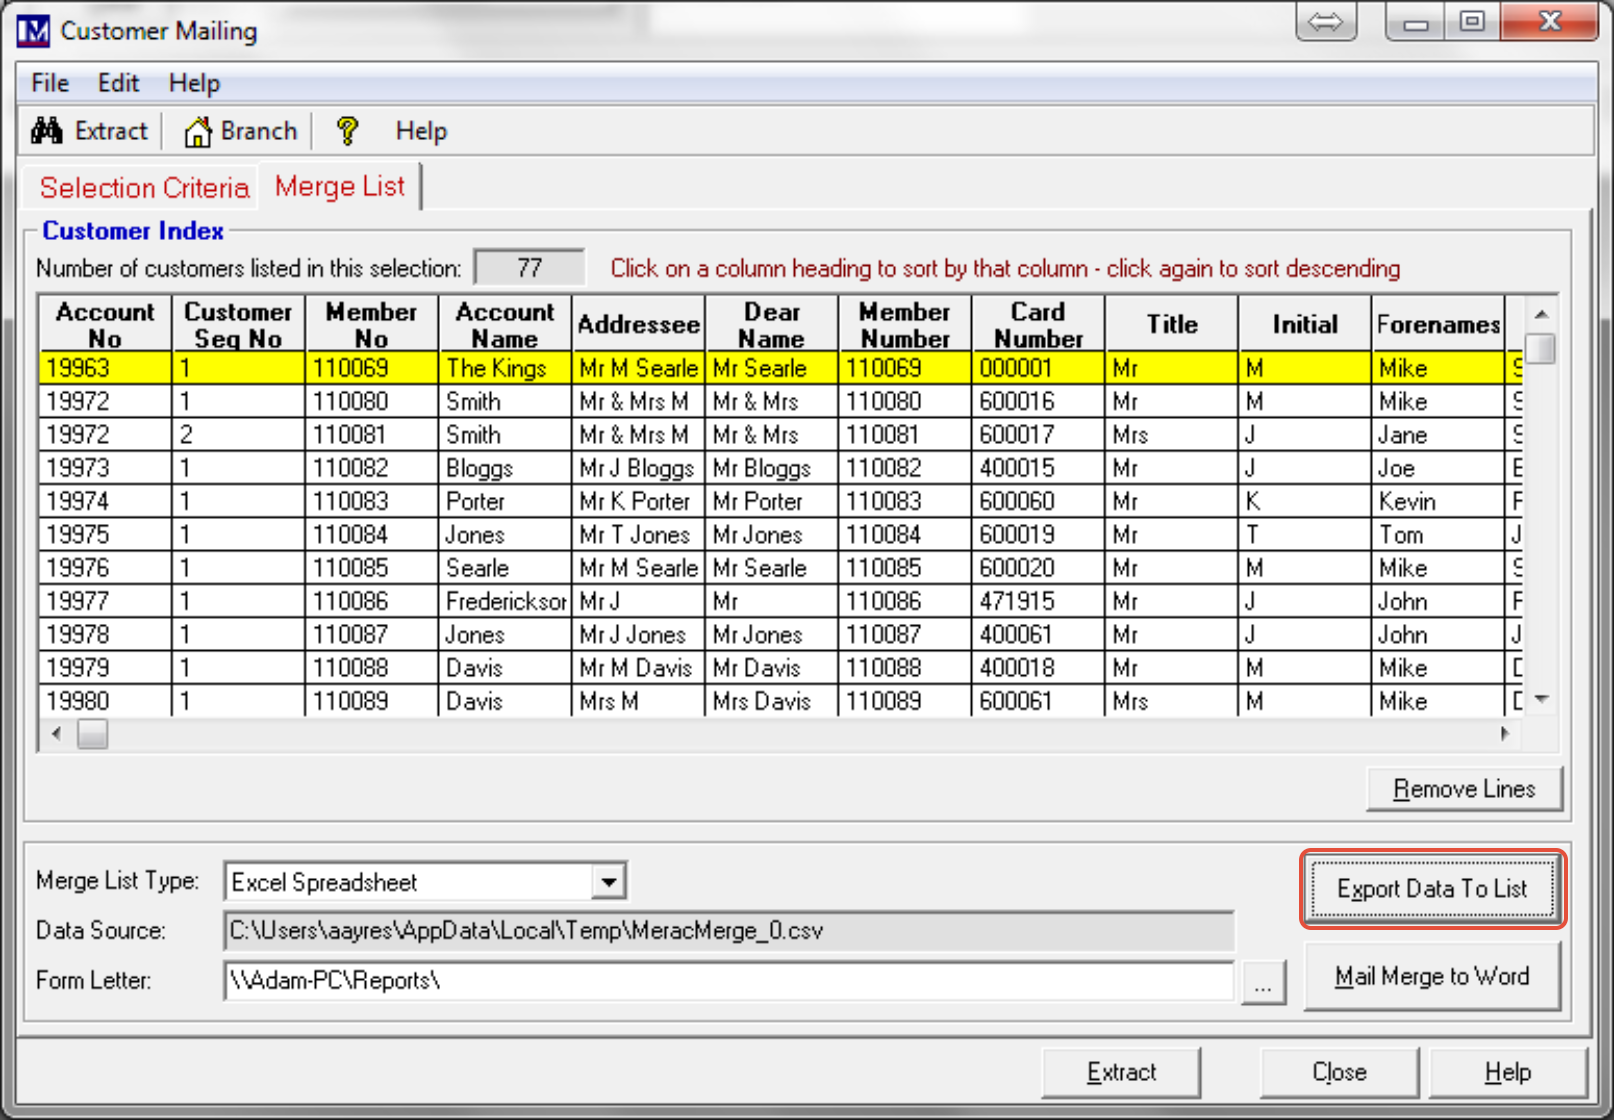
The Microsoft Excel spreadsheet will be created automatically.
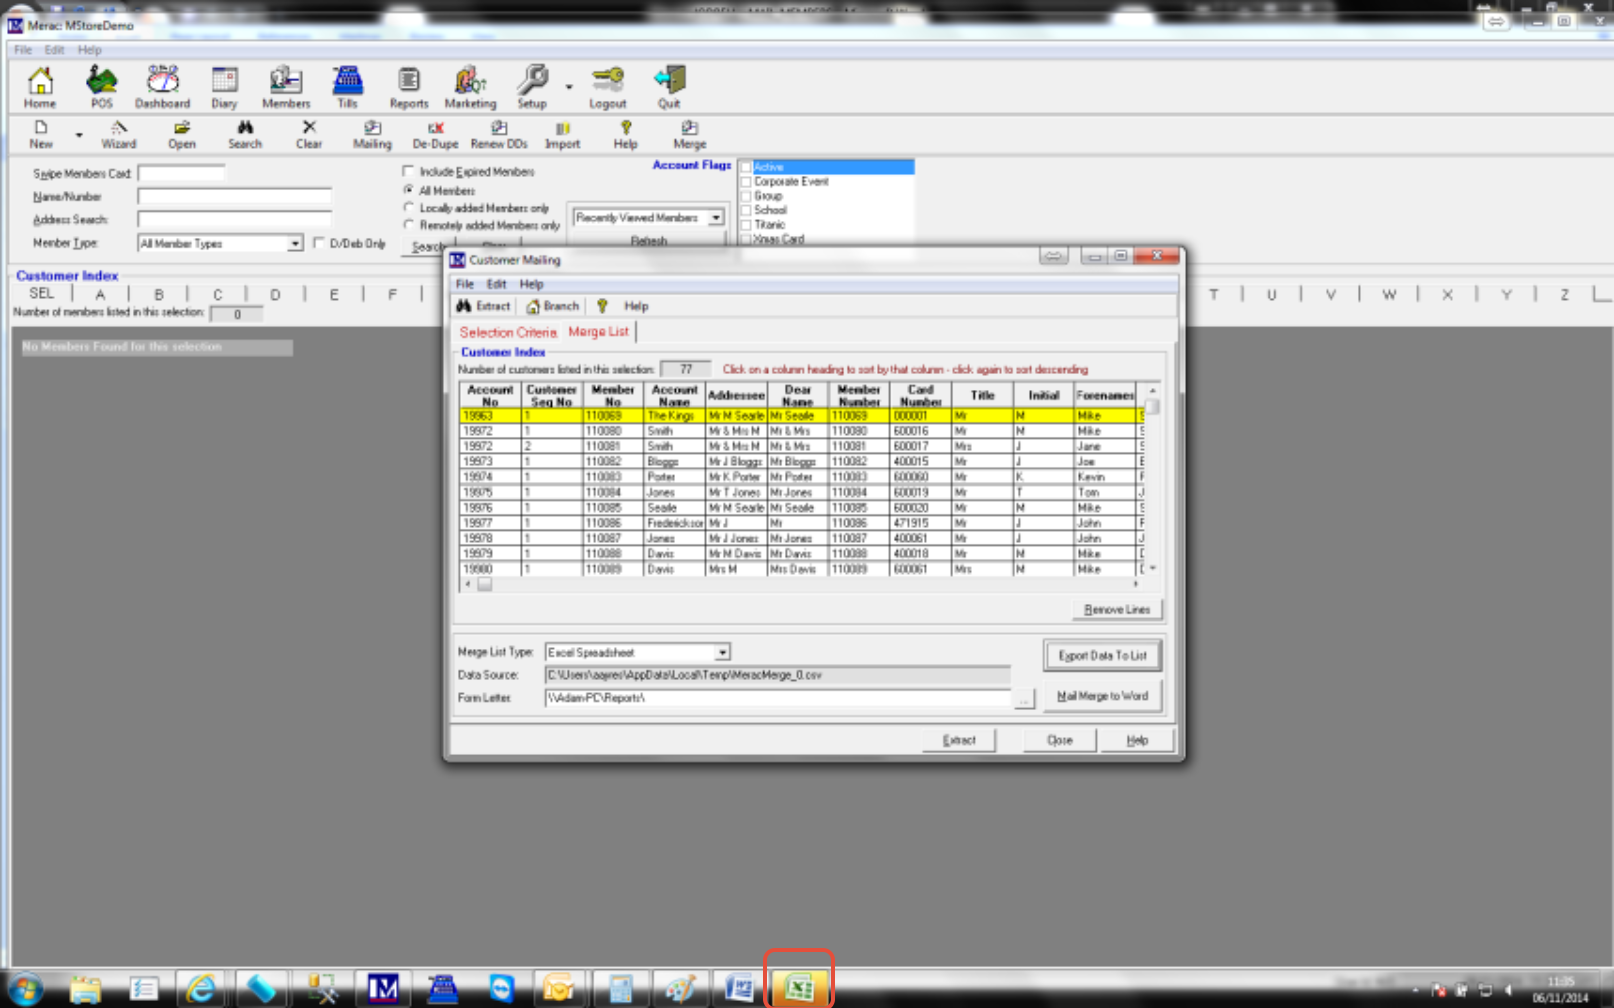
Now click on the ‘Microsoft Excel’ icon on your Windows ‘Taskbar’ .
This will open this spreadsheet so you can view and use this data as required.
Alternatively, the results can be merged to a Microsoft Word mail merge template.
First ensure you have selected the required Microsoft Word mail merge template.
To do this click here to navigate to the required Microsoft Word mail merge template.
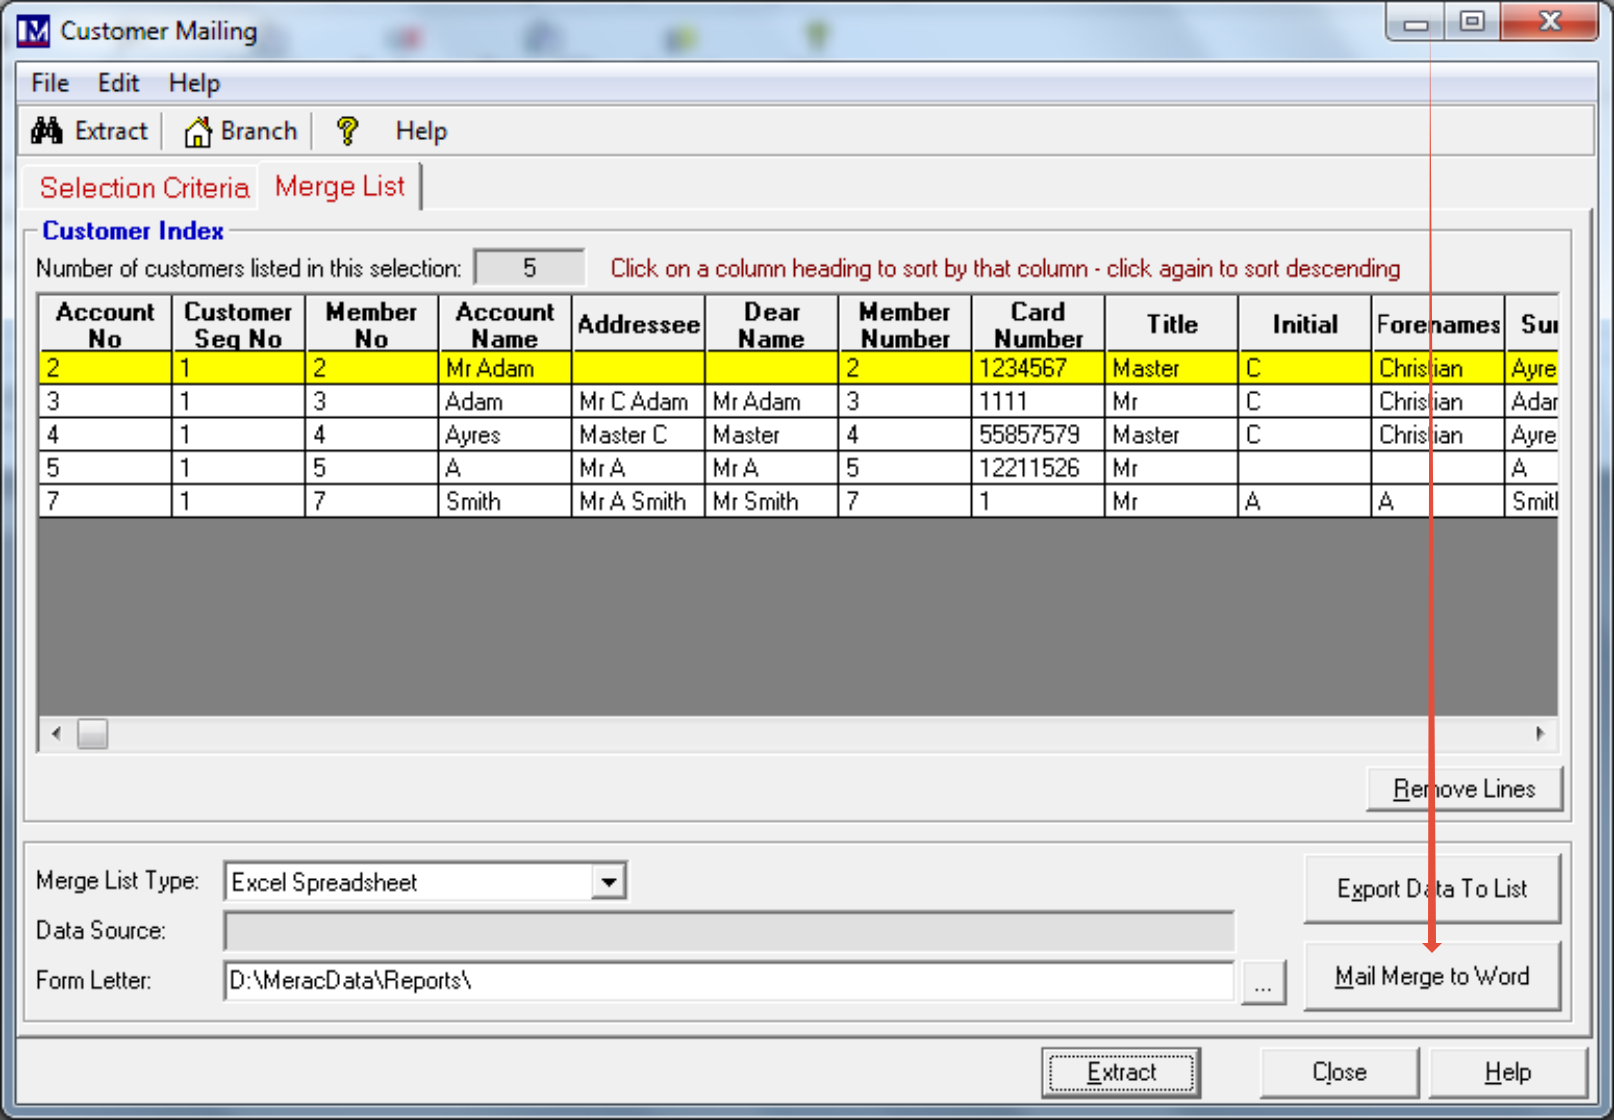
Navigate to the required folder and click on the required Microsoft Word mail merge template.
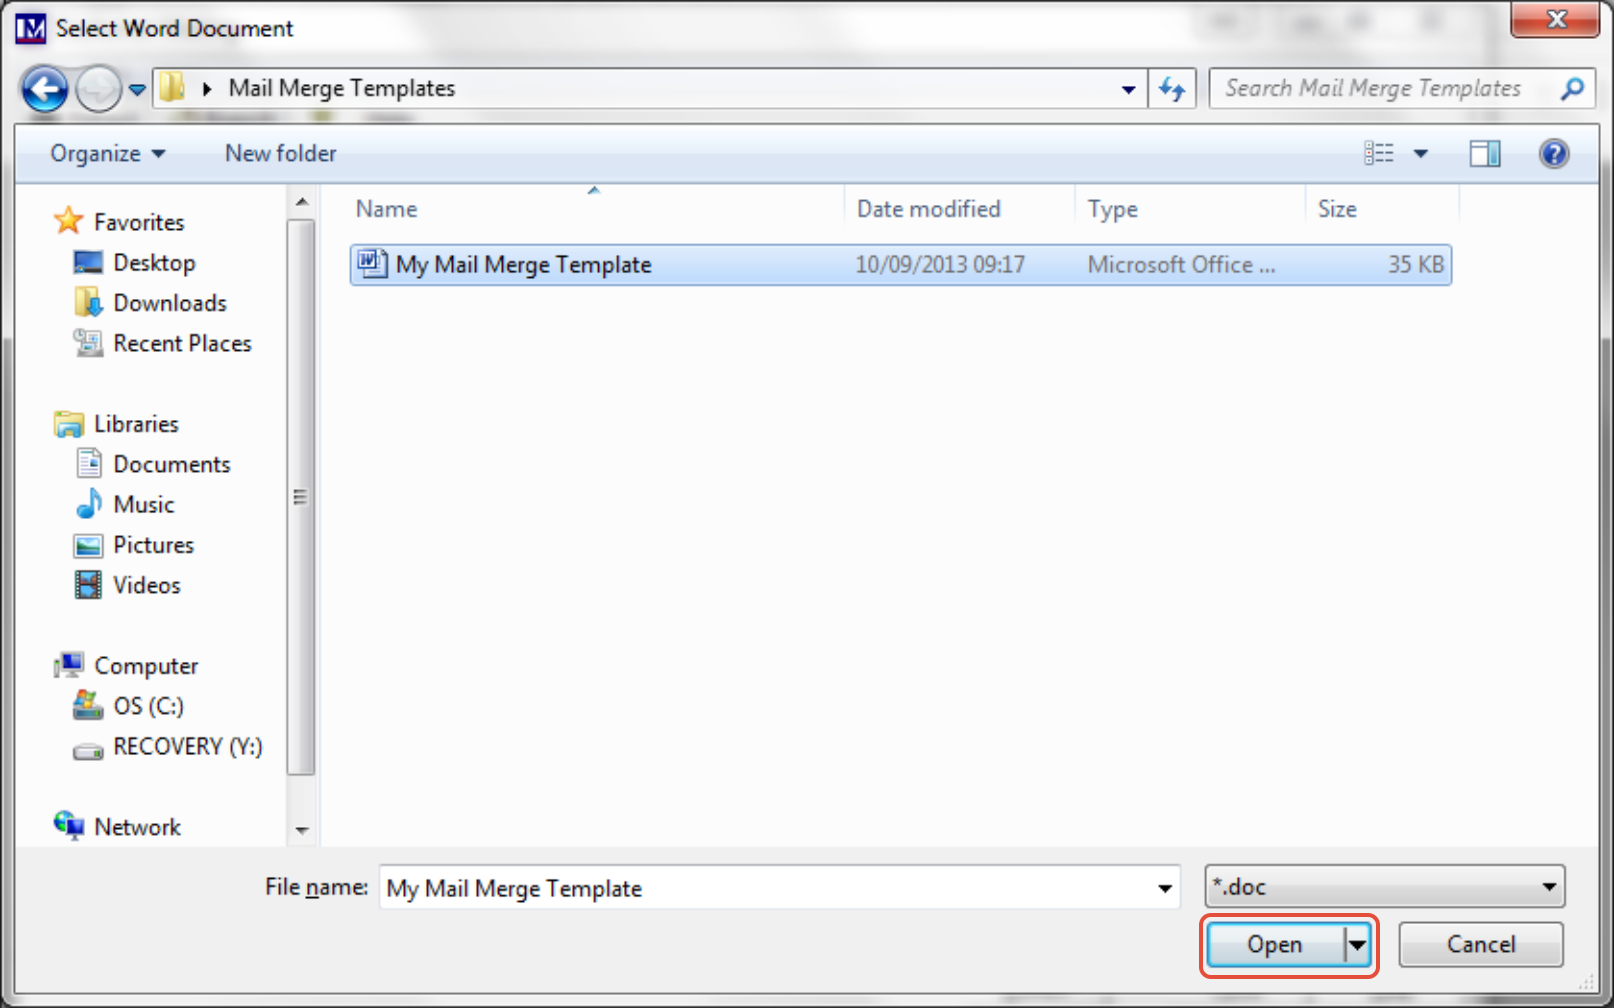
Next click on ‘Open’.
Now click on the ‘Mail Merge’ to Word button.
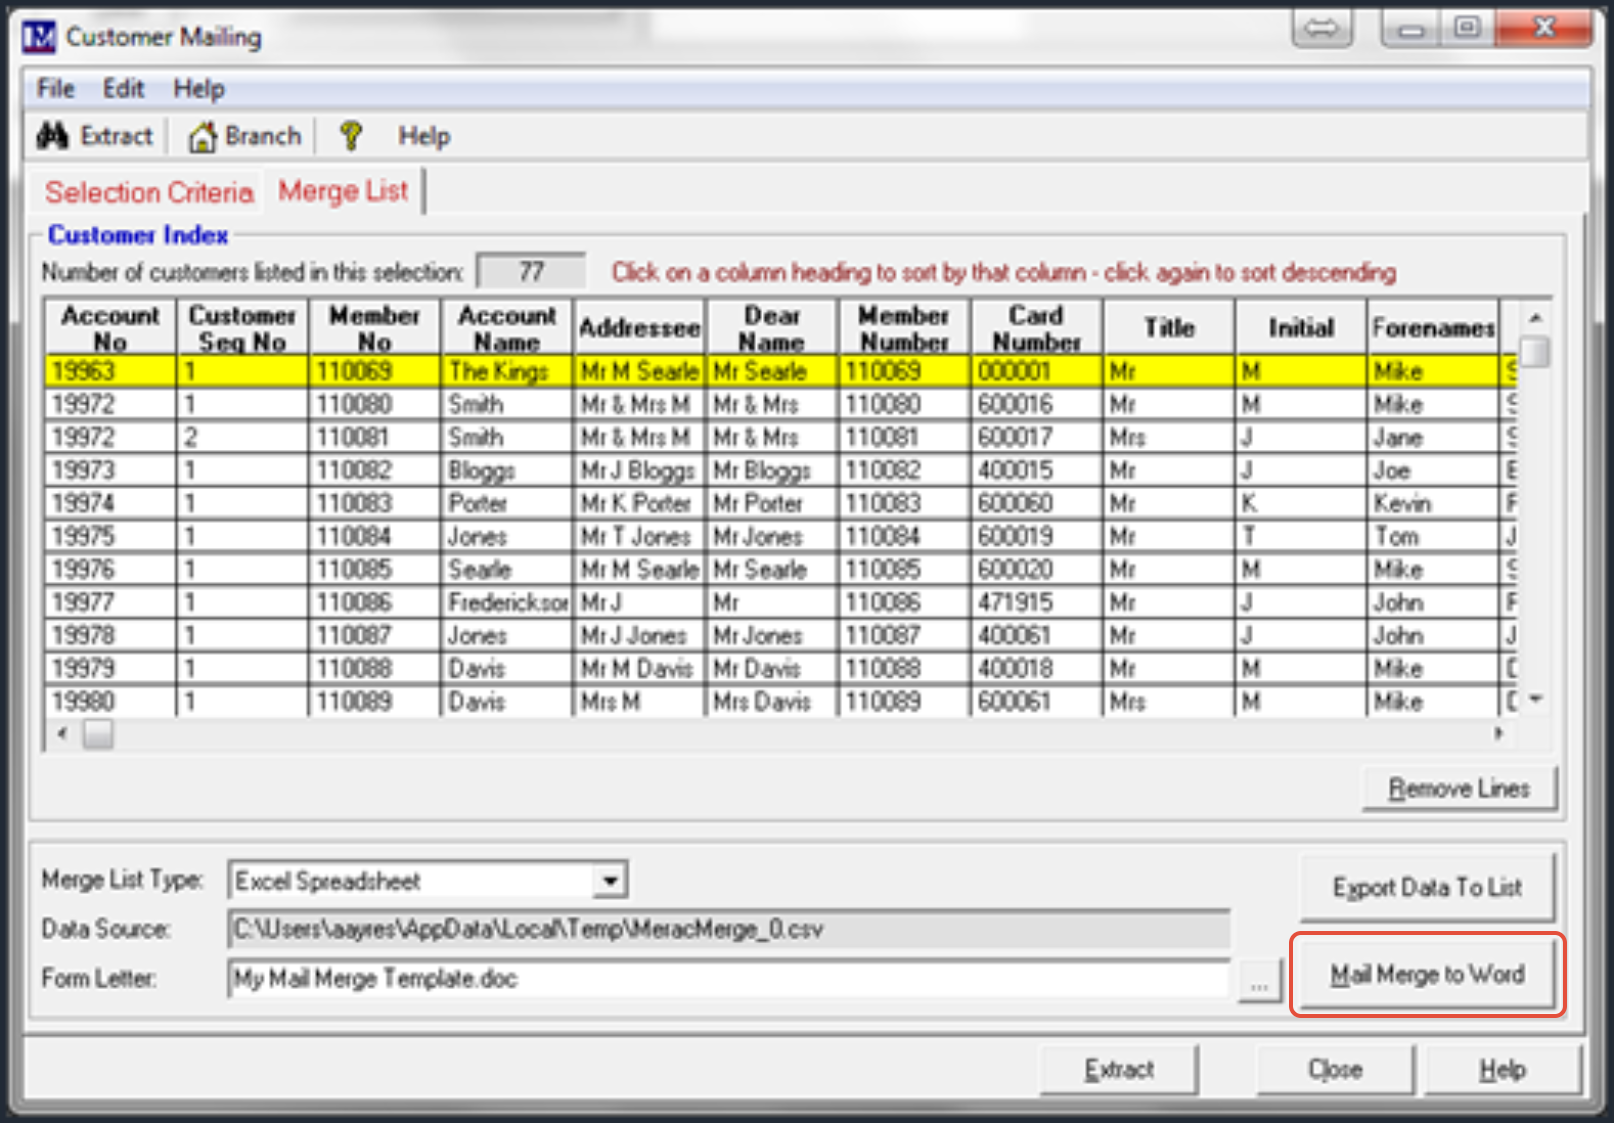
The mail merge will be created automatically.Click the ‘Microsoft Word’ icon on your Windows ‘taskbar’  to view the mail merge results.
As explained previously Merac do not provide support or training on Microsoft Word, but we have included some simple notes below on using the mail merge facilities in Microsoft Word.
If the screens appear different when using mail merges on your version of Word, then please speak to your preferred IT training provider for advice.
Please note that there is an issue with most versions of Microsoft Word when using mail merges whereby the toolbars at the top of the screen will not work unless you first minimise then maximise this window. Please minimise then maximise this window before proceeding.
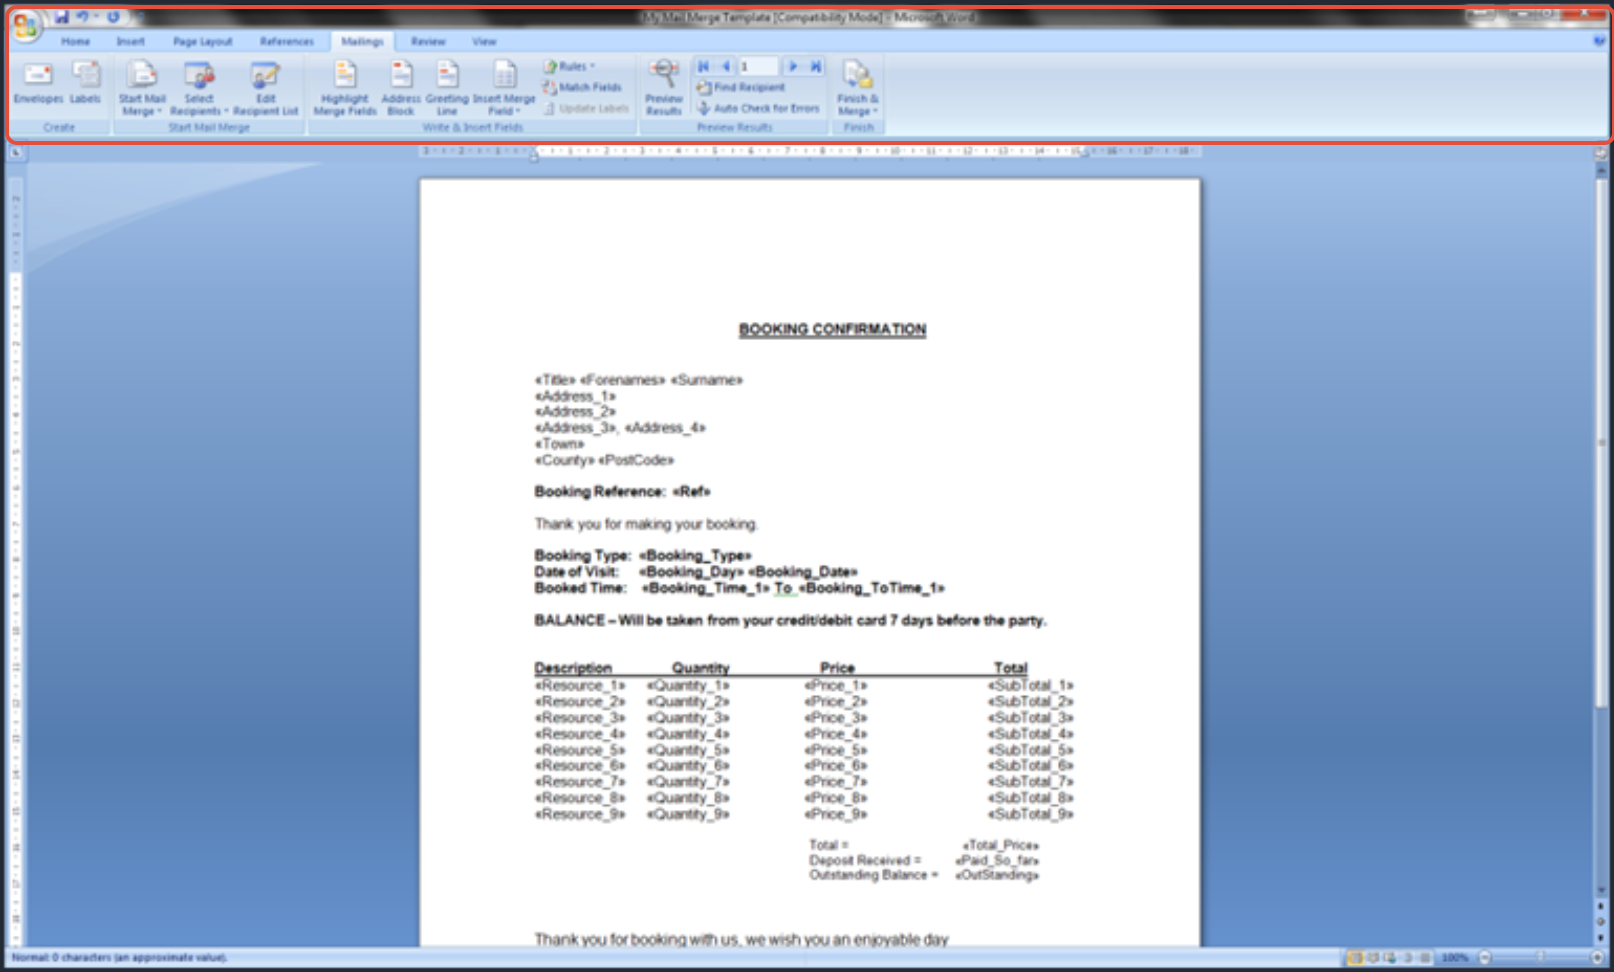
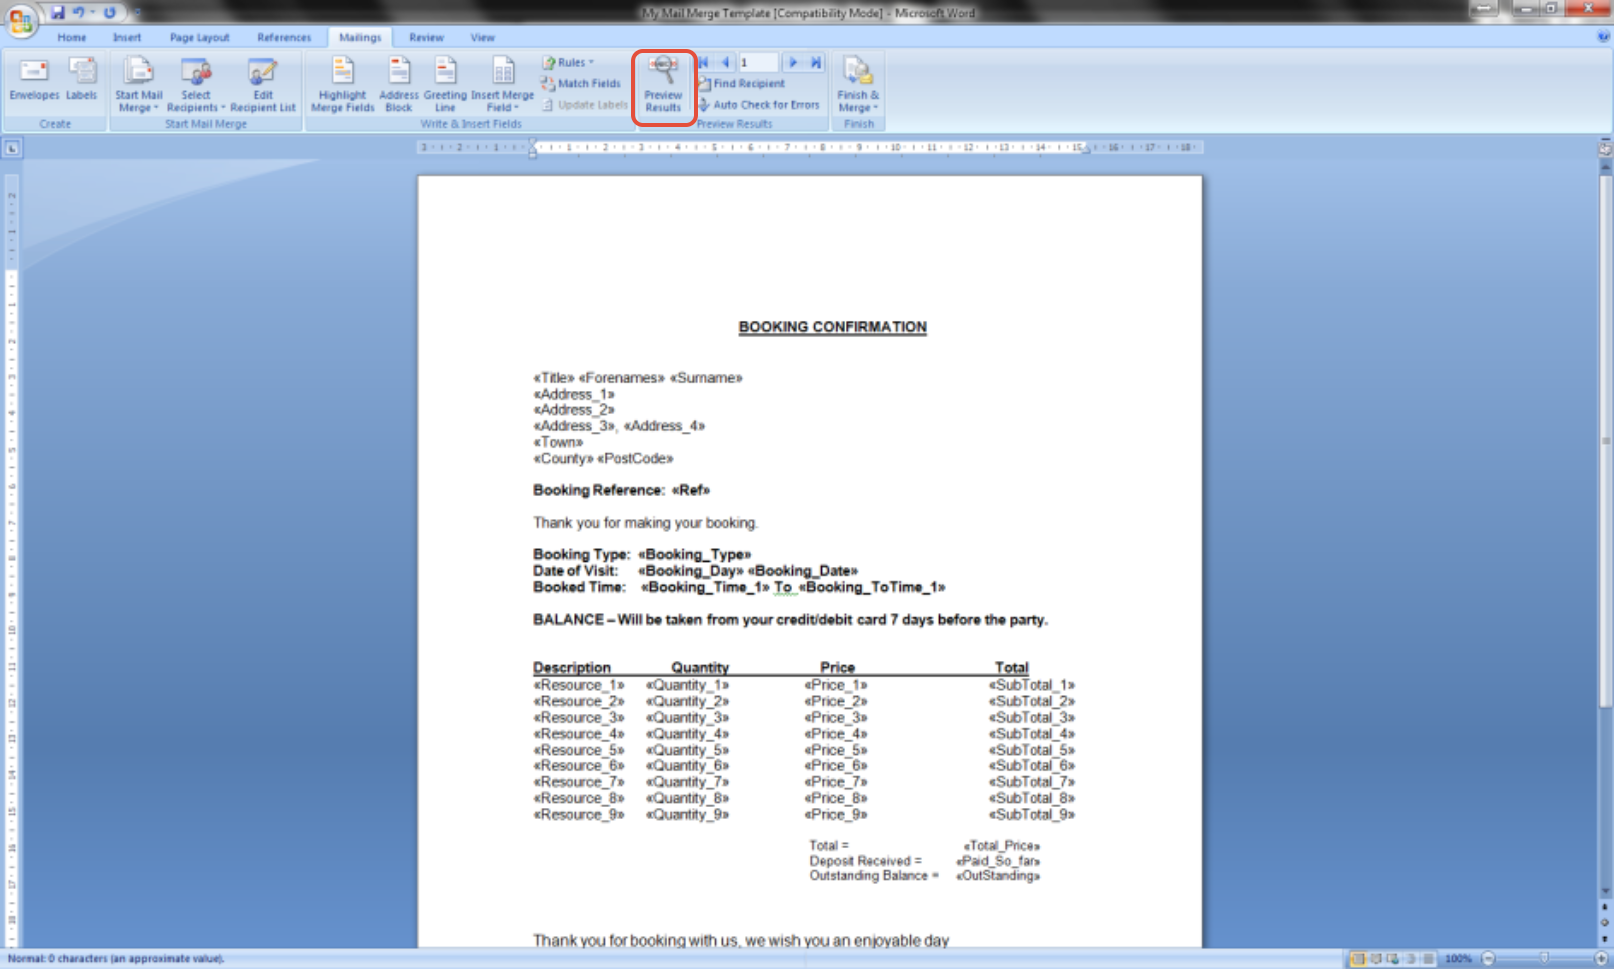
Once you have done this, click on the ‘Preview Results’ icon.
This will show you what the merge results would look like if completed.
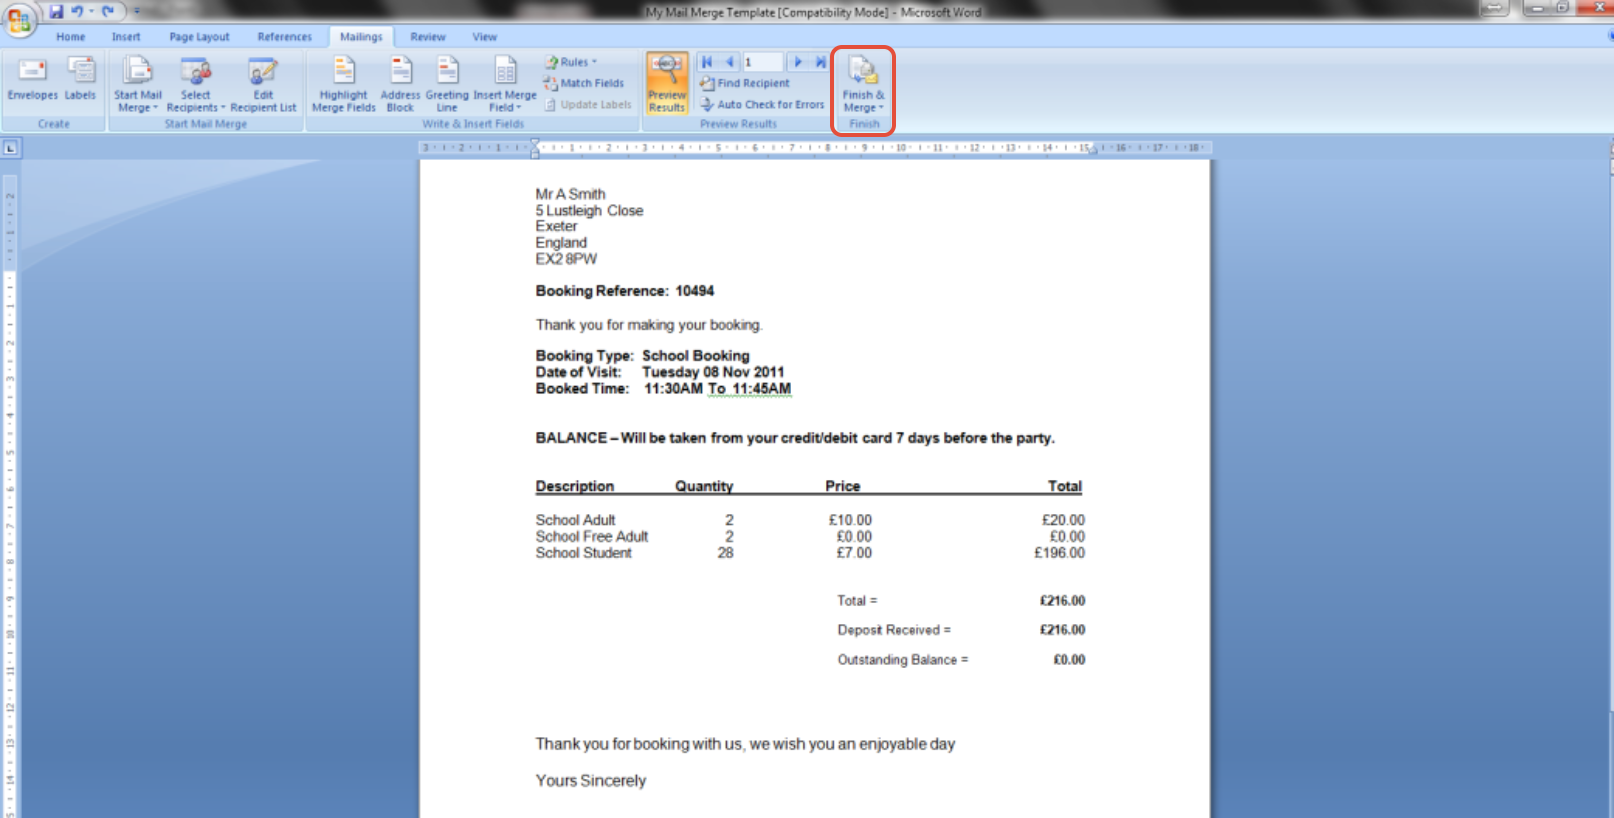
Next click on ‘Finish and Merge’ to proceed with the mail merge.
There are now three options that can be selected as shown here. These are detailed below.
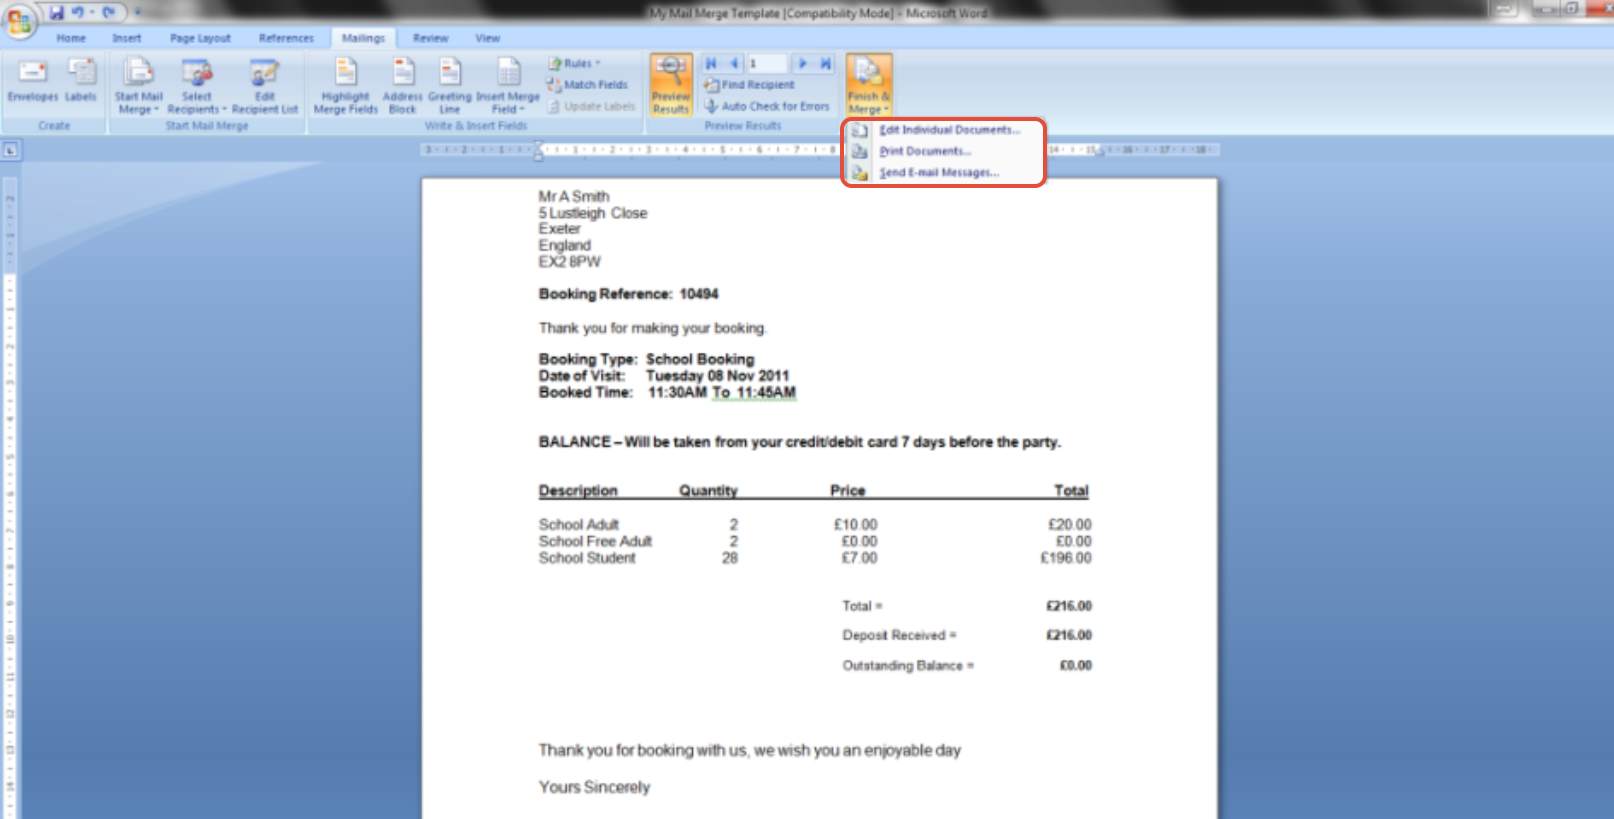
The options available in this dropdown menu are shown below.
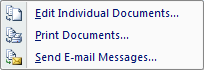
Each of these options is explained on the following pages.
(1) ‘Edit Individual Documents’
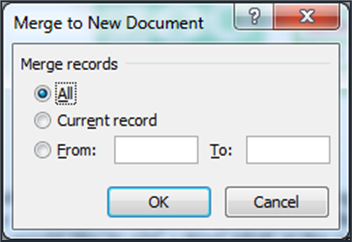
Under the ‘Merge records’ section, select which record(s) you want to include:
Select ‘All’ to edit all records.
There are now three options that can be selected, which are detailed below.
To edit only the record displayed select ‘Current record’.
To edit only certain records, type a range in the text boxes.
Next click on ‘OK’ to merge the required records into a Microsoft Word document.
(2) ‘Print Documents’
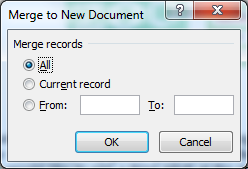
Under the ‘Merge records’ section, select which record(s) you want to include:
Select ‘All’ to print all records.
To print only the record displayed select ‘Current record’.
To print only certain records, type a range in the text boxes.
Now click ‘OK’, which takes you to the printer selection screen.
Now select the required printer.
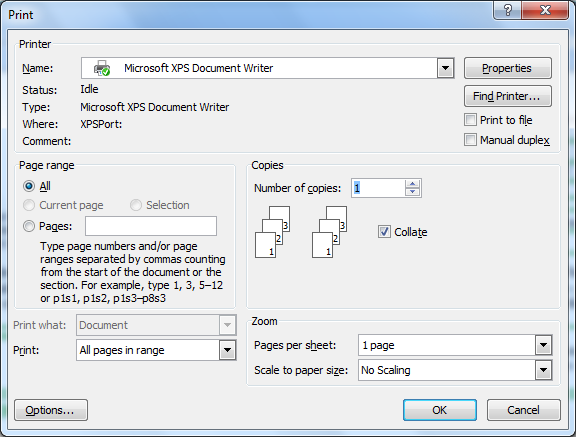
Click ‘OK’ to print all the merged letters.
(3) ‘Send Email Messages’
In the ‘Subject line:’ text box, type a subject.
From the ‘Mail format’ dropdown list, select the desired format for your message.
Under the ‘Send records’ section, select which record(s) you want to include:
Select ‘All’ to send email to all of your records.
To send email for only the record displayed select ‘Current record’.
To send email to only certain records, type a range in the text boxes.
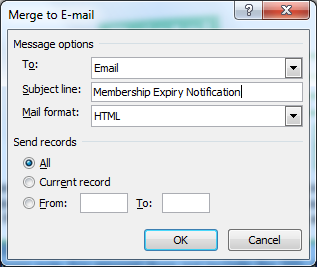
Caution: if you now click on ‘OK’ the email messages will be sent to your recipient(s).