TABLE OF CONTENTS
Introduction
‘Price Breaks’ are a way of setting up price changes to occur on specific dates.
Many of our customers use this functionality for setting up all the new admission ticket prices a month in advance of the start of a new season. Applying ‘Price Breaks’ in this way, will ensure the tills, or the internet prices (for customers who have purchased the ‘Online Bookings’ module) already have, and automatically use the new price from the first day of the new season. Although often used for changes to admission ticket prices, price breaks can equally be used to set up scheduled price changes for PLU’s sold in the retail, or hospitality environments. The process of creating and applying ‘Price Breaks’ is explained in this manual.
Assigning a Price Break to a PLU
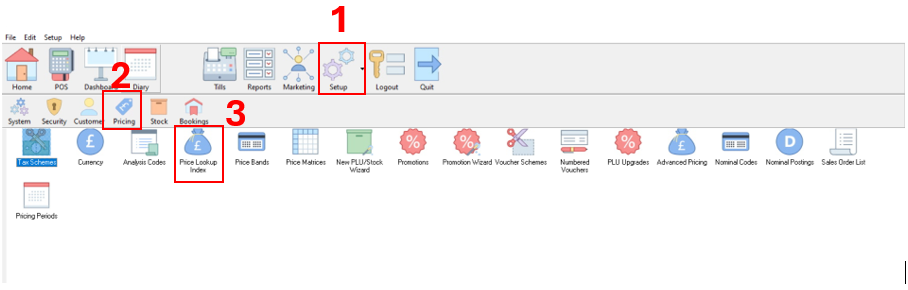
The first step in adding a ‘Price Break’ is to find the PLU.
To do this 1. Click on ‘Setup’, 2. click ‘Pricing’, 3. double click on ‘Price Lookup Index’.
Use any of the search options to find the PLU that requires updating in the usual way.
In this example as the code was known, this was just entered into the ‘Scan/Enter Code:’ field.
The ‘Search’ button was then clicked to bring up the list of PLU’s found (in this case just one PLU).
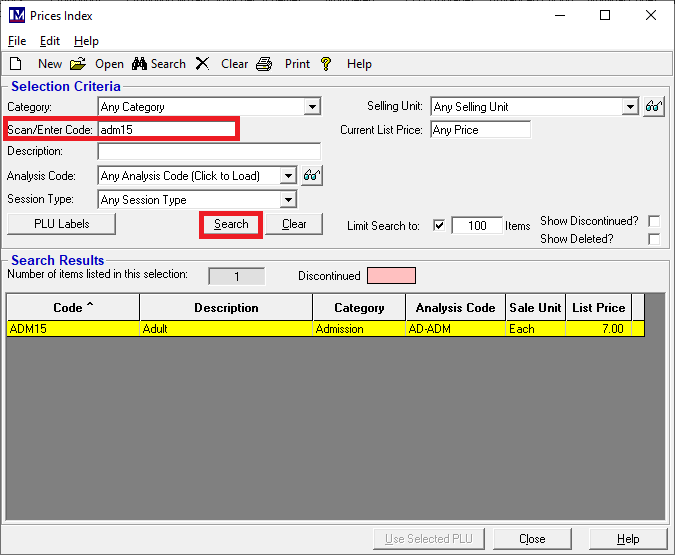
Double click on the PLU record that you want to add a ‘Price Break’ to.
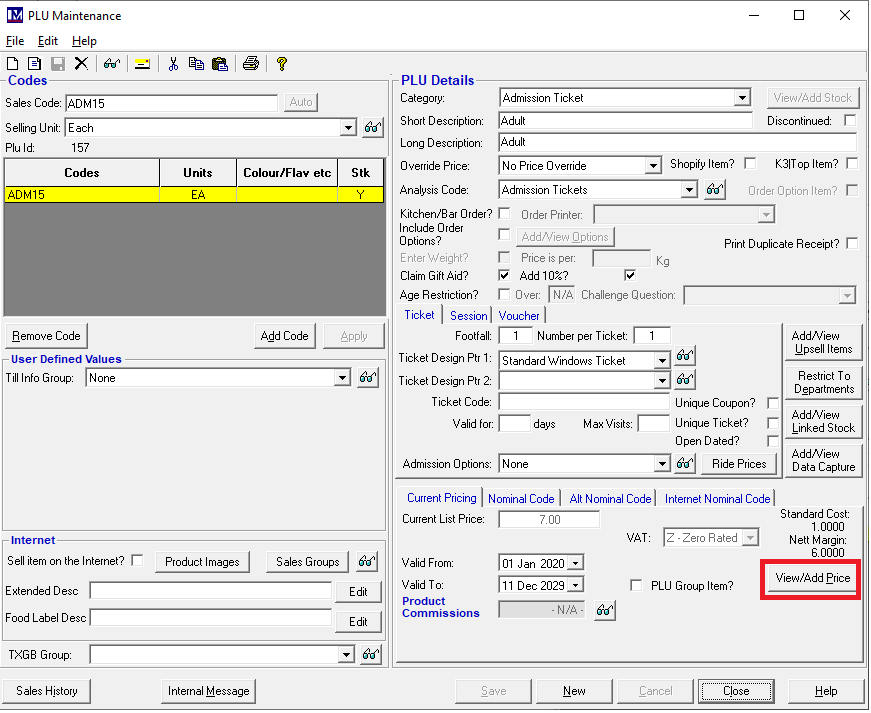
Once in the PLU Maintenance screen, click on the ‘View/Add Price’ button.
Please as this PLU has the gift aid setting to enable the price with (higher) and (lower) without gift aid to be entered.
N.B. the 'Pricing Details' grid does vary depending on whether or not gift aid settings have been applied to the PLU.
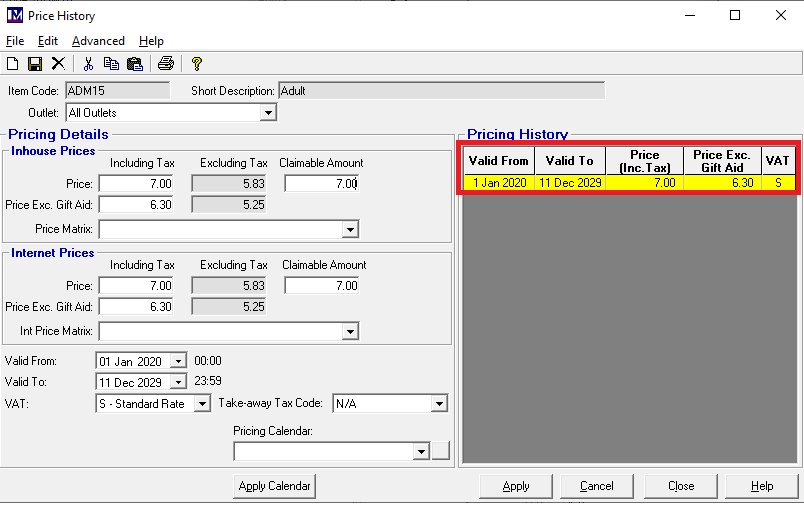
In the ‘Price History’ screen, the current prices and any ‘Price Breaks’ that have already been set up will be shown. In the example below, the current price is set to £7 with gift aid and £6.30 without gift aid. But a there is going to be a price change so we need needs to apply new prices to this PLU for a different date range (a 'Price Break'). The process of creating a new ‘Price Break’ is explained below.
Before changing the price, the date that the current price ends on must be set correctly, as overlapping the end and start dates causes problems and must be avoided! To do this, click on the down arrow next to ‘Valid To’, then the calendar to select an end date for the current price.
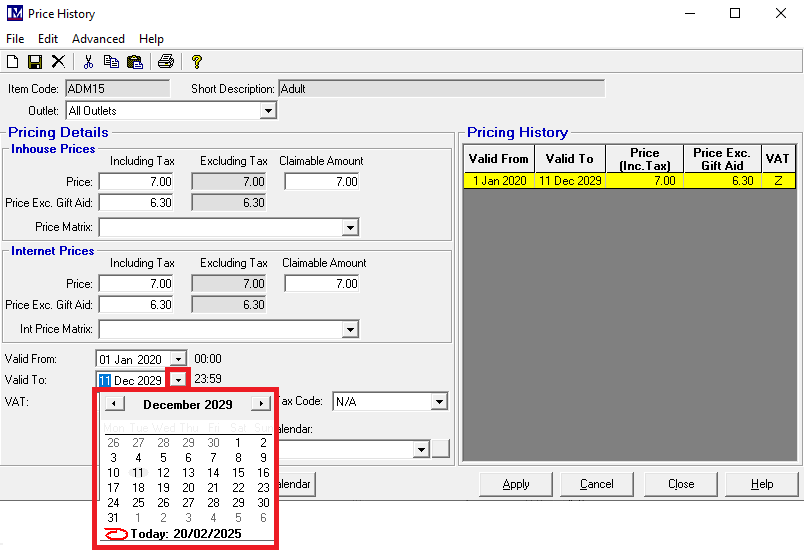
To select a new year click on the year (at the top of the calendar) and use the up/down arrows to select the required year.
Next click on the month and a pop up appears, click the required month.
Finally, click the date on the calendar that the price ends on.
Once the new ‘Valid To’ date has been selected, click on the ‘Apply’ button.
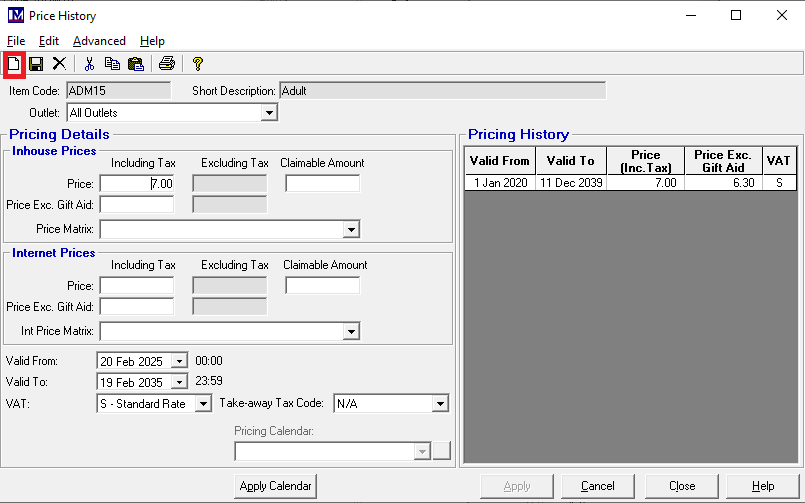
The ‘Valid To’ date in the ‘Pricing History’ window on the right shows as updated.
To enter the new prices click on the ‘New’ Icon (the blank sheet of paper) where shown.
Now enter the new 'Inhouse Prices' and ‘Internet Prices’ as required.
Please as this PLU has the gift aid setting to enable the price with (higher) and (lower) without gift aid to be entered.
N.B. the 'Pricing Details' grid does vary depending on whether or not gift aid settings have been applied to the PLU.
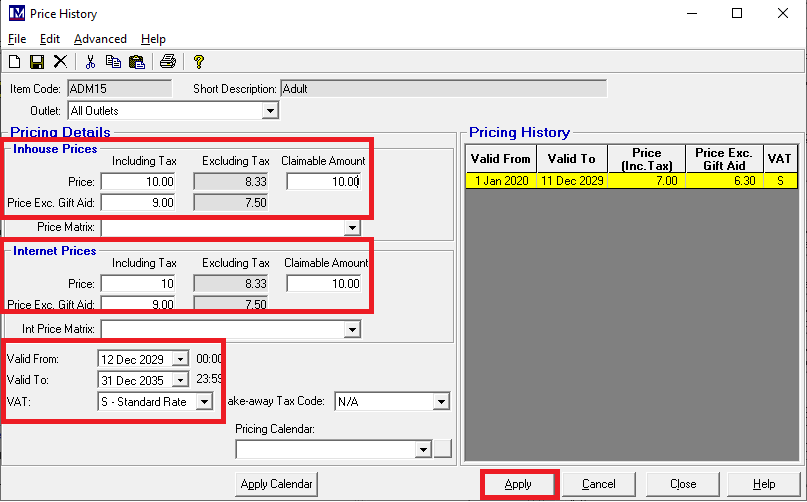
Next set the start and end dates for the new price (ensuring these do not overlap with the previous price).
Do this by clicking on the down arrows next to the ‘Valid From’ date and ‘Valid To’ date and select the new dates required.
When the new price, dates and VAT rate have been set as required, click on ‘Apply’.
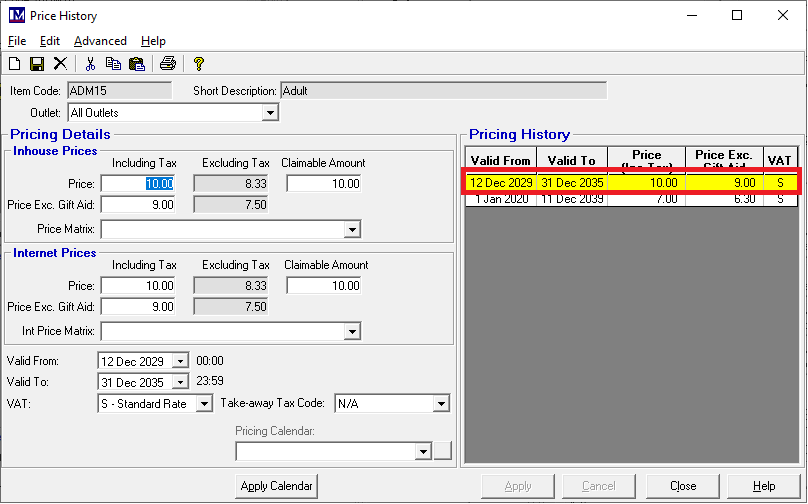
A new line appears in the ‘Pricing History’ window with the new details.
To exit this screen, click ‘Close’.
At the next screen (the ‘PLU Maintenance’ window), click ‘Close’.
At the next screen (the ‘Prices Index’ window), click ‘Close’.
Updating In-House Prices
The process of updating the “in-house” prices is by carrying out the ‘Recreate Till Data’ process.
This is done in the usual way, which is: Click on 1. ‘Edit’ then 2. ‘Recreate Till Data’
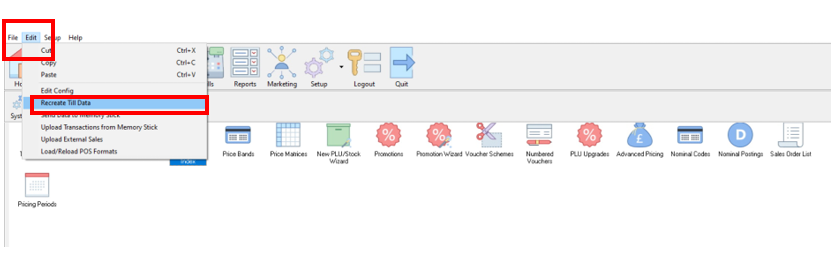
At this point we usually recommend sending to all tills, by clicking ‘Apply’.
At the “Till data recreated successful!” message, click ‘Ok’.
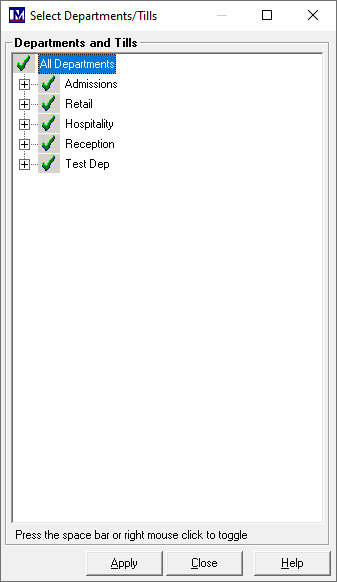
You can expand the ‘Departments and Tills’ tree in the usual way (by clicking the ‘+’ symbol).
Then you could select / deselect tills as required, by right clicking them before clicking ‘Apply’.
However, we do not usually recommend this, as this could lead to different tills having different prices.
Updating Internet Prices
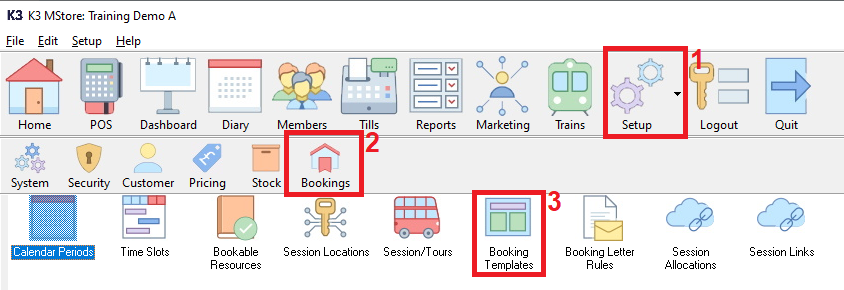
To update the 'Internet Prices' entered so the relevant Merac e-commerce pages (for those customers who have purchased these modules) then first you need to access the Merac Online Admin Page. To access this page in the Merac software:
1. click on ‘Setup’, 2. then click ‘Bookings’ and then 3. double click ‘Booking Templates’.
Next click on the 'Website Login' button.
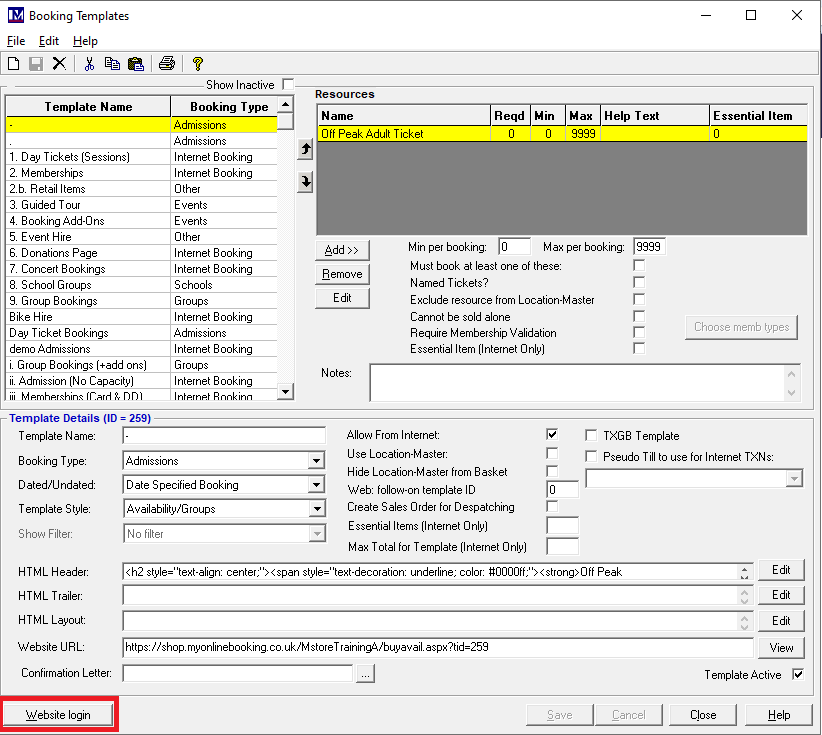
This will now open your default internet browser to access your specific admin menu page URL. You will need to ensure your computer has a working internet connection and your preferred web browser software is installed. Your ‘Windows User Account’ must not have any restrictions that would prevent internet access or browsing. Your own IT department or external IT support team will need to assist if you have any issues accessing the internet, as Merac are not responsible for supporting or enabling access to the internet.
If there are no internal IT restrictions, you should see the your online ‘Admin Menu’ login page.
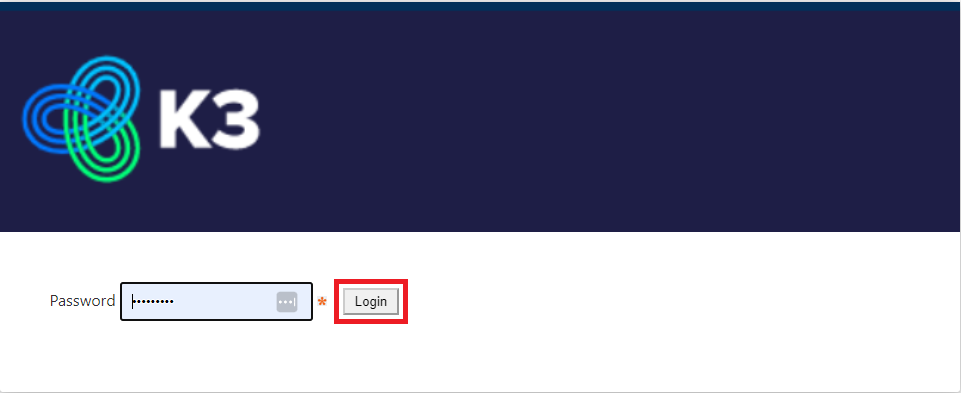
Enter the password you have been supplied in the relevant box and click the 'Login' button.
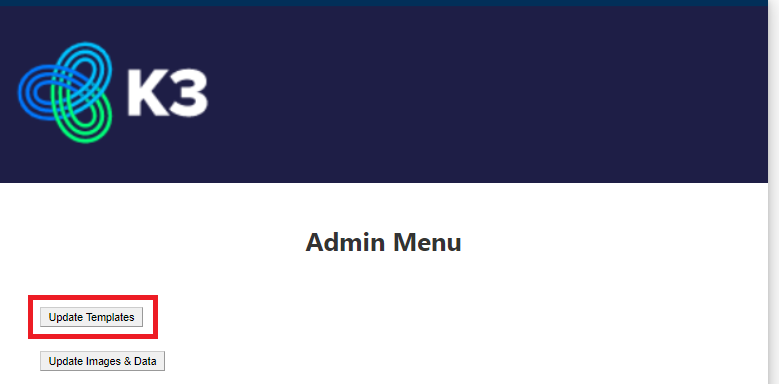
Next click the 'Update Templates' button and wait for the update to complete.
Your web page updates have been sent (please note these updates can take up to 5 minutes to reach your web pages)
You can now log off the 'Admin Page' by clicking the 'Logout' button at the bottom of the screen.
