TABLE OF CONTENTS
- Introduction
- Create the “Finished Product” Stock Item
- Opening the Recipe Maintenance Screen
- Recipe Maintenance Screen Content
- Creating a Recipe
- Making the Recipe
Introduction
This manual explains the ‘Recipe Maintenance’ functionality in the ‘Merac’ back office software.
This document is aimed at customers that wish to use ‘Recipe Maintenance’ to convert combinations of “ingredient” stock items (that are defined in a ‘Recipe’) into a “finished” product stock item.
An example of this would be where a ‘Chocolate Cake’ (the “finished product” stock item) is created from its raw “ingredient” stock items, e.g. flour, eggs, sugar, butter, cocoa powder (etc) 'stock items'.
On making a quantity of a recipe ‘Merac’ will deduct from the relevant “ingredient” stock items and add to the stock of the relevant “finished product” stock item at the selected stock location.
Create the “Finished Product” Stock Item
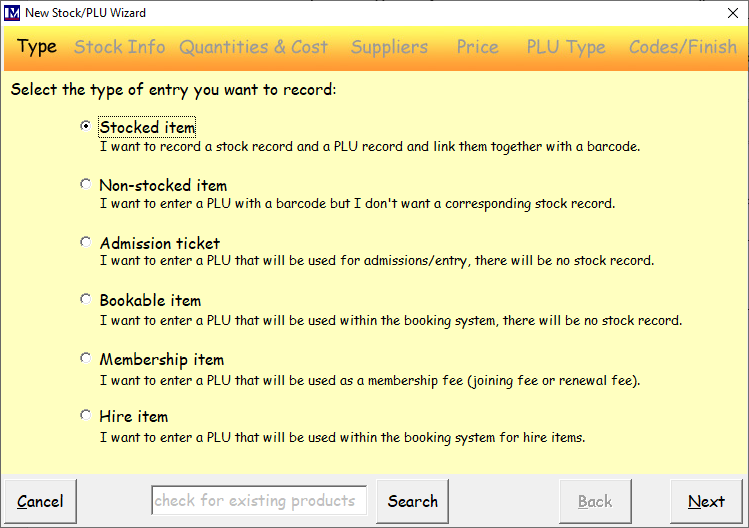
The easiest way to set up the “finished product” stock item is by using the ‘New Stock Wizard’.
This can be located by clicking 1. Setup then 2. clicking Stock then 3. double clicking New Stock Wizard.

Select the ‘Stocked Item’ option.
Enter the information as required in this screen as usual (a separate guide covers stock item creation).
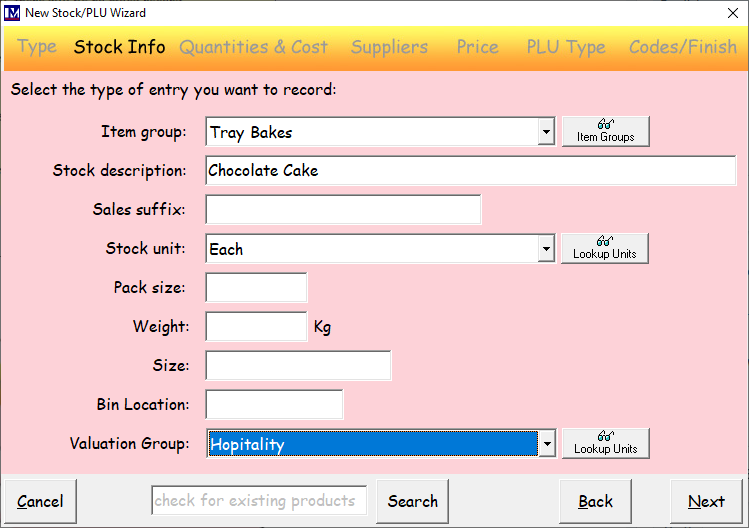
The bare minimum information required in this screen is to:
- Select the ‘Item Group’ from the drop-down (e.g. ‘Tray Bakes’)
- Enter the required ‘Stock Description’ (e.g. ‘Chocolate Cake’)
N.B. although the ‘Valuation Group’ is not mandatory, it may be beneficial to select the required 'Valuation Group'. This is an additional (user definable) stock reporting grouping structure that can be used in stock reports with the 'Valuation Group' filter option. Please note the 'Valuation Groups' can be created as required in Setup >System > Lookup Items.
As stock items in question are usually batch cooked in-house, these are not usually ordered from a specific supplier. This means that the ‘Re-order level:’, ‘Re-order qty:’ and ‘Maximum qty:’ would not normally be required in this scenario. If so, these fields can be left blank or enter the information as required by typing the required number. Please see the descriptions to the right of each of the above fields for information as to what each of the fields is used for. These fields relate specifically relating to automatic 'Purchase Order' generation functionality (and related reports) that is covered in a separate guide.
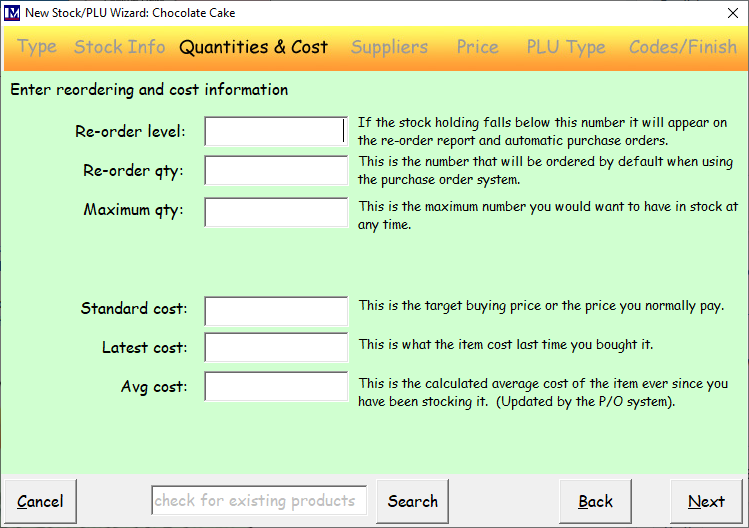
The ‘Standard cost:’, ‘Latest cost:’ and ‘Avg cost:' (average cost) do not need to be entered at this point.
The cost will be updated once this stock item is linked to a recipe, which is explained in the following sections.
'Main Supplier’ is not mandatory as this item is not supplied it is cooked in house, but you may want to create an internal supplier(s) for such 'Recipe' stock items, e.g. "Catering Department" and select this. This will be helpful in the future for filtering data when searching for products and will also be useful for running reports that have a ‘Supplier’ selection in the report parameters (filters). So, it is recommended that you create an internal supplier(s). Please note that can be done by clicking the 'Suppliers' button and creating a 'Supplier' in the usual way then selecting it, however if deemed as not required then this can be left blank as it is not mandatory for the reason given above. 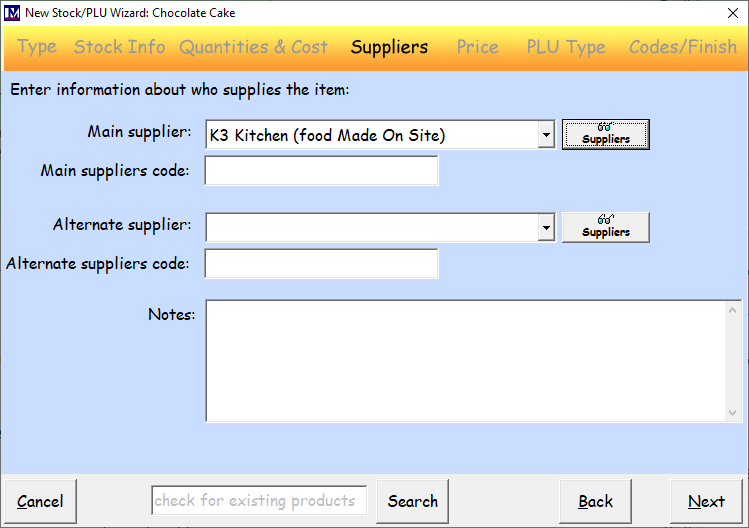
Option 1: If this “finished product” stock item will be sold at the till (if not see Option 2)
Ensure this box is ticked and fill in all the required data in the below screen as usual.
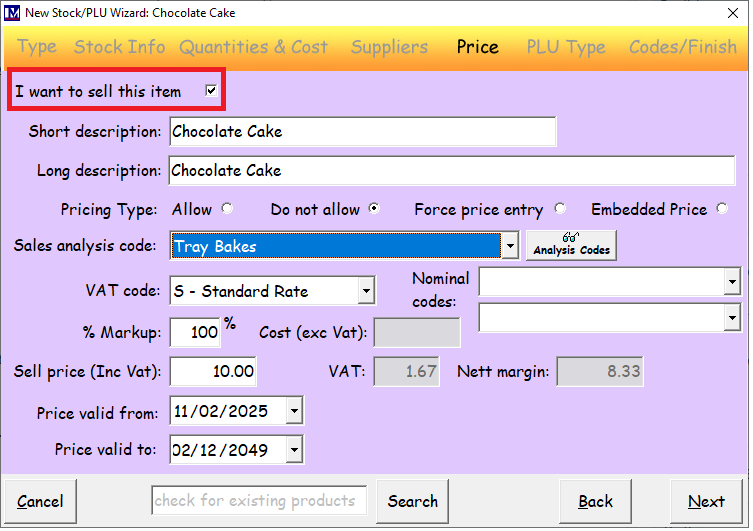
If there are any printing / order requirements, tick the ‘This is a food Item’ box and select the required option(s).
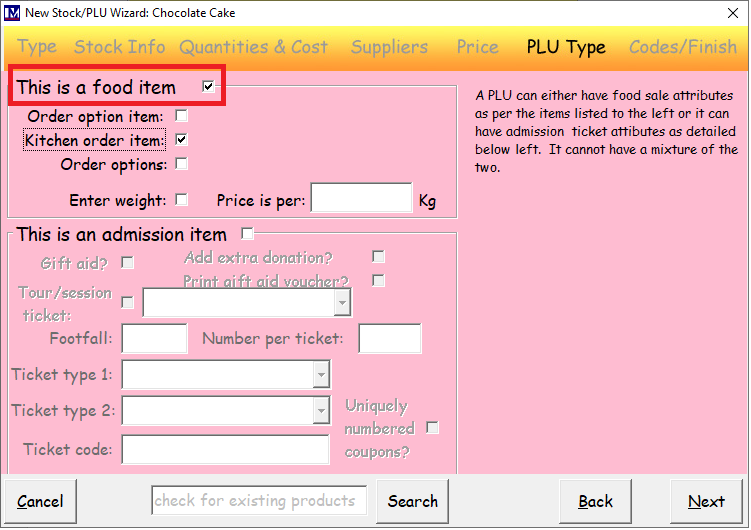
These options are covered in full in a separate document, however the basic one to consider is whether when buying the item at the till then does this sale need to be also sent through to your kitchen printer(s), if so the 'Kitchen order item:' box will need to be clicked, so it becomes ticked. If will also need to edit the PLU once it has been created and select the specific Kitchen Printer(s) that this PLU will send to when sold at the till. Full details of setting up PLUs that willbe sent to kitchen printers is covered in a separate guide.
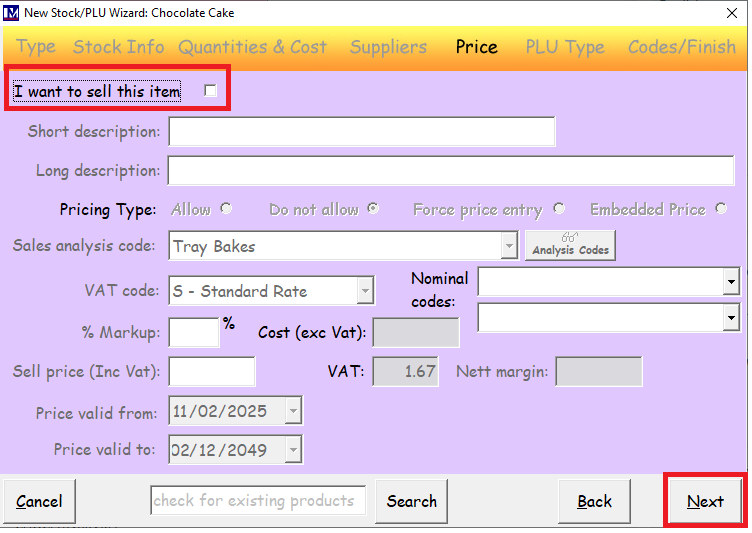
Option 2: If this “finished product” stock item will not be sold at the till.
Ensure this box is unticked and simply click ‘Next’ (i.e. do not enter any other data in this screen).
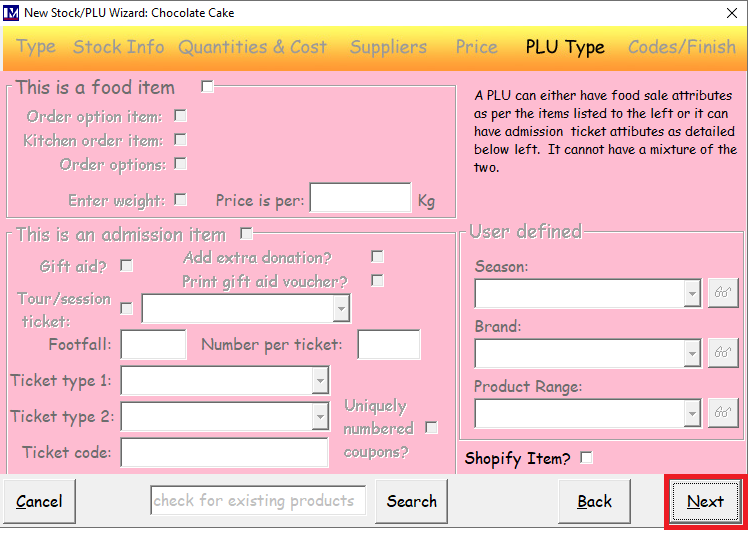
At the following screen simply click ‘Next’ (i.e. do not enter any other data in this screen).
At the following screen enter a ‘Code’ for this “finished product” stock item (e.g. CHOCTRAYBAKE).
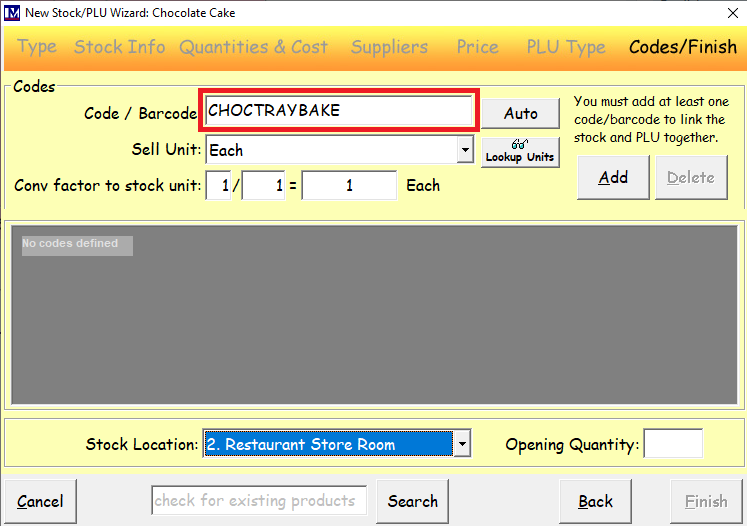
Next click the ‘Add’ button.
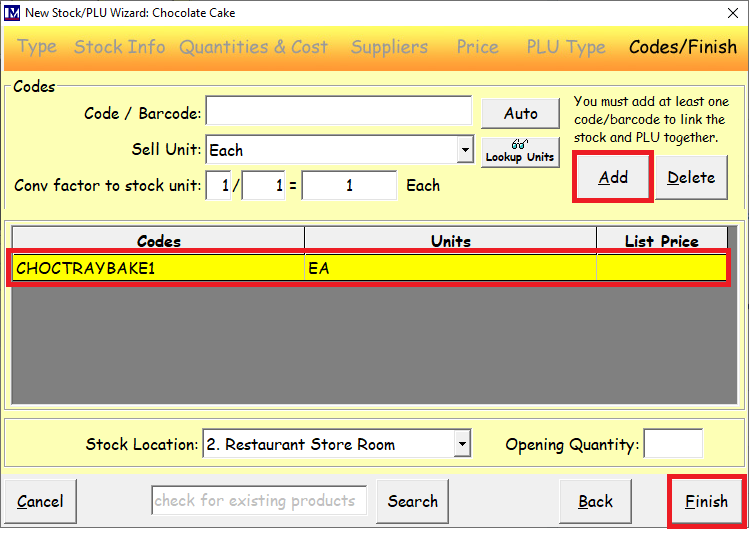
The stock code will now appear highlighted in yellow where shown.
Next, click the ‘Finish’ button.
You have added this stock item and you will now see the message below.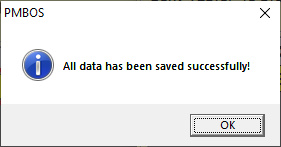
Click ‘Ok’.
You will now be at the below screen and you can repeat the steps to add a new 'Stocked Item' if required.
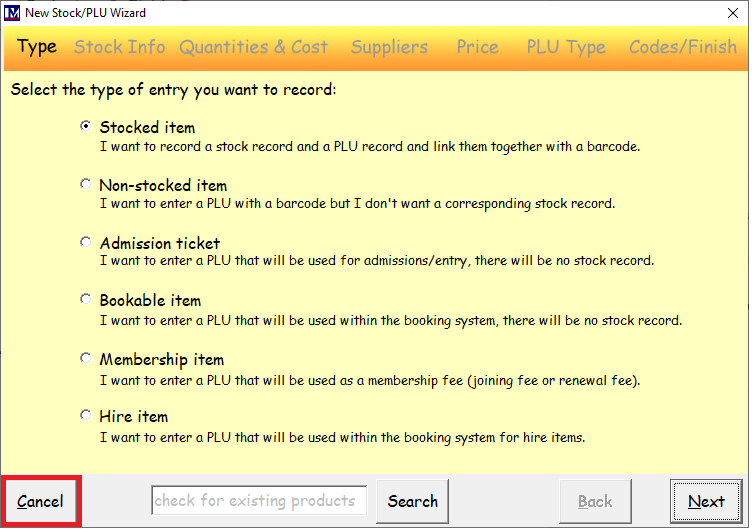
In this example we will now exit this screen by clicking the 'Cancel' button.
The “finished product” stock item that you have just created now needs to be linked to a ‘Recipe’.
This process is detailed in the following sections.
Opening the Recipe Maintenance Screen
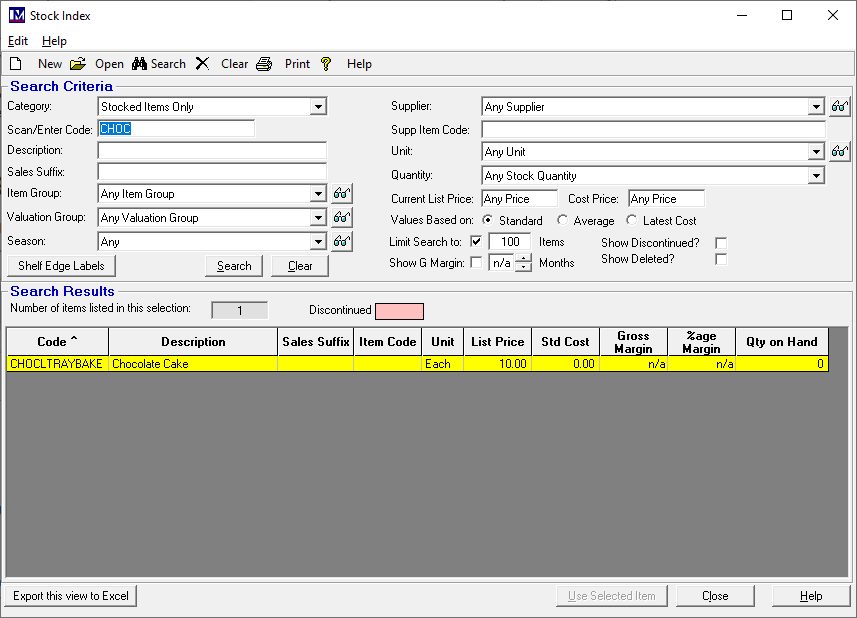
First open the ‘Stock Index’ screen by 1. clicking on 'Setup' then 2. click on 'Stock' then 3. double click on 'Stock Index'.

Use the following screen to search for the required stock item in the usual way, and double click the record to open it.
You are now in the ‘Stock Maintenance’ screen of the “finished product” stock item.
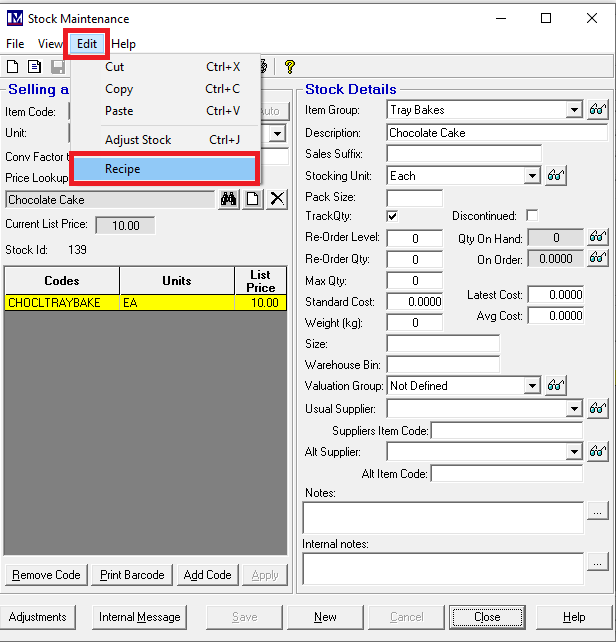
Next click on ‘Edit’, then click on the ‘Recipe’ button.
Recipe Maintenance Screen Content
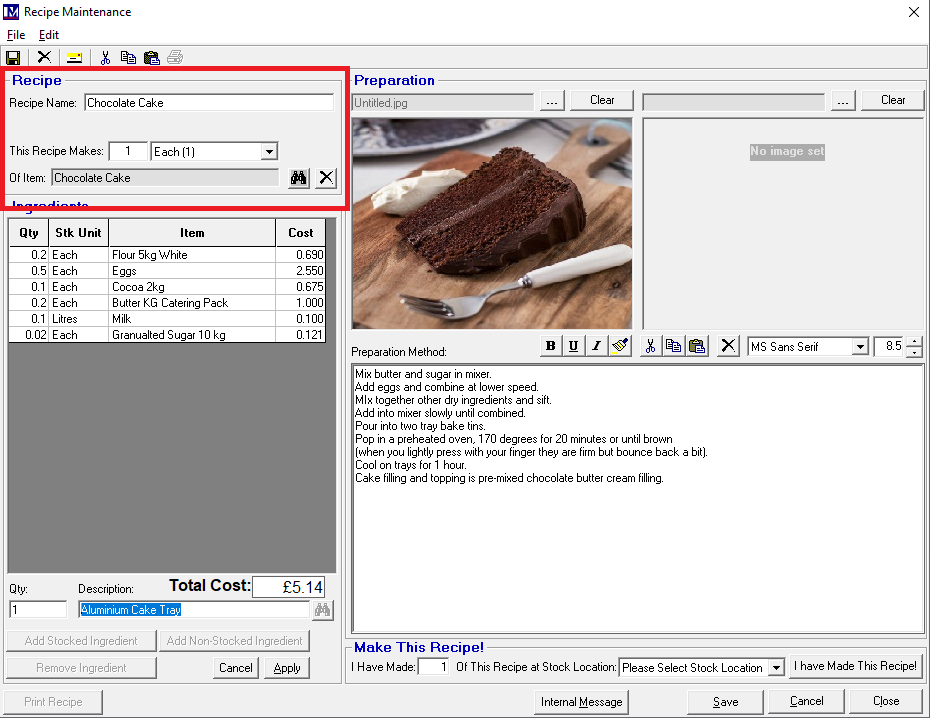
The ‘Recipe Maintenance’ screen will now be showing.

An overview of each of the sections of the above screen is given below.
Then the criteria referred to in the below overviews are explained in detail later in this guide.
Recipe Section - Overview
In the ‘Recipe’ section the following information is defined:
- The name of the recipe
- The stock item that will be produced on making this recipe
- Quantity of the above stock item that will be produced when a batch of this recipe is made.
Ingredients Section - Overview
In the ‘Ingredients’ section the following information is defined:
- Stocked items and quantities deducted from stock when this recipe is made.
- Non-stocked items and quantities consumed (these is for information only in a recipe).
Preparation Section - Overview
In the ‘Preparation’ section the following information is defined:
- Up to two photos can be assigned to the recipe.
- The written preparation method for the recipe can be entered.
Make This Recipe! Section - Overview
- In the ‘Make This Recipe!’ section the following information is defined:
- Quantity of the recipe “finished product” stock item that will be produced.
- The ‘Stock Location’ to remove ingredients from and add the “finished product” stock item to.
Creating a Recipe
Please note before creating a ‘Recipe’ you must have first added all the relevant “ingredient” stock items.
(i.e. stock items for all the ingredients of this recipe, e.g. eggs, butter cocoa, flour, sugar etc).
This is outside the scope this document as this is covered in a separate guide.
You must also create a stock item that will be the end product (e.g. a ‘Chocolate Cake’ stock item). This part was covered earlier and so we need to be in 'Recipe Maintenance' screen (below) of the stock item product you created.
 The data entry requirements of each section of this screen are now detailed below.
Recipe Section
Recipe Name:
This is pre-populated with the “finished product” stock item’s description.
If required, this can be changed by typing the relevant description in this field.
This Recipe Makes:
These two fields are used to indicate the quantity of stock that this recipe will make.
- Enter the required value in the quantity field.
- Select the required ‘Stock Unit’ from the drop-down.
Of Item:
This is the “finished product” stock item that you set up, that will be created when the recipe is made.
(N.B. the correct code should be populated here automatically and will the that of the 'Recipe' stock item you created)
Ingredients Section
This section is where stocked and non stocked ingredients can be added to a 'Recipe' and where it can be printed out from.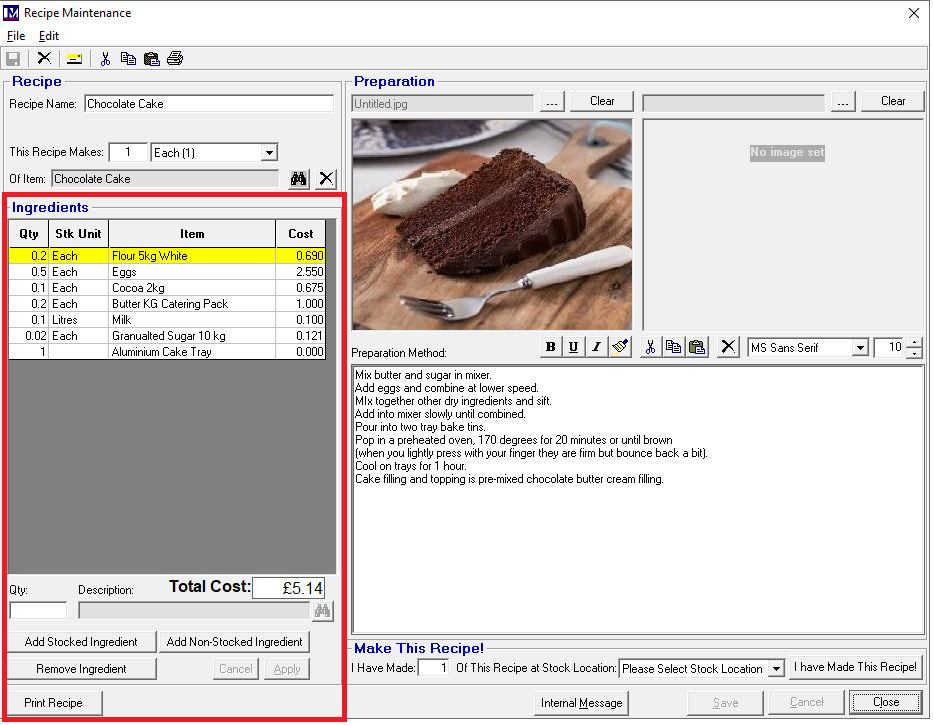
Adding Stocked Items into a Recipe
- Click on ‘Add Stocked Ingredient’ button.
- Click the
 ‘Search’ button (to the right of the ‘Description’ box) to open the ‘Stock Index’ screen.
 - Search for the item in the usual way and click on the required “ingredient” stock item (so it is highlighted yellow).
- Next, click ‘Use Selected Item’ button.
- Enter the required number in the ‘Qty:’ box.
(N.B. this can be a whole number, or a proportion of the ingredient’s stocking unit, e.g. 0.5)
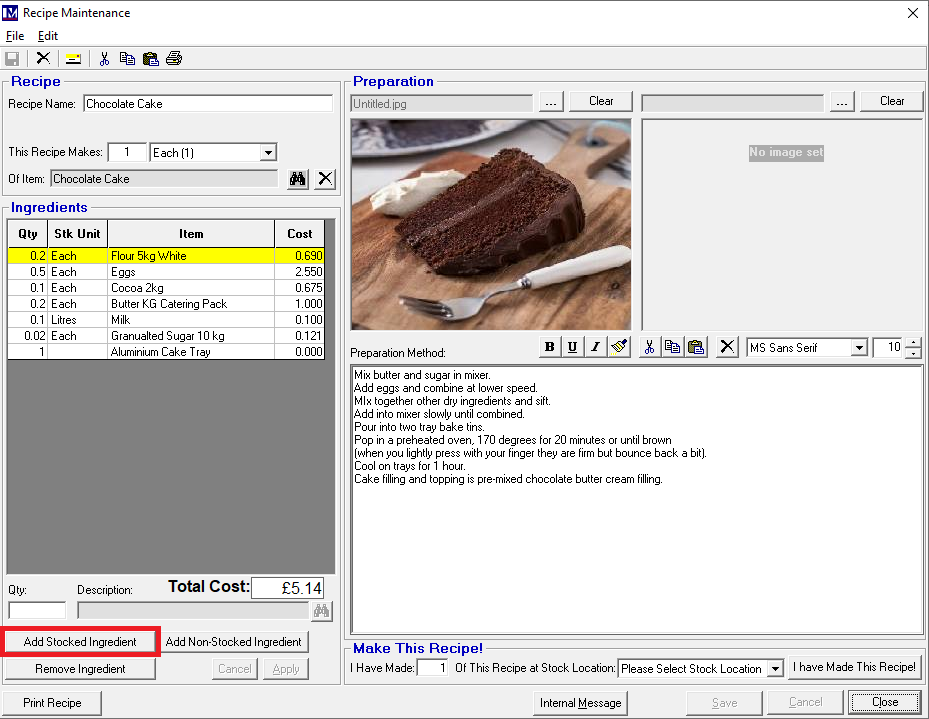
- Click ‘Apply’.
Repeat the above process steps to add all the other “ingredient” stock items into the recipe.
Adding Non-stocked Items into a Recipe
Non stocked ingredients option really just allows you to enter a quantity and a text description line into a recipe for ingredients that are not in the ‘Merac’ software. These are really to add information into the recipe that are for reference only, but are not 'stock items' in Merac.
To do this click on ‘Add Non-stocked Ingredient’.
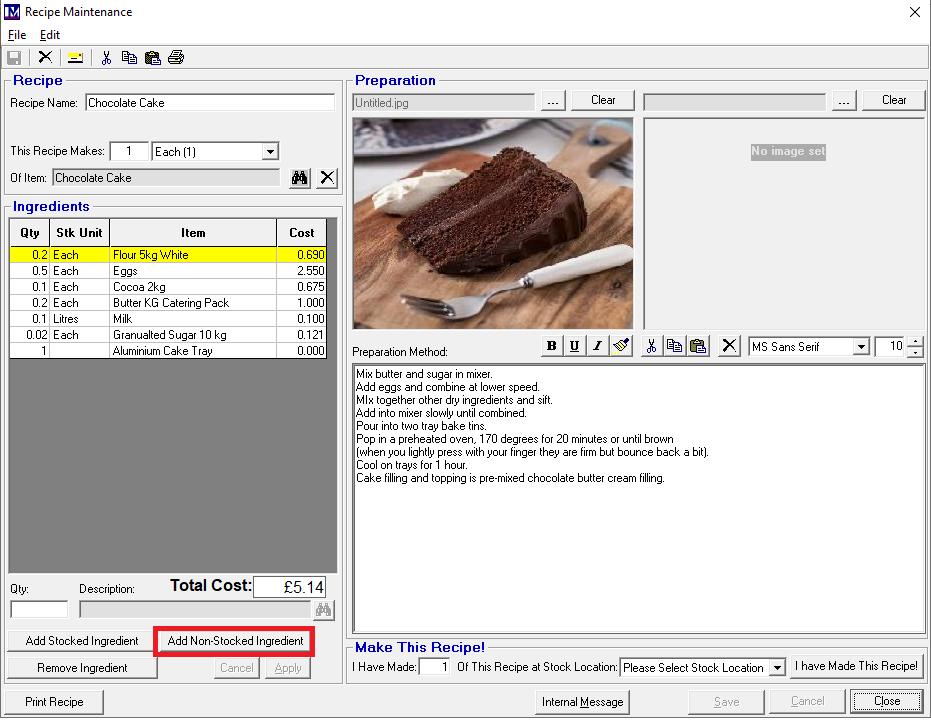
Enter the required number in the ‘Qty:’ box.
Enter the ingredient ‘Description’ as required.
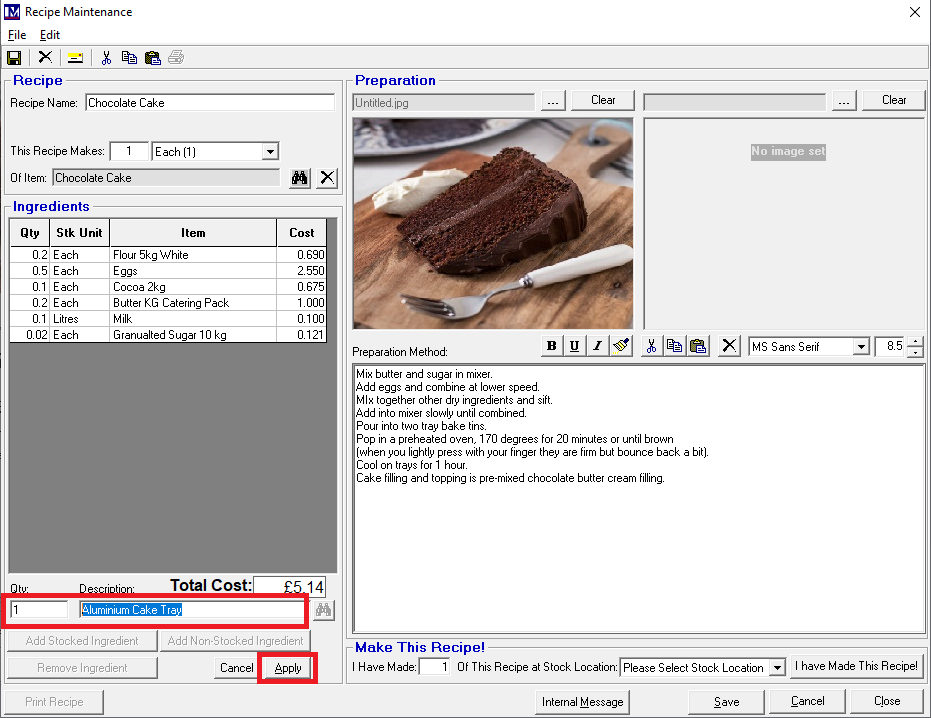
Click ‘Apply’.
Repeat the above process steps to add a line for any other ‘Non-stocked Ingredient’(s) into the recipe.
Printing a Recipe
To print out this recipe, click the 'Print Recipe' button.
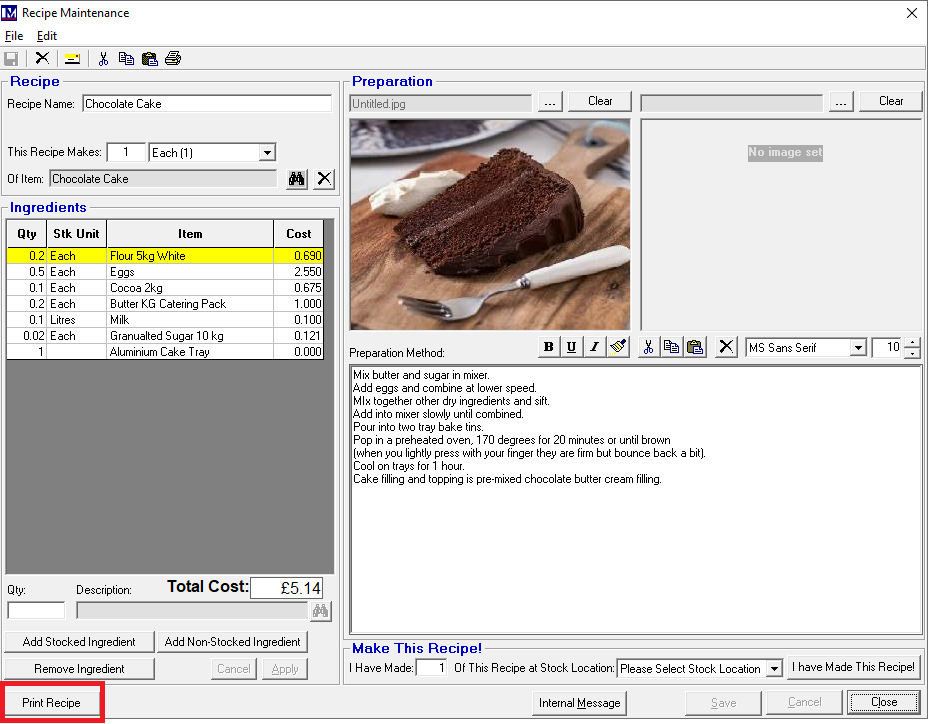
Select the required printer and number of copies as required and click the 'Print' button to print hard copies on the printer.
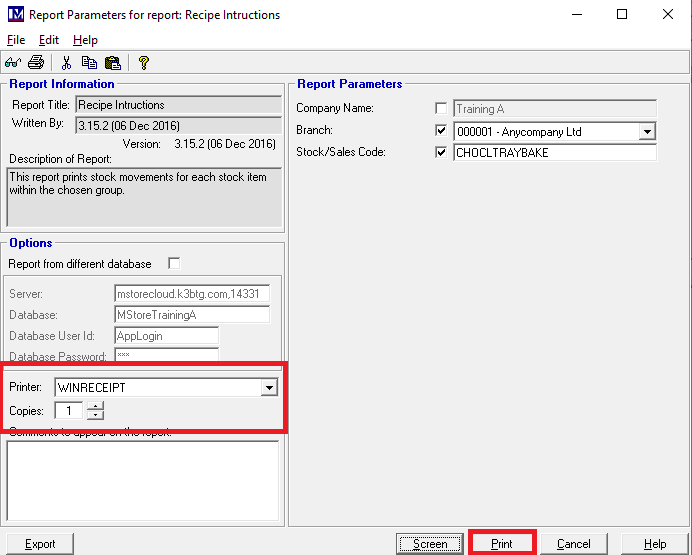
Alternatively, click the 'Screen' button if you want to view this report before printing to see the report (sample below).
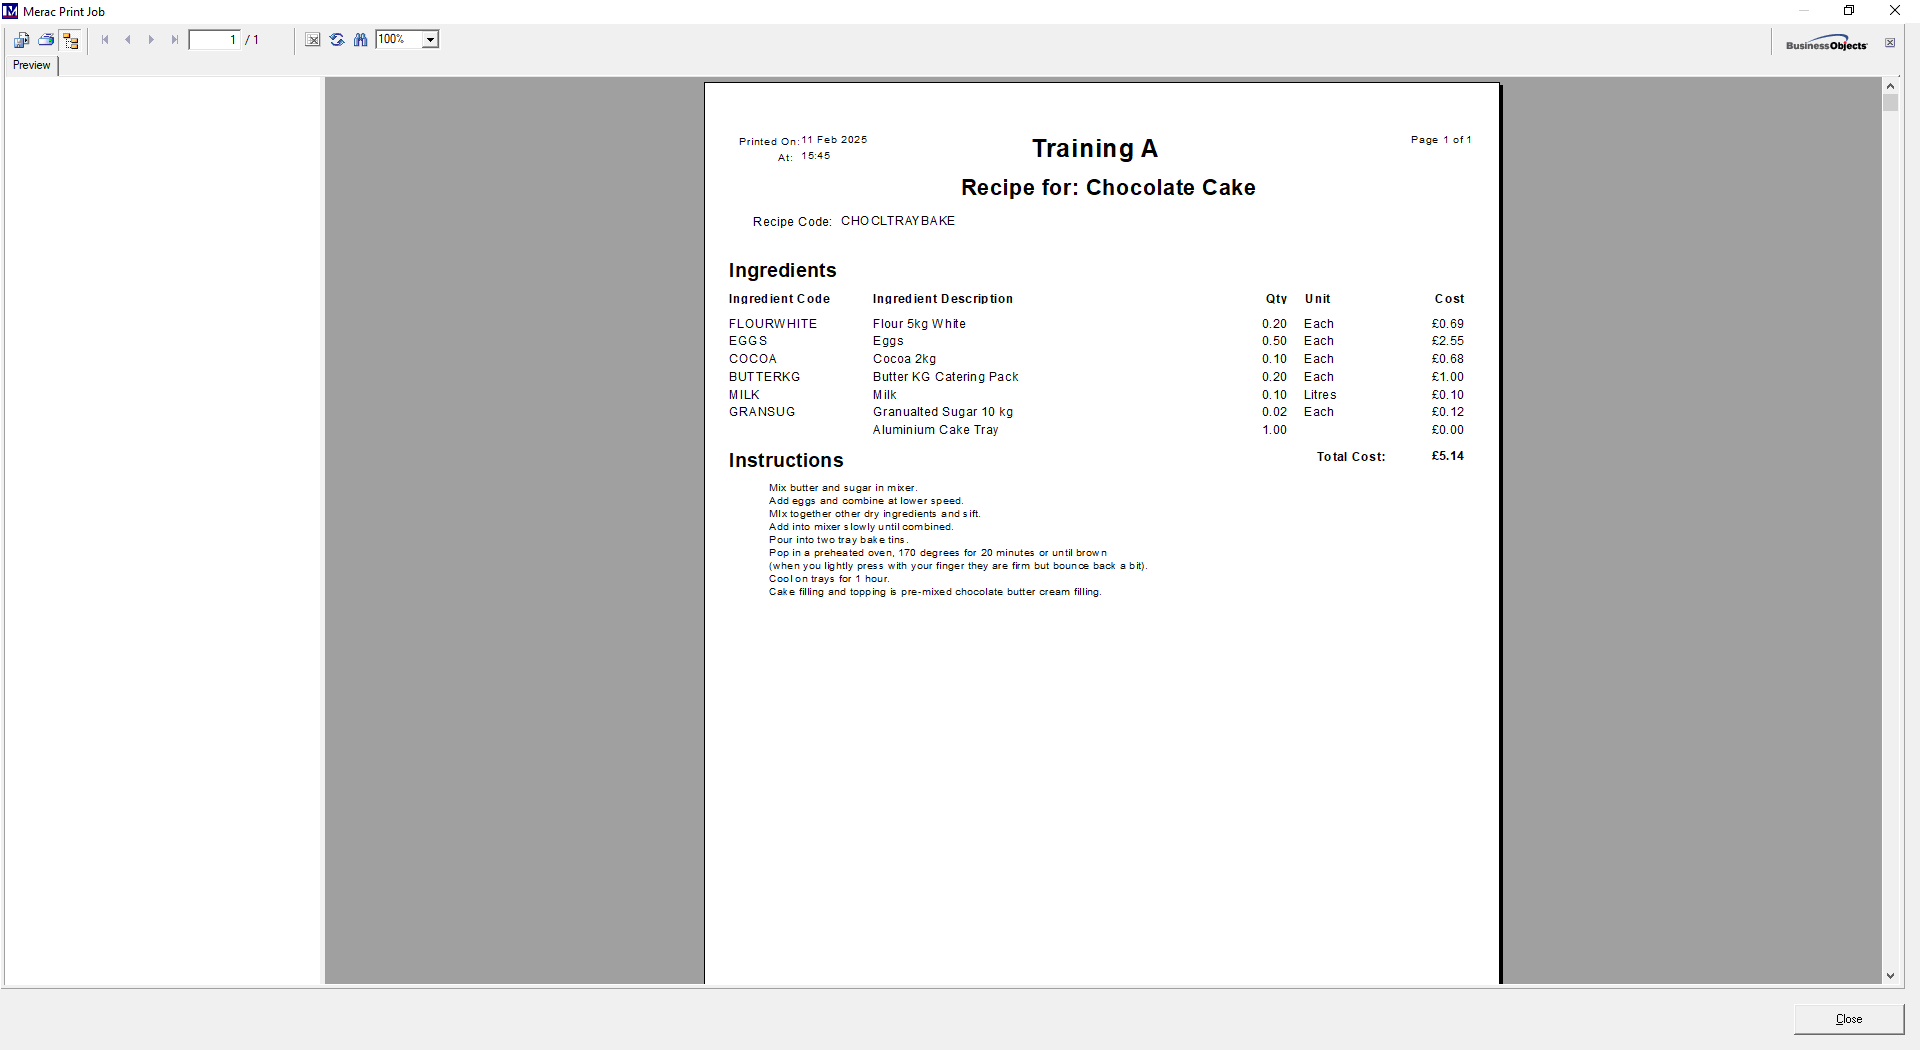
You can then click 'Close' to exit this screen ad then click 'Cancel' to exit the next screen.
You will now be back at the 'Recipe Maintenance' screen.
'Preparation' Section
Now the various elements of the 'Preparation' section of 'Recipe Maintenance' screen will be explained.
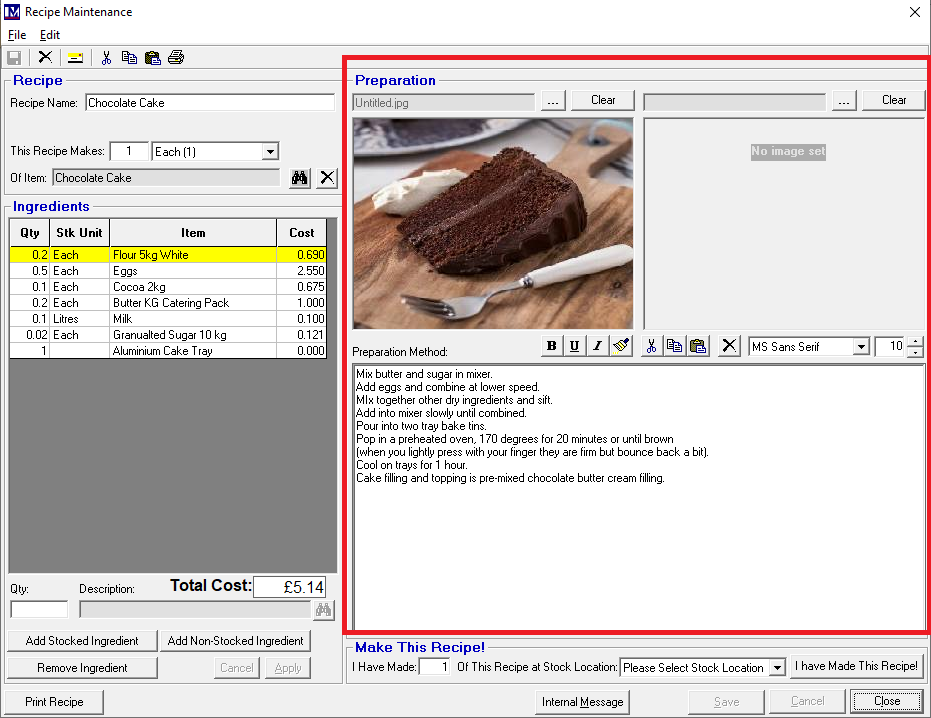
Photos
Please note for all computers that have Merac installed on them to be able to view these images they are recommended to be stored in a default path within the Merac date structure (C:\ProgramData\Merac\Photos ). Your IT team may need to grant you access to this folder structure so you can access, open and save files to this folder. If they have any queries then please ask them to log ticket with Merac Support.
To select the first preparation image, click on the ![]() button and then select the .jpg image file to add.
button and then select the .jpg image file to add.
The image will then appear in the box below.
N.B. if required, click the ‘Clear’ button to remove the image.
There is also the ability to select (or clear) a second preparation image if required.
This is done using the second set of buttons in the top right corner of this screen, in the same way as detailed above.
Preparation Method
Click in the text box below ‘Preparation Method’ and type in the required instructional text to make this recipe.
N.B. this screen accepts rich text formatting (i.e. bold, underlined, italicised characters etc).
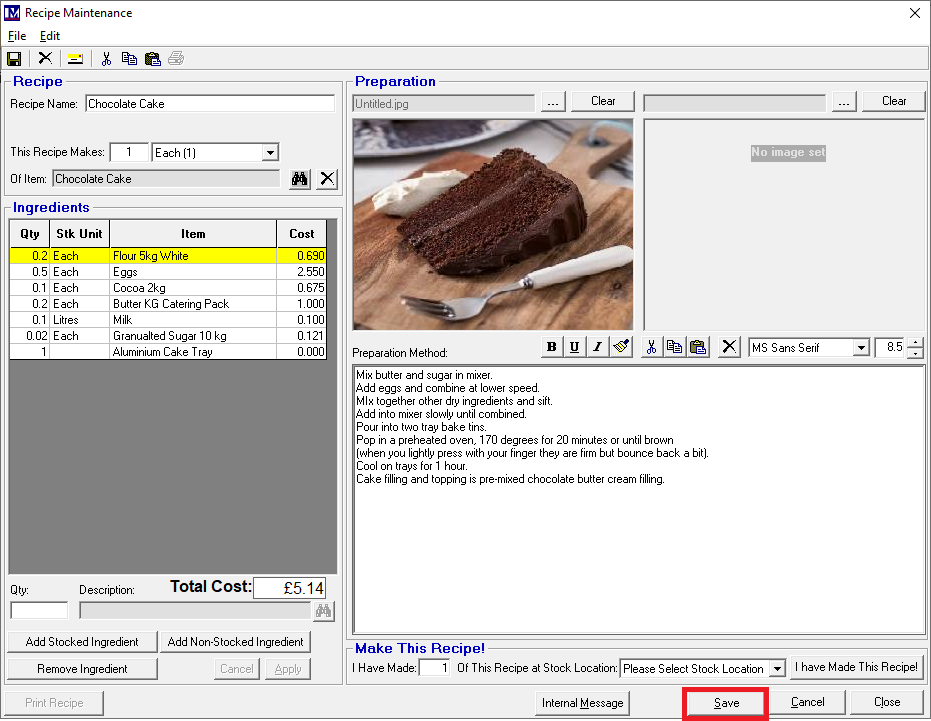
Once all data has been entered as required, click the ‘Save’ button.
N.B. it is very important to click the 'Save' button, otherwise you can lose all the data if you exit without saving!
Making the Recipe
The below image shows the relevant buttons to carry out the process detailed below.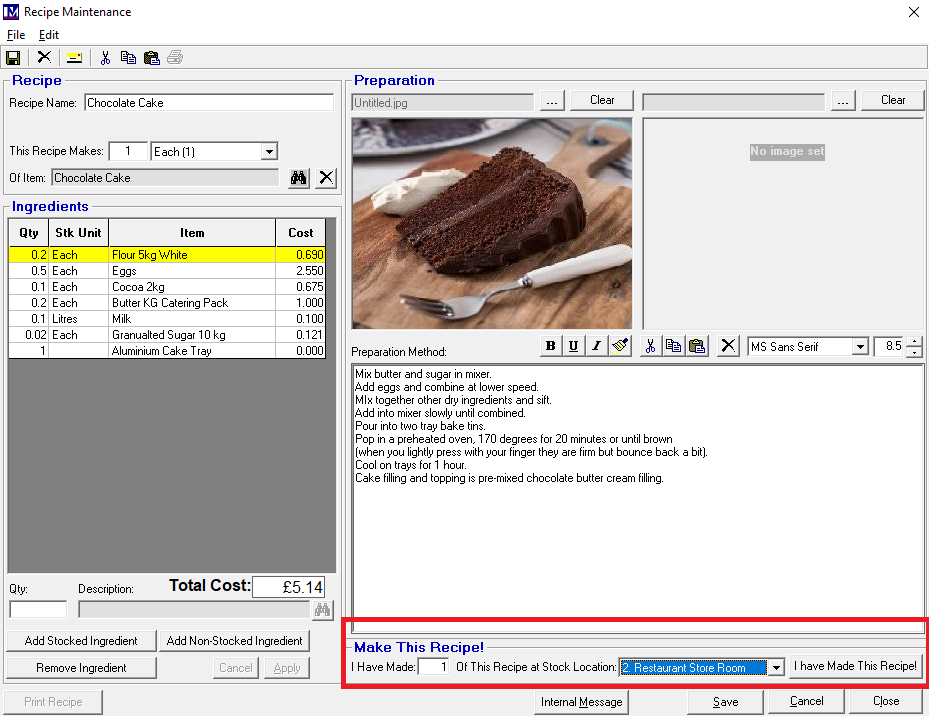
I Have Made:
In this box, set this to the quantity * of this recipe you wish to produce in the ‘I Have Made:’ box.
Of This Recipe at Stock Location:
Use the “Of This Recipe at Stock Location:’ drop-down to select the required stock location.
N.B. this is the stock location the “ingredient” stock items will be deducted from.
This is also the stock location the “finished product” stock item will be created in (at the quantity specified above *)
Making the Recipe:
To make this recipe up, click the ‘I Have Made This Recipe!’ button.
A message pops up saying “Recipe Successfully Made”, click ’OK’.
Please Note:
The “finished product” stock item will now have been added to stock at the specified ‘Stock Location’ in the quantity as specified above. Likewise, the relevant quantities of the “ingredient” stock items have now been deducted from stock at the same ‘Stock Location’. If required, you can check your stock levels have been amended as expected by looking at the ‘Stock Valuation Report’ for the required ‘Stock Location’.